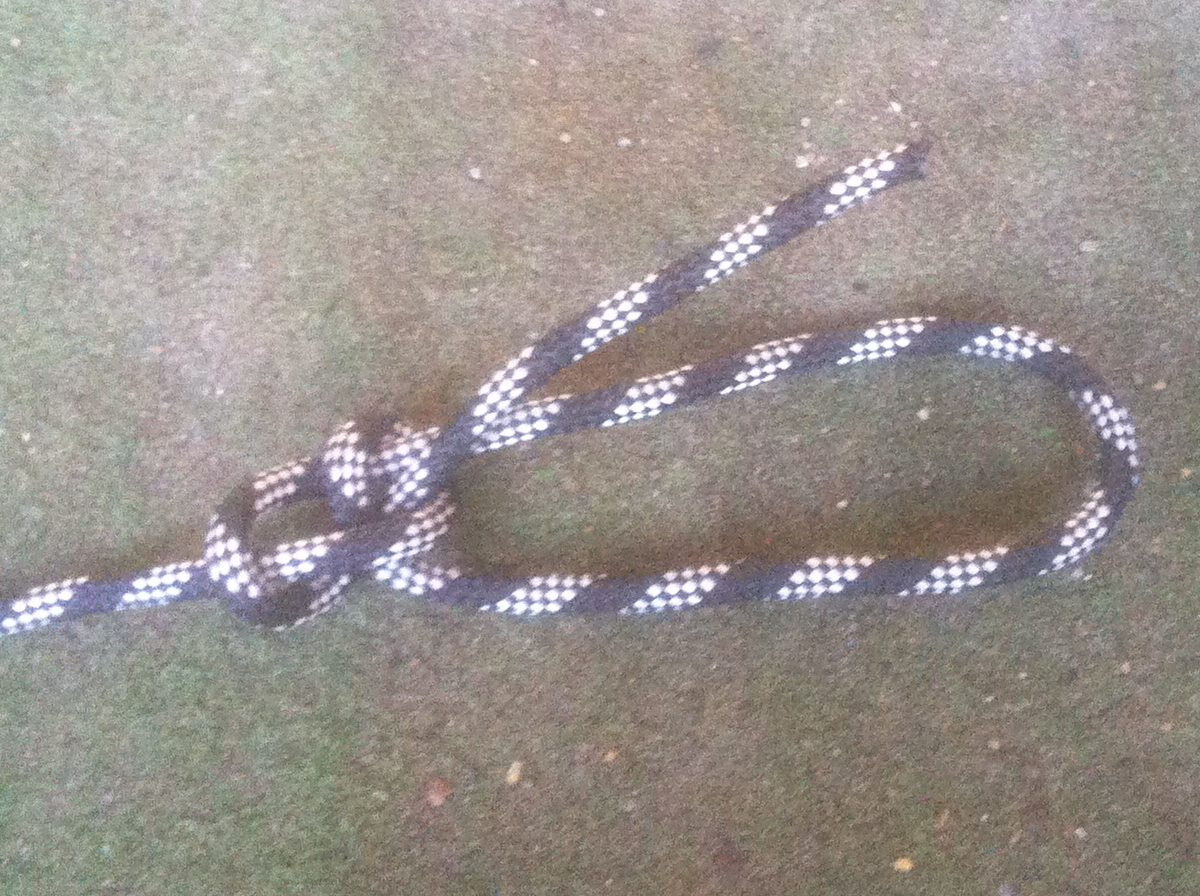
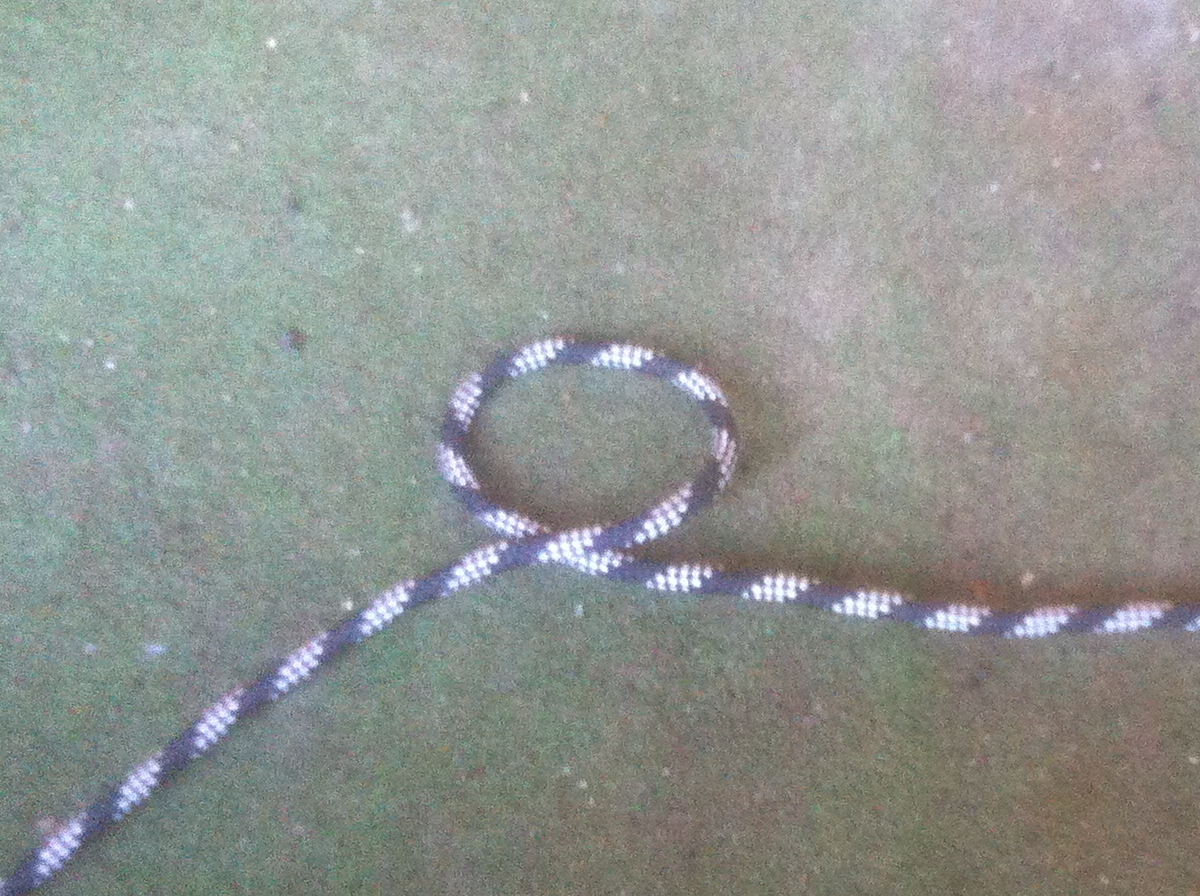
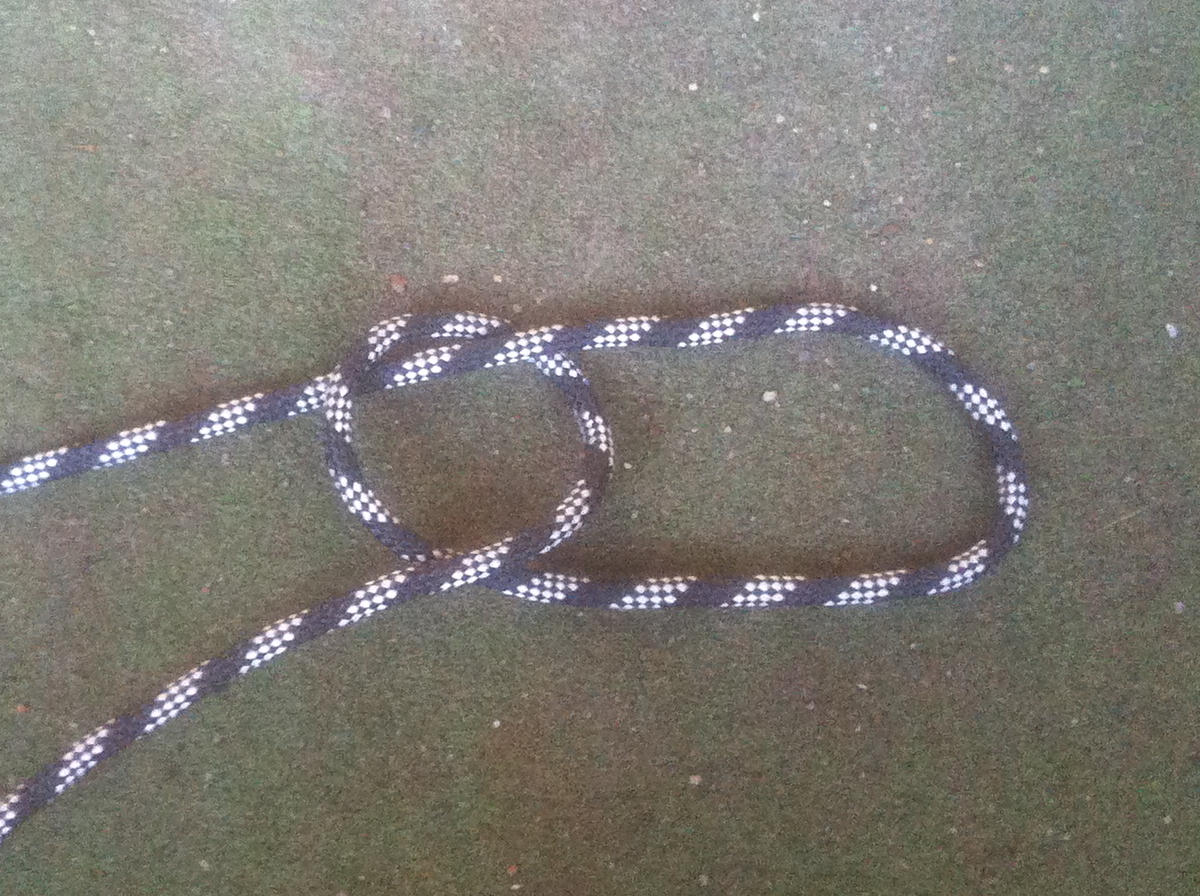
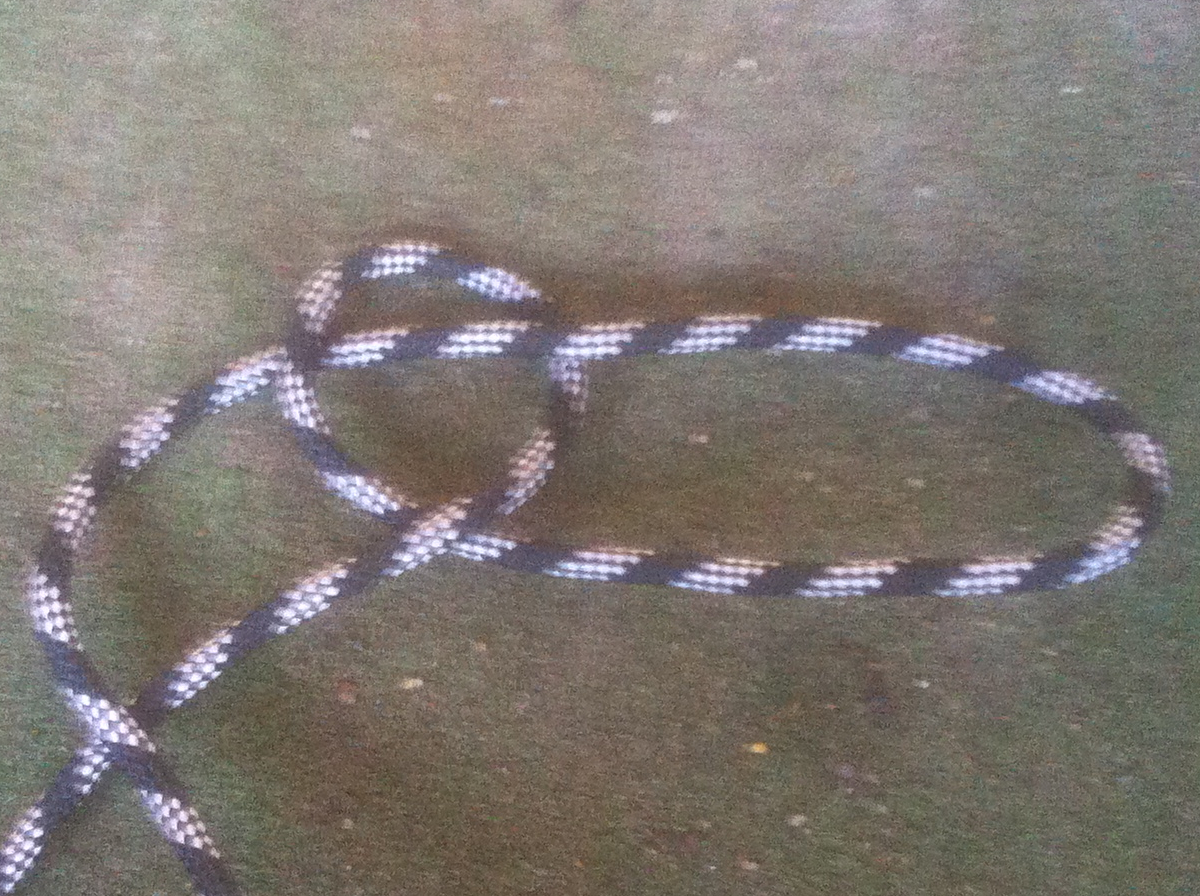
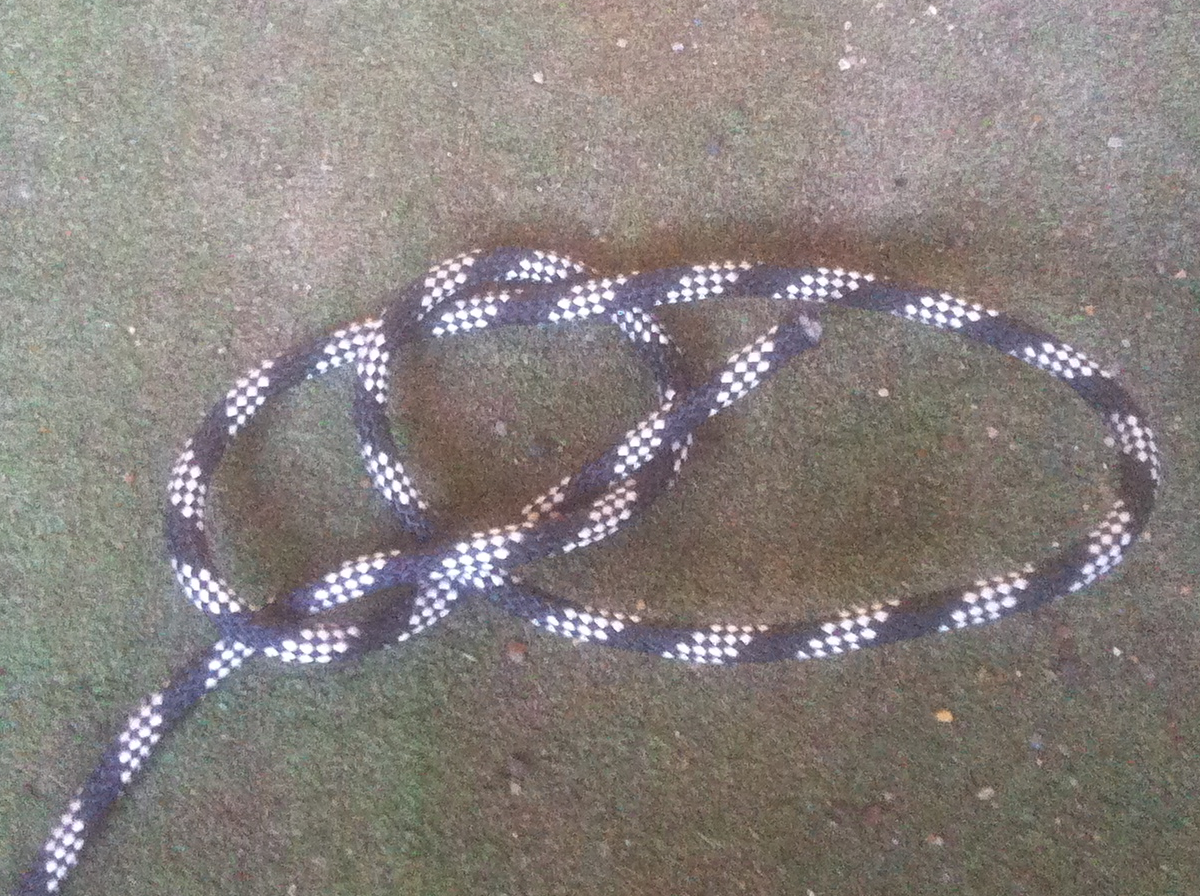
The bowline knot is the second essential knot on the list. It is the best knot to add a non-self-tightening noose to the end of a rope. It is used on the end of the downhaul line to hook the harness hook in to tense the downhaul.
Since June of last year I have been writing and uploading step by step explanations of how to windsurf at various levels and each manouver one by one. I have been writing other tips and tricks in the last few weeks but I want to make sure that the content I am posting is stuff you want to read. So, here is my question:
What are you looking for? What would you like to know?
Just answer in the comments below and I will write about each of them or refer you to a previous post on my site that you might not have been able to find.
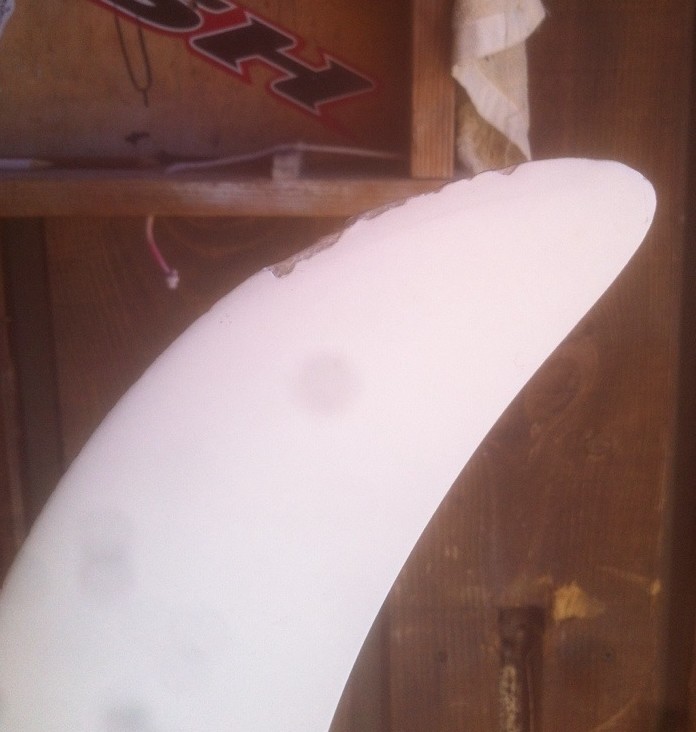
First off, don’t be misled by the title. I am only talking about how to get the form back on a fin that has scraped over rocky bottom.It is impossible to repair a fin that has snapped in half.
This also goes for fins that have been sailed over sandy ground a few times to many and have flattened the smooth curve to the tip. This also usually implies that the tip has been formed into a sharp point. These changes in the fin shape will greatly influence the efficiency of the fin and cause more spin outs than necessary.
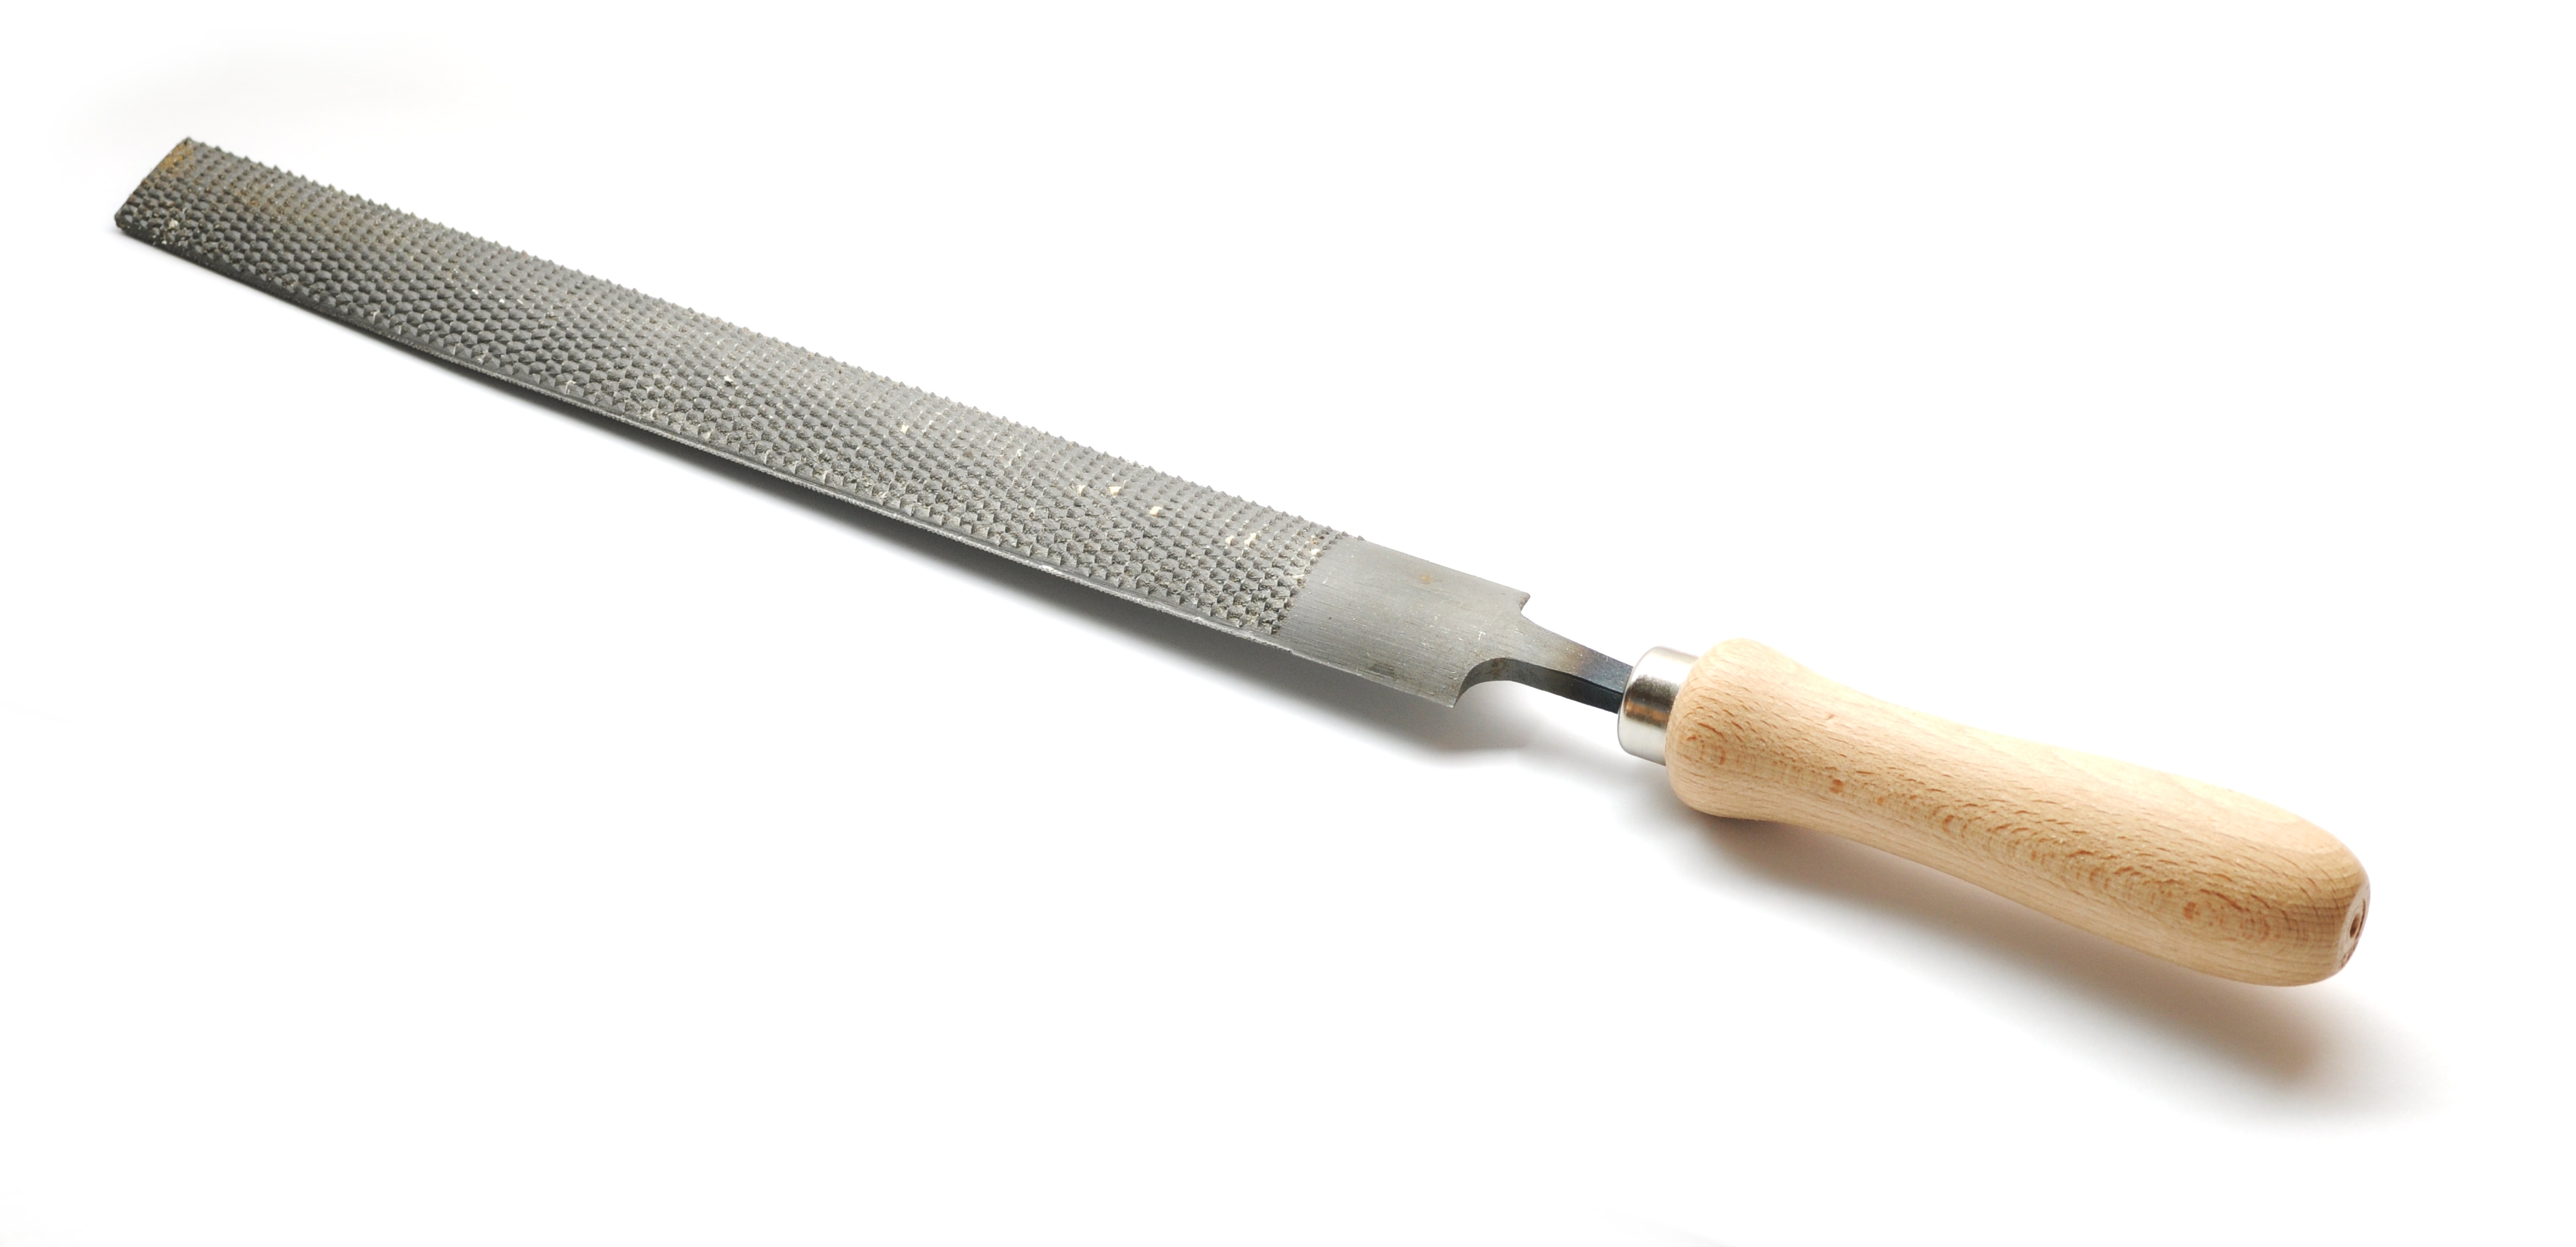
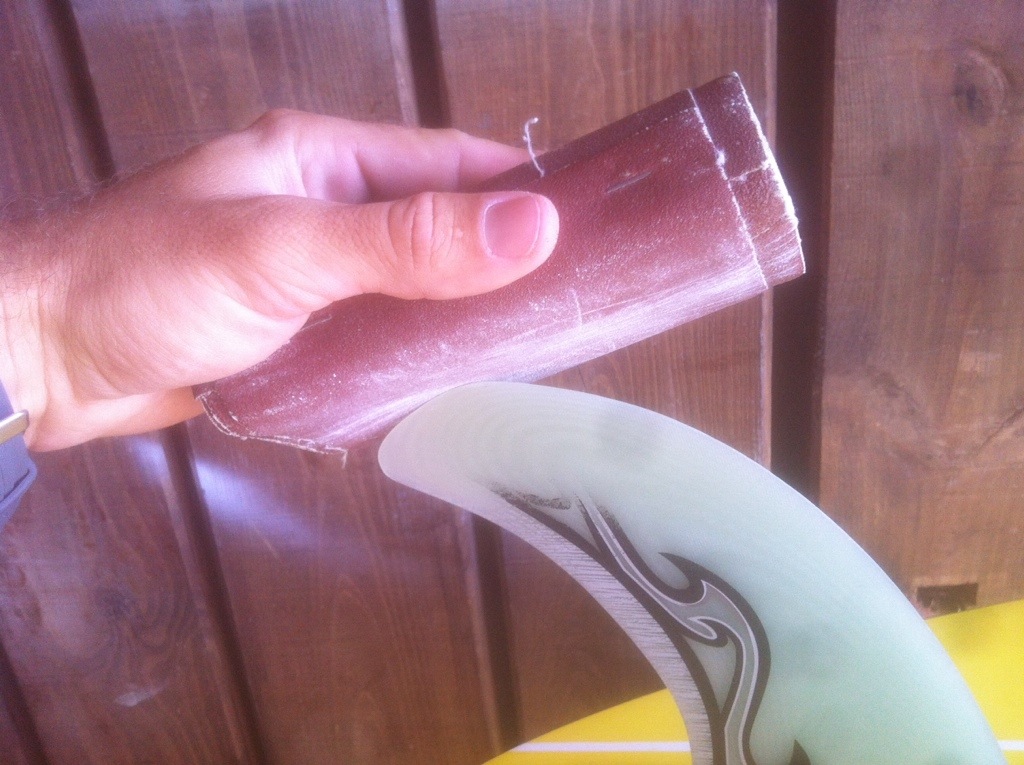
Depending on how badly the fin has been damaged. If you have gone over rocks, it is very likely that the edge has split open and you can see all the individual layers of materials that make up the fin. If that is the case you have a lot of sanding to do if you use sandpaper. For the rough sanding it is best to use a rasp.
Then for the fine sanding you can use sand paper. There is a trick you can do though. If we just take the sandpaper in our hand and start scraping the edge, we will not get a good result because of the uneven surface and the small area of our fingers. What we have done at the surf center is to wrap some sandpaper around a block of wood and staple it on to make the sanding easier and faster.
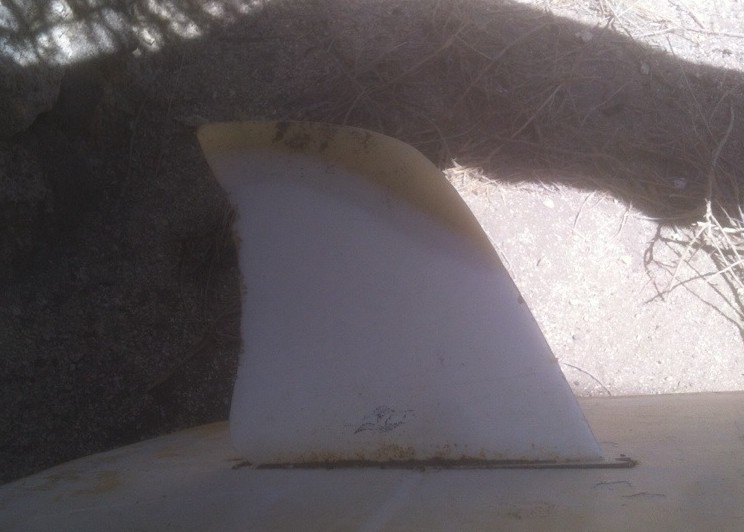
Now to the technique for getting a smooth curve on the fin again. Don’t just sand the immediate area that is damaged but the 5 cm on either side of it in long broad strokes (to get a gradual curve) moving from one side of the fin to the other every two strokes or so (to make sure the leading edge doesn’t become flat but rounded).
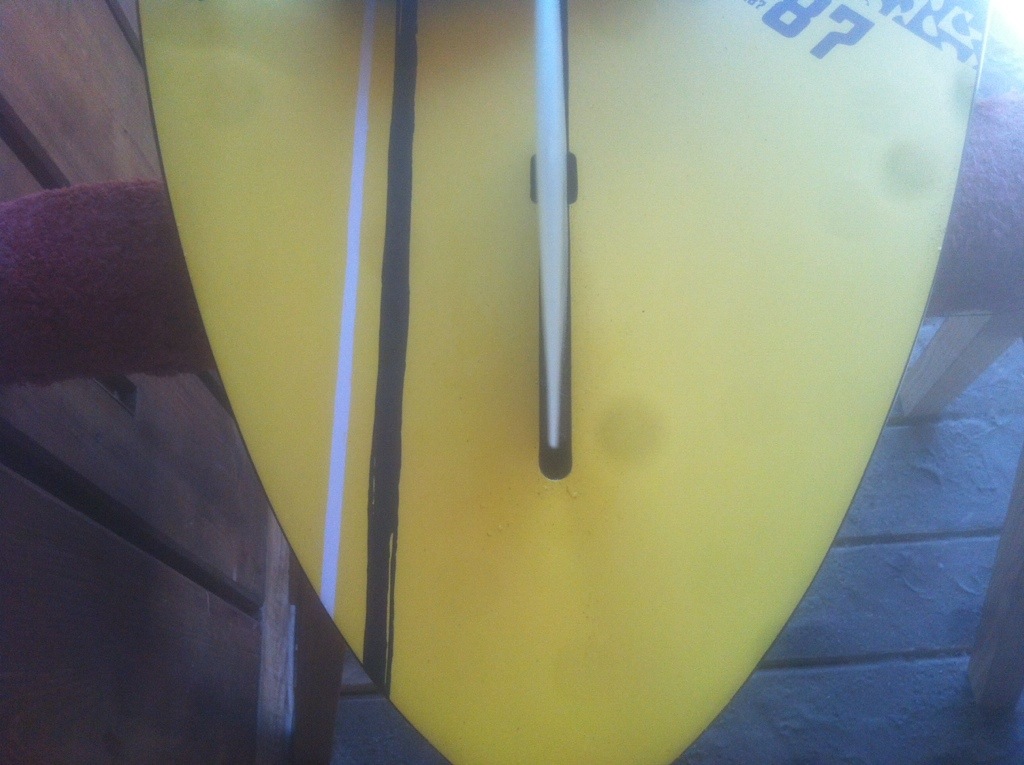
As for the trailing edge, here is my advice on that. Obviously a sharp edge will make for a clean separation of the water from the fin and reduce the risk of a spin out. However, do not make it so sharp as to be able to cut flesh. I have had the painful experience of accidentally kicking the fin when hastily positioning the kit for a waterstart and have to get stitches on the sole of my foot. That same fin could just as well cut another part of your body in a wipeout or a stranger in a collision.
In short, have a narrow trailing edge on the fin but not so sharp that it cuts.
It can happen to anyone. It has happened to me more times than I can remember. It is annoying and exhausting, but it can also be dangerous if you don|t know how to get back to shore with the kit. First off there are two very important things to keep in mind:
1. NEVER LEAVE YOUR KIT!
The kit is the only flotation device you have and if you get tired you can just lay on it or hold on to it rather than try to keep your head over water in the waves. Aside from this it also offers more visibility for any rescue services that are looking for you. It is easier to spot a board and sail which may even have bright colors than a person half submerged in the water.
2. SWIM PERPENDICULAR TO THE CURRENT
Obviously we don’t want to go to where the current takes us. However, we are not going to be able to be able to swim against the current. So, what is left? Swim perpendicular to the current. If we swim at 90 degrees to the current we will naturally be dragged downstream, but if we keep swimming across it we will eventually arrive on land.
Beginner gear
Sail pumping
Using the sail to move forwards with no wind at all is a very useful skill to have indeed. Mainly it consists of generating your own wind and then using the physics of the sail to work its magic.This technique is to be used if there is at least a little bit of wind as it is faster than the one below.
Start off by leaning the sail far forwards to the bow and opening the sail. From there pull the whole sail backwards to the stern strongly so that you move the whole mass of air over the board aft. It is important to do this in one energetic motion. What this does is us the mass of air as if it were stationary and we push the board forwards under it with our feet. This will generate a slow movement forwards.Then sheet the sail in so that it is practically in line with the board so that you provide as little wind resistance as possible with it and move it towards the bow again. The board will naturally start to slow down again and when it does we open the sail again to repeat the movement. This way we will advance slowly but surely towards land again.
Lay the boom on stern
This method only really works if there is no wind at all as if there is a little breeze, the wind can blow the sail back into the water and undo our work of putting the boom on the board. This method is also slower than the one mentioned before as soon as there is a little bit of wind.
If the water is shallow enough, we can also walk back to the shore although this method also works in deep waters. However there is a more and a less efficient way to do this. The most efficient way is to lay the boom on to the back of the board. If necessary lover the boom. The idea is to balance it on the board so that it does not touch the water. If it touches the water it will generate resistance and make advancing through the water much more difficult.
Then go to the bow and pull the kit behind you. This works for wading through the water as well as swimming if the water is too deep.
Image courtesy of http://www.nationalcentrecumbrae.org.uk/
Sinker boards
Having the wind bail on you when you are out on a sinker board is one of the most annoying (and tiring) things that can happen. On top of that, even though the wind disappears, the current in the water will most likely continue, meaning that you will be at the mercy of the currents. This can be a real problem indeed if this current is heading out to sea.
Waterstart position
Usually the wind will not disappear completely meaning that there will still be enough wind available to keep the sail in the air. Here our best option is to lift up the sail and hold the back footstrap while keeping our body as horizontal as possible (for less resistance) in the wake of our movement. This will provide us will a slow yet definite progress back to the beach. Another option is to hold the sail in the air with both hands and put the feet on the board if this is more comfortable for you. It ultimately comes down to preference.
The benefit of holding the position with the feet on the board is that if the wind does pick up a little, even if it is just a gust, it may be enough to lift us up with a waterstart and we can wobble on the board in a sailing position back tot he beach which is a little bit faster that dragging our body through the water even if it is a little bit more tiring.
If the wind does drop completely while we are doing this method we can always fall back on the next method.
Boom on stern
It may be the case that the wind goes away completely so that the sail is not held up.by the wind. Here we lay the boom on the back of the board, trying to keep it out of the water as much as possible so that there is as little drag as possible. Then we stay at the middle of the board and hold the sail in place by holding on to the mast at about 30 cm (1′) above the mast foot. In this position we start swimming back to the shore.
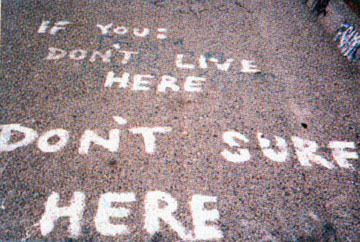
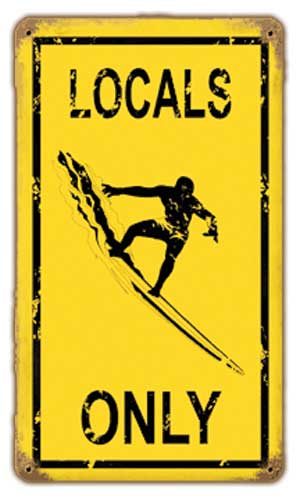
Localism: The aggressive behaviour that locals of a particular spot have towards outsiders to make sure they don’t have to share the wave, etc.
How many stories have you heard of local surfers threatening, insulting or even attacking other surfers who are visiting the spot? This is a worldwide phenomenon and is not limited to surfing or water sports. In essence it is a form of surf rage but applied to territorial protection.
On my home island of Tenerife alone there are a large number of spots governed by a group of friends who have been surfing at a certain spot for ages and don’t let anyone else enjoy that particular wave or spot by resorting to violence.
Ultimately, localism is nothing but selfish behaviour manifested through violence. As nice as it is to have the spot all to ones self, the ocean belongs to everyone and as long as we all using concienciously and respectfully towards everyone else, there is no reason why we can’t all enjoy it.
Maybe you missed the best wave of the day because a newbie was in the way or a visitor took the wave thinking you would get wiped out because they didn’t know how the wave breaks at that particular spot. Never mind, the ocean will bring plenty more waves, winds and epic sessions on the water. No need to act like it is the end of the world.