Disclaimer: I will refer to both gybes as planing gybe so I don’t have to keep writing “power-gybe and carving-gybe” all the time. Basically the thing that differences them is at the end anyways and I will mention it when I get to it.
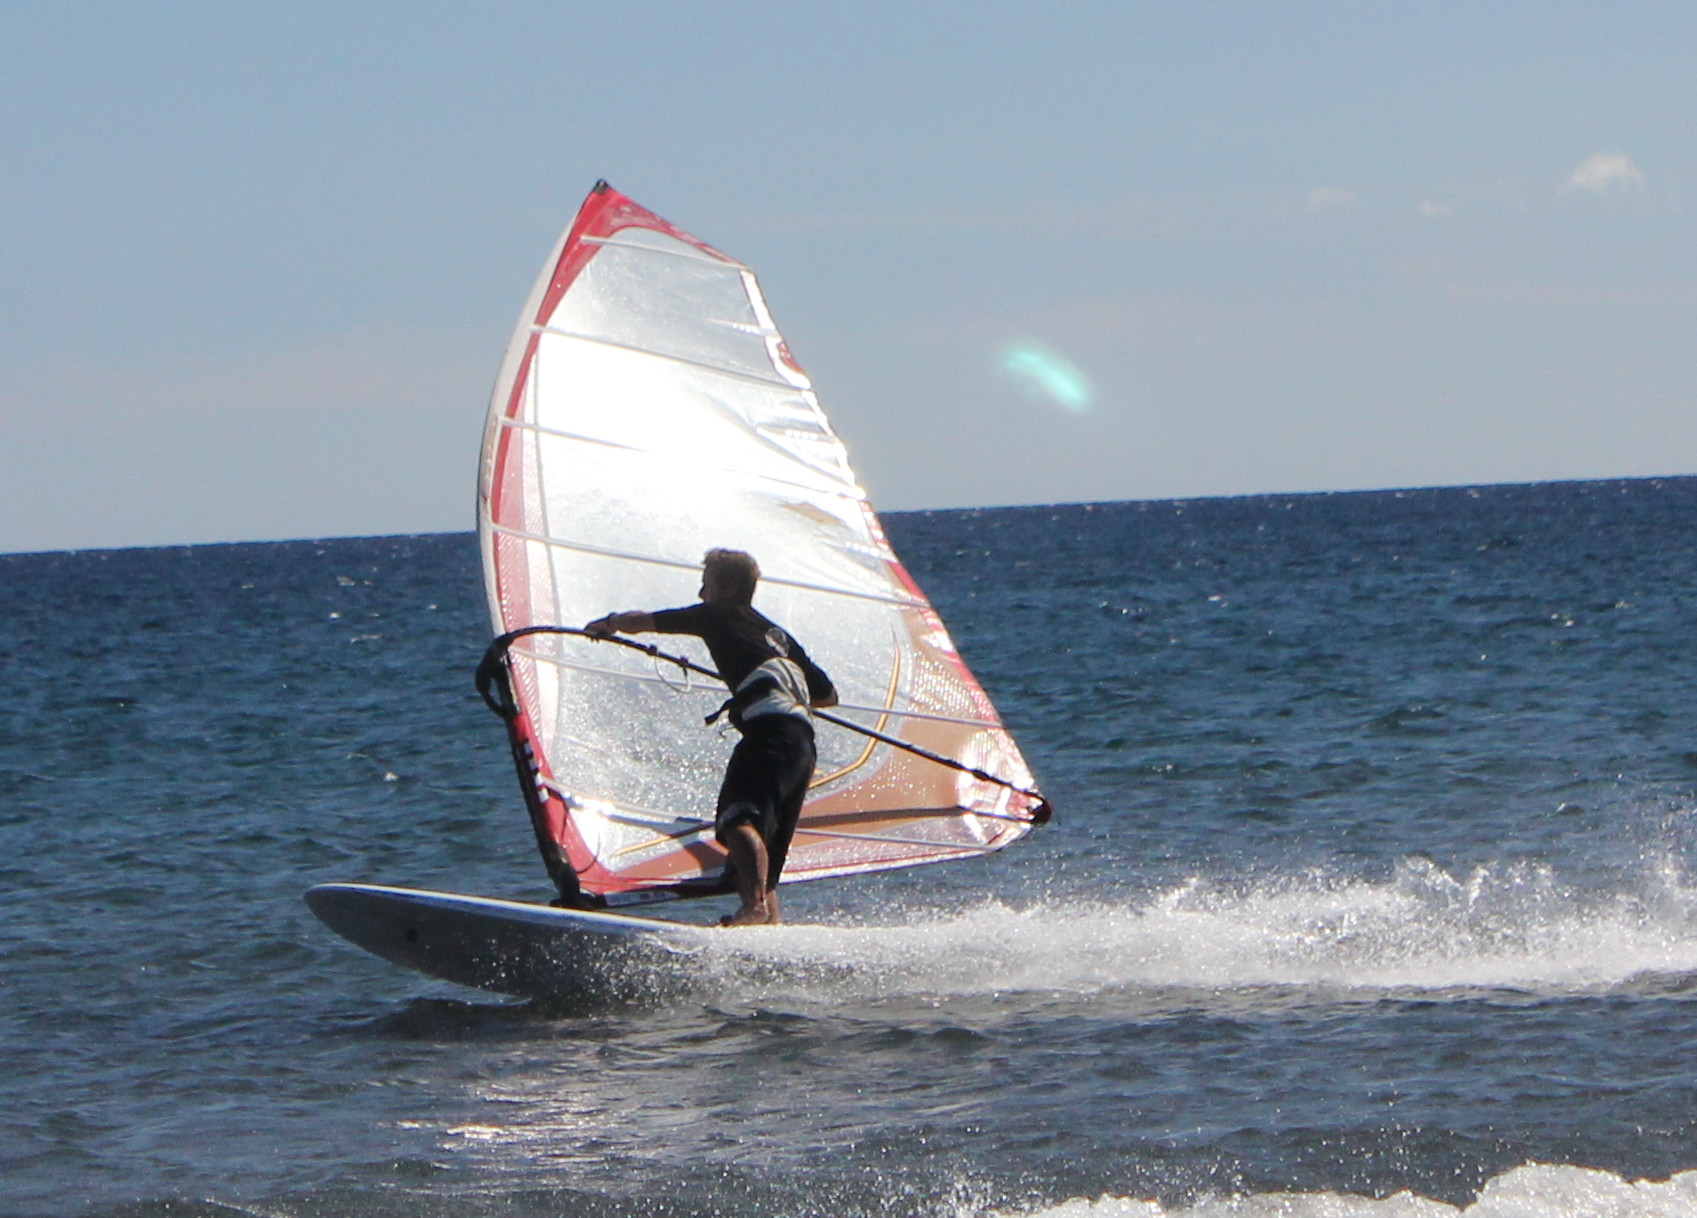
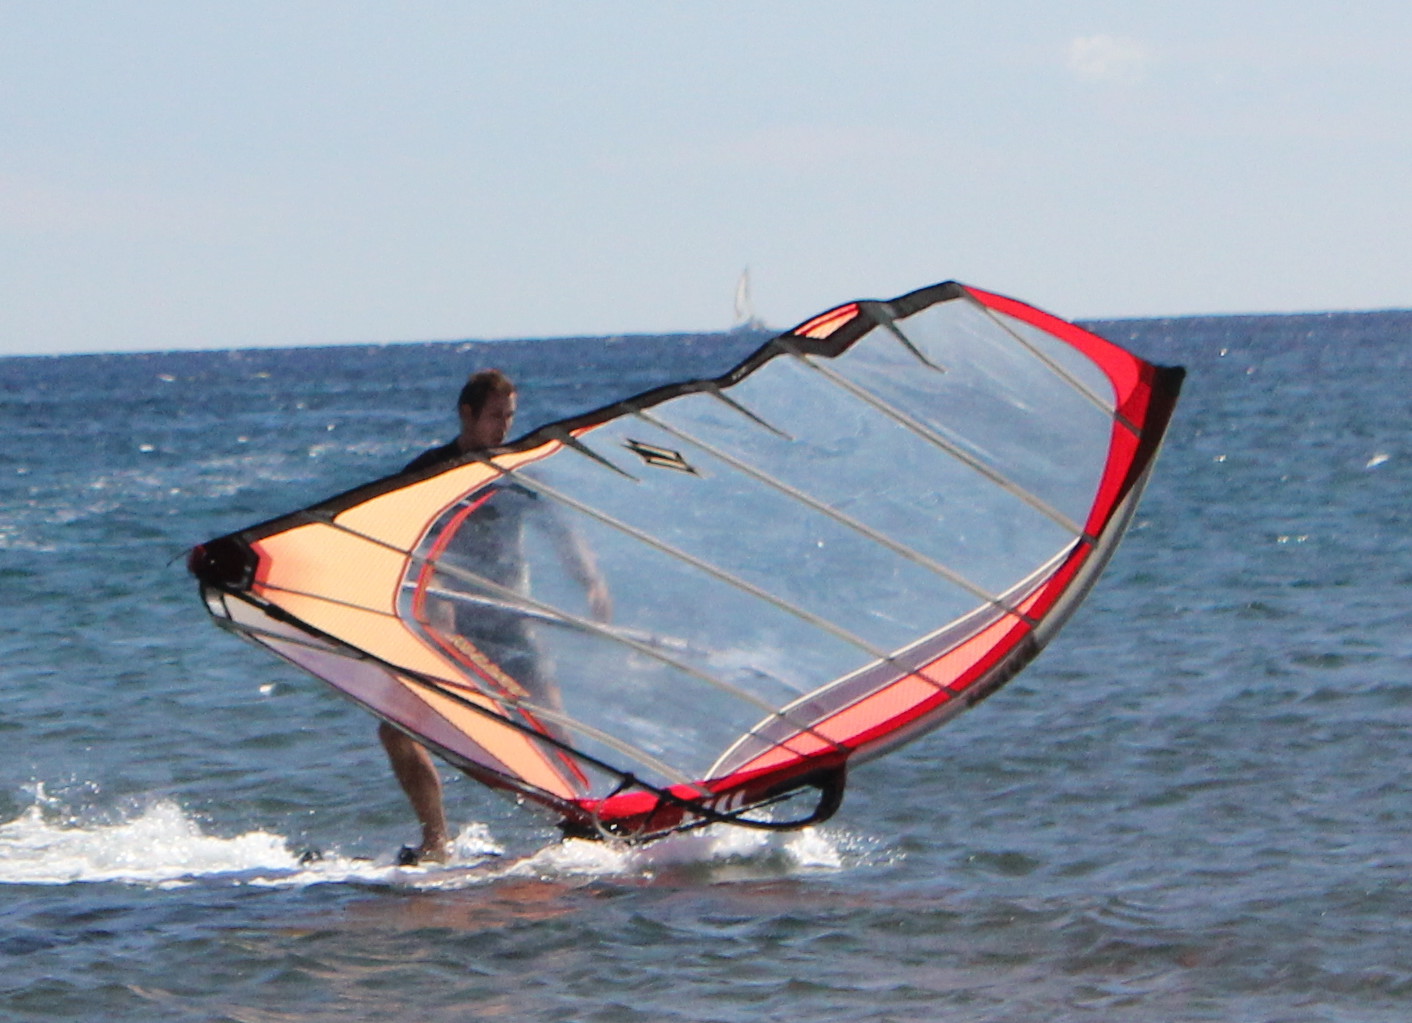
We have arrived at the holy grail of windsurfing. Sailing out on a plane, turning around and coming back to the beach with dry hair. Once the waterstart is a struggle of the past an no linger a big deal, it also becomes a bit of a nuisance having to let ourselves fall in the water to turn around and waterstart back to the beach. It is time to learn how to do the planing-gybe.
First off, the technique of the planing-gybe has little to do with that of the beginners gybe. The first is for small boards with little volume that sink when they are not planing. The normal gybe is for large volume boards which float even when at a standstill. For this reason I recommend learning the planing-gybe with a board no bigger than 120 litres, less if you are a lightweight.
So let’s get down to it:
Start by planing
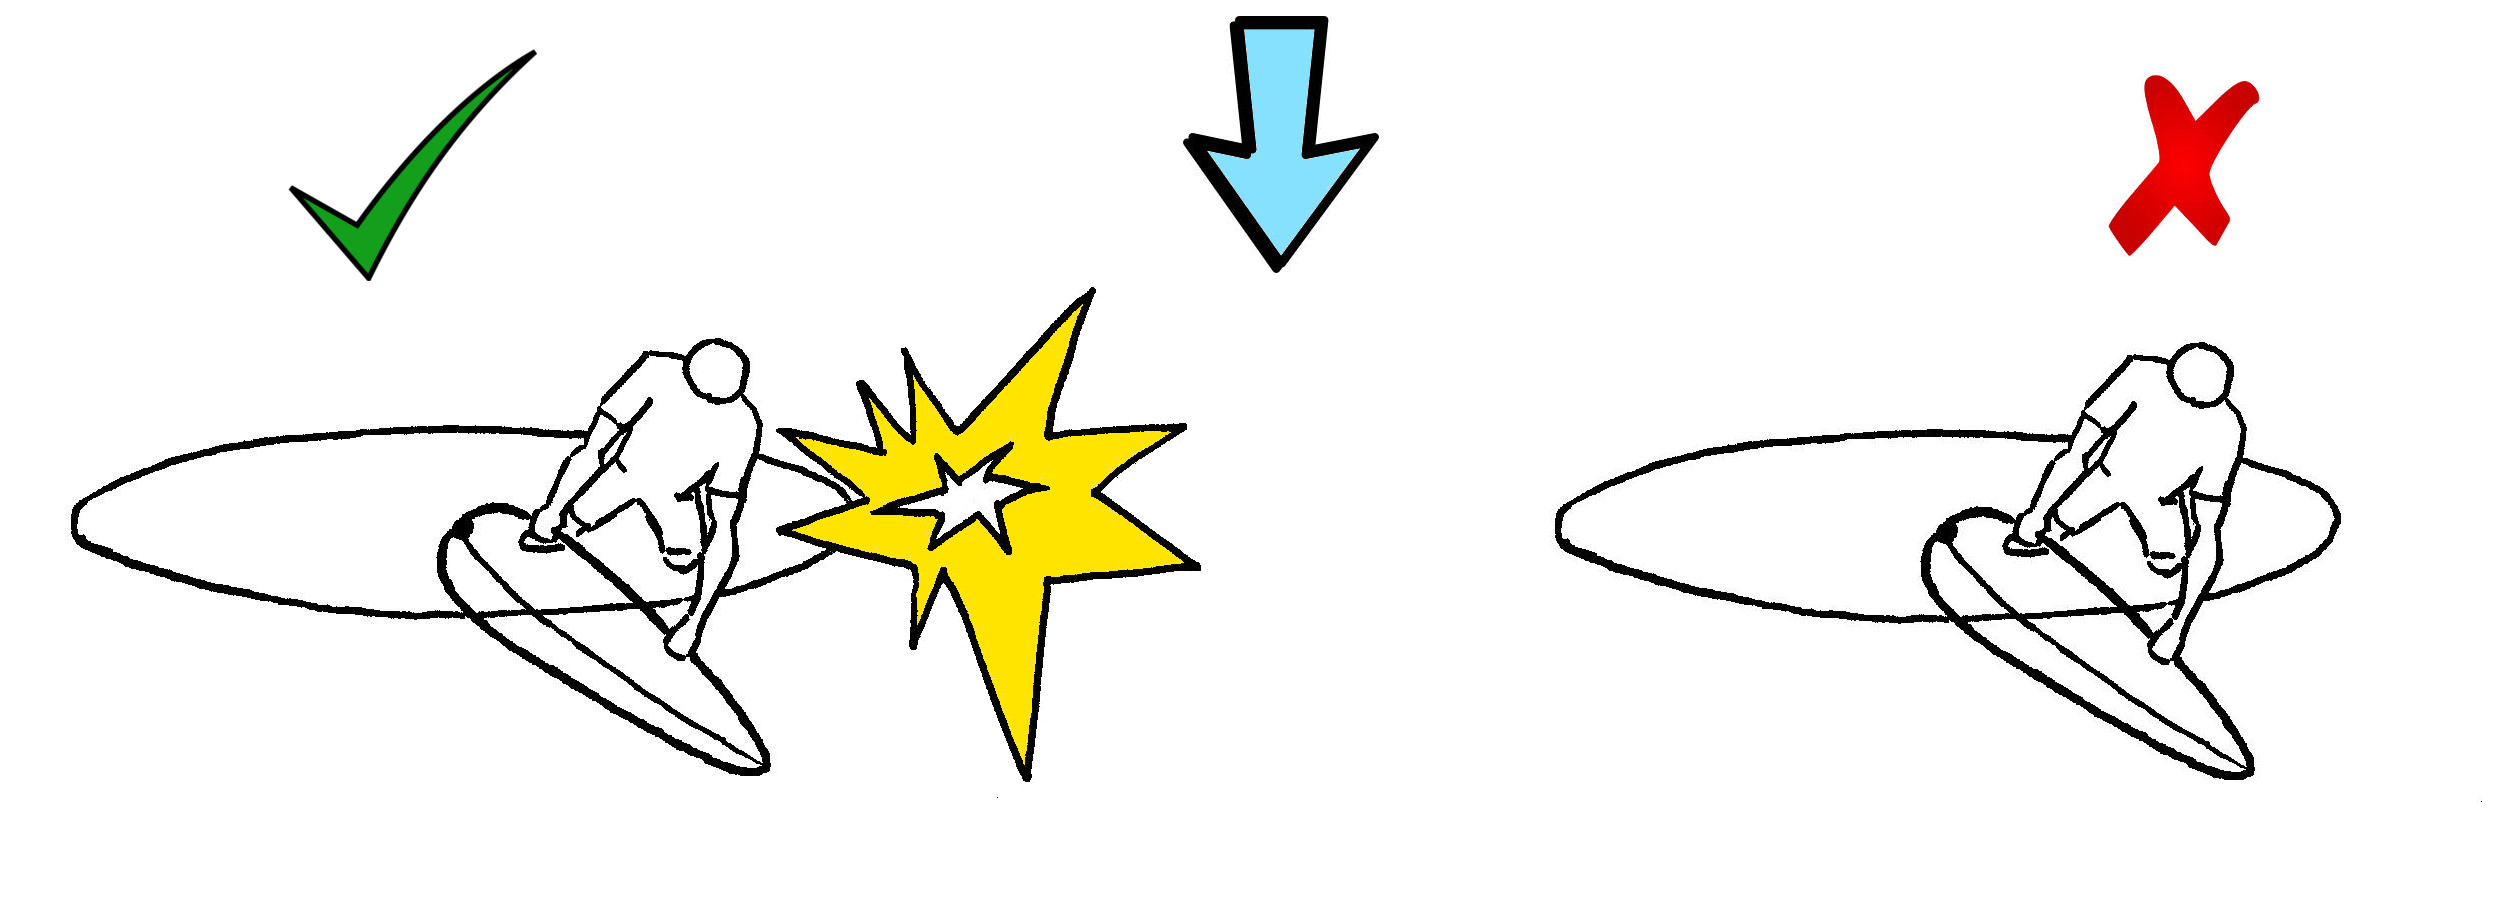
As already mentioned a few too many times before, we want to be planing for this gybe. The one thing that will make or break the success of this manoeuvre is speed. Having it when we go in and keeping it throughout. The faster we go, the easier the entire sequence of motions is going to be since the board will be more stable at high speed and the sail will be easier to handle. Our immediate goal is to arrive in the downwind course having the same speed as the wind since then the relative wind is zero and the sail can be handled much easier.
Take the back foot out of the strap
We take the back foot out of the strap and place it on the downwind rail and begin to put pressure on that rail.
Move our weight forward
As the board starts to turn we shift our body forward, over the front foot to make sure that the board remains as flat on the water as possible instead of having too much weight over the stern which would cause the board to sink and slow us down quickly. Keep the front arm straight and the sail sheeted in
As we start to bear away, the relative wind changes also. At one point the board speed is going to be faster than the actual wind and the relative wind will be coming from the downwind course. To use this relative wind to the fullest extent we must keep the front arm straight and the back hand sheeting in the sail to keep an optimal angle of attack on the sail.
Keep the weight over the front foot
Resist the temptation of leaning back as you pick up speed on the downwind course. You want to lean forward with your shoulders without sticking your bum out. Leaning back will only slow us down or make the board shoot out forwards from under our feet and stcking our bum out will rob us of stability.
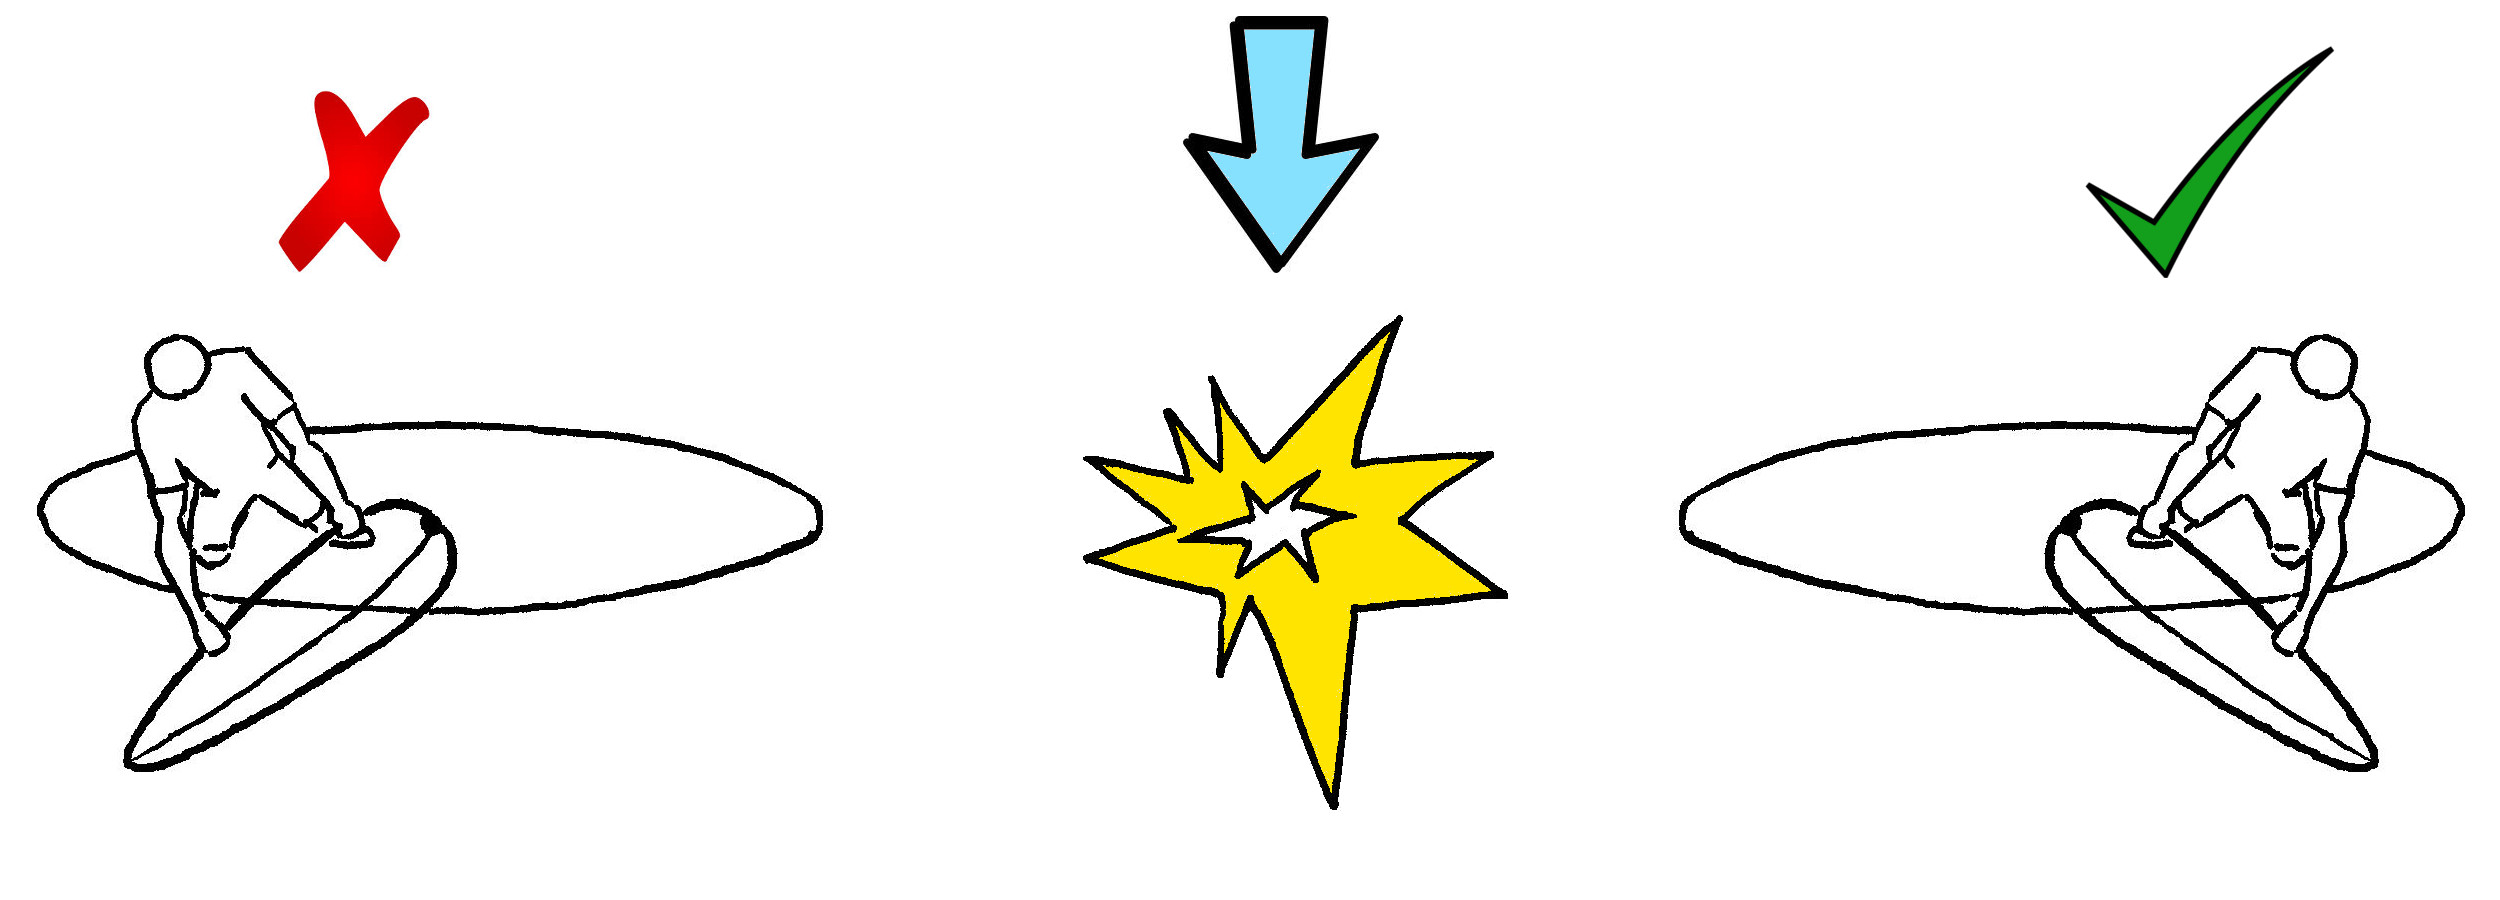
Keep steady pressure on the rail
If we stand on the board unsteadily we will be applying varying pressure on the inner rail which will result in the board to not make a smooth arc through the water but snake lines which will reduce our stability even more.
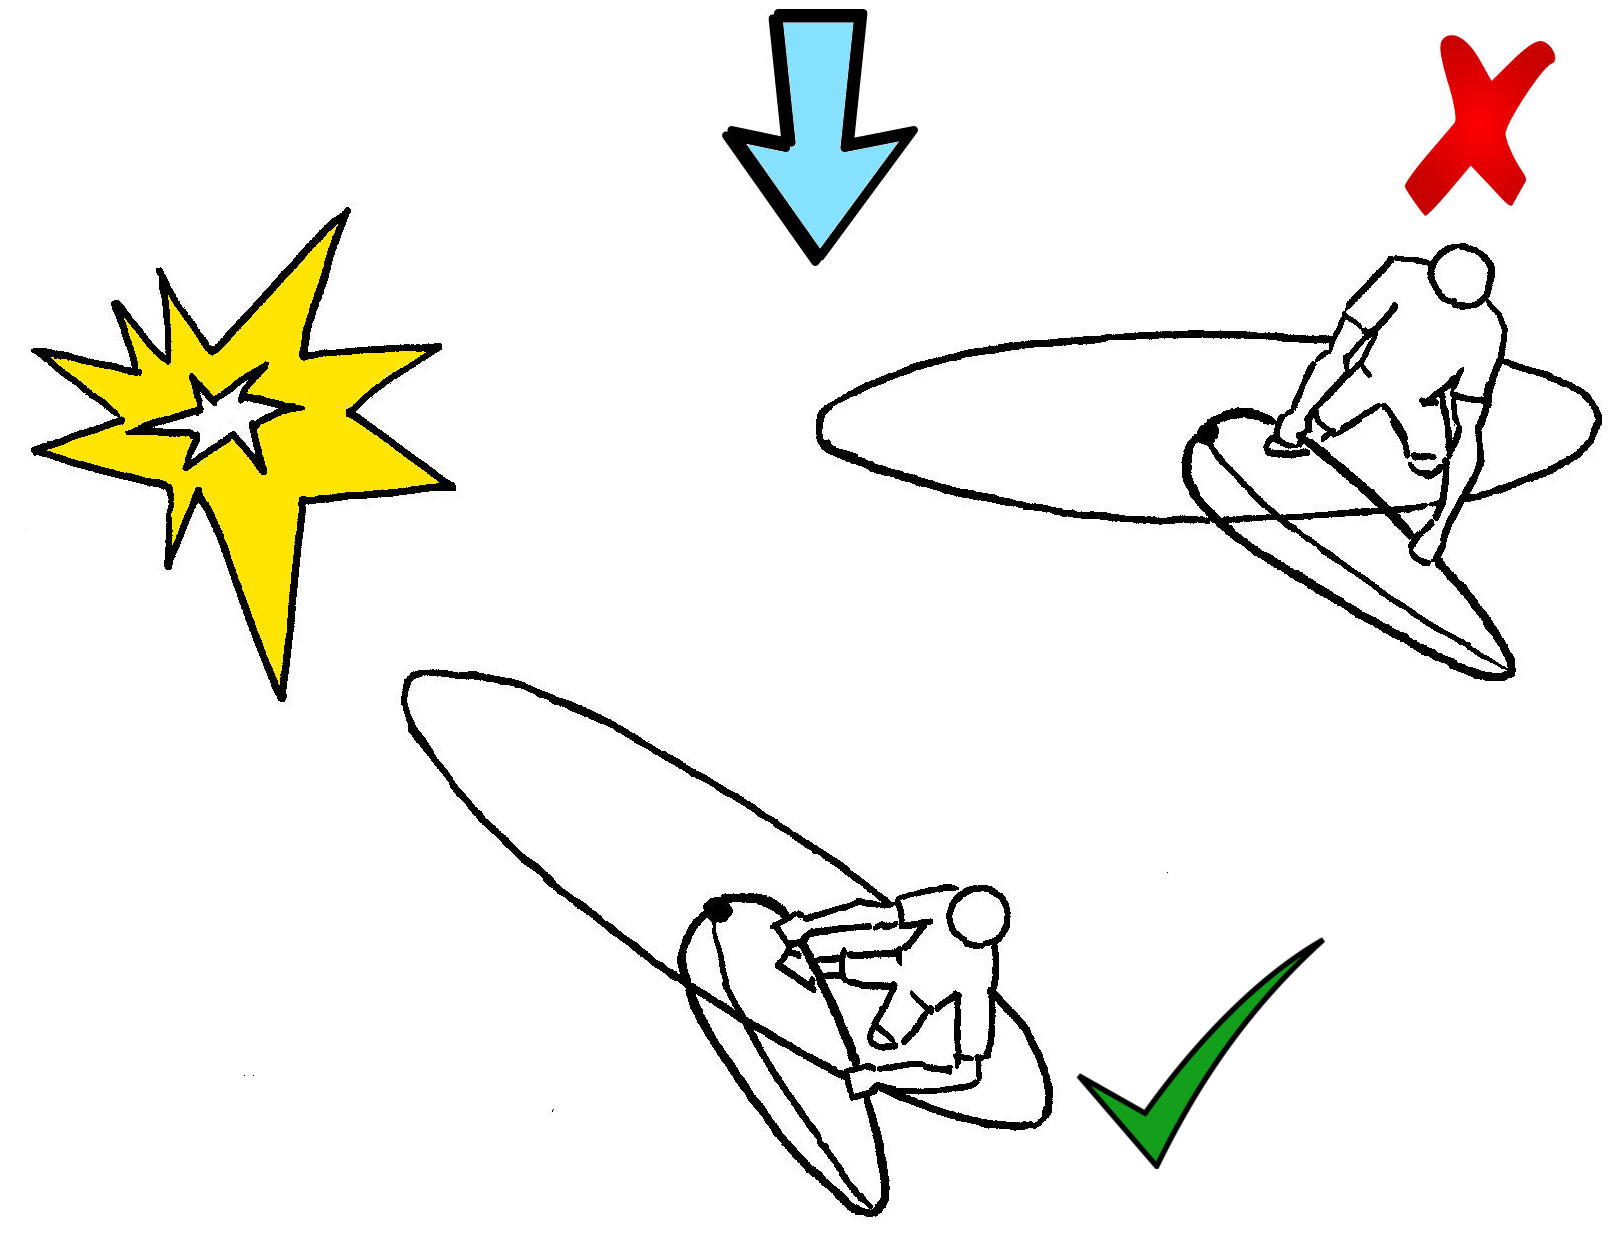
Once we arrive at the downwind course we will do one of two sequences that will decide whether your planing gybe is a power-gybe or a carve-gybe. Taking advantage of the relative wind being close to zero, and so hardly having any pressure in the sail we:
Power Gybe
Carve Gybe
Change our foot position taking care to keep them positioned along the centreline of the board and putting a little more pressure on the heels to keep the board durning. First we change the front foot (of the old side), basically just rotating it on the spot and moving slightly to the centreline of the board so it comes out of the footstrap. Then we move the back foot (of the old side) and move it just behind the mastfoot so that the board remains flat over the water and so that when the sail is shifted we can transmit the power of the sail into the board again.
We then we shift the sail making sure that we bring the mast forward again as quickly as possible as the clew can get caught in the water when it arrives one the new side resulting in the sail getting pulled out of our hands. Once the mast is brought forward we can also grab the boom again with our back hand.
Shift the sail making sure that the mast is brought forward again once it has shifted so that we can grab the boom on the new side and so that the clew doesn’t get caught in the water and the resistance in it pulling it out of our hands.
Now it is time to change our foot position: first the front foot which is taken out of the footstrap and placed just behind the front footstraps and on the centreline of the board; then the foot that is on the rail is moved forward just behine the mastfoot ready to transmit the sail power into the board again on the new side.)
Once on the new side with the feet and sail set up correctly again we need to continue the plane (or get back into it in case we slowed down too much). In other words we must lean back, close the sail and push our hips forward.
I personally do vary on the gybe I do depending on the side I do it in. I feel most comfortable with my right foot in front as I have a goofy stance when surfing or skateboarding. For this reason I do a power-gybe when starting on a port tack and a carve-gybe when I start on a starboard tack so that I stay as long as possible with my right foot in front as I feel I have more control. People with a regular stance will probably prefer to keep their left foot in front longer. In any case, try out both ways and see which one comes more naturally to you.
To recap:
– Important is to be planing
– Back foot out f the footstrap
– Start putting pressure on the rail
– Weight forward
– Front arm straight, close the sail with back hand
– Keep body vertical: no sticking our bum out in a sitting positiion, no leaning back with the shoulders
– Keep steady pressure on the rail throughout the manoeuvre
– Switch feet first, then shift the sail (power gybe)
OR (Depends on preferred stance)
– Shift sail, then switch feet (carve gybe)
– When shifting the sail, bring the mast forward again quickly so the clew doesn’t get caught in the water
The waterstart could be an easy and energy saving way to get going again after falling in the water. However, a lot of the time I see how people on a more advanced level (such as learning how to gybe in lessons with me) waste a lot of energy on the waterstart. In my previous post on how to waterstart I only focused on the waterstart itself and skipped the part on how to get the sail out of the water or position the gear. In this post I will focus on how to lay out the gear and lift the sail out of the water in the most energy efficient way so that your sessions on the water can last longer.
Check the wind direction
Missing this small little detail is by far the one which has robbed the most people of a lot of energy. By trying to lift the sail out at an angle which has the wind pushing down on the sail rather than going underneath it and lifting it up, many windsurfers end up tired in a matter of minutes. Before you do anything in terms of handling the gear or making a physical effort for the waterstart, take a moment to ensure you have a clear notion of the wind direction.
Put the sail on what would be/is the upwind side of the board when the board is pointing in the direction we want to start in
Let’s assume we want to start on a starboard tack. If we have the sail on the upwind side of the board, all we have to do is turn the board under the sail (if necessary) so that it is set out on the starboard tack. If the sail were laying downwind of the board, simply lay out the board so that if the sail were upwind, it would be set out for a starboard tack.
Position the sail so that the mast is on the sailing direction and the clew is on the aft side of the board
If the sail is not already laid out like this, we must flip the sail. The way we do this is by positioning the clew upwind of the mast and starting to lift the clew out of the water until the wind gets some of the sail surface and helps you by pushing the clew all the way on to the lee side.
Turn the gear so that the mast is between 20° and 90° to the wind
There are two ways we can turn the gear. I generally recommend considering the mast top as the centre of rotation and making the board move around it, always with the bow first (as this is the natural direction to move in and will be wasier). The exception is when the gear is practically already correctly laid out and all that is needed is a few more degrees around. It is more effective to swim 20° in the unnatural sense than 340° in the natural one. I recommend grabbing the mast between the boom and the mastfoot and swimming paraell to the board.
Swim to the correct position along the mast
The closer the sail is to 20°, the higher up on the mast we must position ourselves to start lifting up the sail. The closer to 90° the sail is to the wind the closer to the boom we must position ourselves. At the 90° mark we must be at around 60 cm (2ft) above the boom.
Swim to the wind until the sail is flat on the water surface
Start swimming towards the wind with the mast in hand until the sail is lying flat on the water. Do not lift the mast out of the water until the sail is flat on the water as if the clew is still to deep in the water when you lif the sail up, the wind will blow the sail out of your hand and over the clew instead of getting the rest of the sail out of the water smoothly.If the clew is in the water you will not be able to hold it when the wind hits the sail, and if you are able, all that is going to happen is that the sail sinks into the water again.
Lift up the sail slowly and don’t stop swimming
With the sail flat on the water we start lifting the sail with constant upward force. Do not jerk it upwards. The water on the sail will keep the sail from going up and all you are going to do is waste energy. Lift up the sail slowly so that the water can run out of the sail as you slowly lift it up. Slowly lift the mast about 30 cm (1 foot) over the water surface so that the wind can do the rest of the sail lifting for you. Do not stop swiming towards the wind or the clew will start to slip deeper into the water.
Set up for the waterstart
Now all that is left is to move the sail over your head and grab either the boom or the back footstrap with the back hand and you are set to tackle the waterstart itself.
So to recap:
– Check wind direction – Set up board relative to the sail first – Then rotate to get mast between 20 and 90 deg to the wind – Grab mast and swim towards the wind until the sail is laying flat on the water – If the sail is not flat in the water it can get stuck in the water an undo all the progress. – Start lifting the sail by continuing to swim towards the wind and lifting it up slowly but steadily. – Do NOT jerk it upwards as tere is water weighing the sail down and will just use a lot of energy for little result. – Slow steady lifting up so the water can roll off the sail. – Raise it up to 30 cm so the wind lifts it up completely – Do waterstart
The waterstart: portal to the small volume boards. The manoeuvre that separates the men from the boys, real windsurfers from the newbies, the dedicated from the dabblers…. The waterstart is THE manoeuvre you need to get a hang of to truly enjoy the sport of windsurfing.
If we remember my post on the beachstart, I mention that the beachstart is 95% technique and 5% wind. The waterstart is 80% technique and 20% wind. This means that we can still do a waterstart easily even if the wind drops. However, I have seen so many people unable to sail back to shore when the wind dropped just because their waterstart technique was useless. Therefore I recommend that everybody read this even if they know how to do the waterstart.
The technique of the waterstart is very similiar to that of the beachstart. Basically you can think of the waterstart as a beachstart without touching the ground. Therefore I recommend getting the beachstart technique sorted out before you tackle the waterstart.
Pulling the sail out of the water
I wrote a separate article on how to get the sail out of the water for the waterstart and positioning the gear to save time and energy. You can read up on it now and come back to this post later or finish this one first. For now the main piece of information I want to to take away is that you make sure you keep the sail flat on the water surface to avoid the end of the boom sticking in the water and undoing all your progress of getting the sail to hover out of the water.
Now to the actual waterstart:
We position the board similar to the beachstart, beam reach or slightly more downwind for more sail surface (if there is little wind). We get the board into this position with the same pushing/pulling on the mastfoot as the beachstart only that we need the keep our body more tense as we don’t have a ground to use as fixed point.To get and maintain the board in place we can hold the boom or mast with the front hand and the back footstrap with the back hand.
With these two contact points we can lever the board into place. We can either move on to the next step immediately if we have enough wind or, if we don’t have enough wind, wait for a gust strong enough to lift us out.here is what comes next: Once we have the gear laid out correctly we put the back foot on the board. If there is enough wind we can put both feet on the board which will give us greater control. However, if we use only one foot we can use the other leg to swim upwards and help us get on.
A very important note, when you put your foot on the board DO NOT push the board away from you. You want to lay the foot on the centerline of the board and pull it towards you if anything. Pushing the board away with the back foot will cause the board to turn into the wind and leave us luffed up so far that we no longer have any wind lifting us.
So: lay the back foot on the centerline of the board and push with your front hand onto the mastfoot through the mast. As soon as the foot is on the back hand goes from the back footstrap to the boom (if you didn’t have there already). Once there do not immediately pull down. What you want to do is pull the back hand upwards towards the mast top. Basically over your head. Our intention is to keep the boom horizontal throughout the whole procedure.
As you do this you want to bend your knees and lean your shoulders forwards so that your chest is touching your knees. What this does is in essence position the sail as vertical as possible while bringing your weight centre as low and close over the board as possible. The result is as much sail surface available to the wind to lift us up and the minimum resistance of your bodyweight to pull us down.
Do not sabotage yourself
As soon as we start to get lifted out it is important to avoid two things:
– Bend the front arm
– Lunge forwards with our hips
Both of these will sabotage our efforts and make us fall backwards into the water again. Try to keep this in mind:we want the sail to lift us out of the water with the wind. We DON’T want to pull ourselves up as we would doing pull-ups.
Once our body’s weight centre is over the board we must start to open the sail again to avoid being catapulted over the other side.
And to top it all off we need to keep the boards position steady throughout the whole procedure. As you can see, it is quite a complex maneouvre indeed and one that takes a while to be mastered. I would definitely recommend getting an instructor to guide you for the first two hours as keeping all of these things in mind is nearly impossible… Also, it will stop you from taking up bad habits (especially the front arm and hip lunging thing).
So, to recap:
– Board on beam reach or slightly downwind
– Wait for wind gust if not enough constant wind
– Foot resting on the board, not pushing the board away
– Front arm straight and leaning the mast forward
– Bend knees
– Shoulders forward
– Let the sail lift us up and NOT pull ourselves up
– Open the sail in time
– Maintain board direction steady throughout all manoeuvre
Once we are sailing back and forth we need to consider that we are indeed not the only ones on the water. In order to avoid collision we must abide by the rules of right of way of the sea. First we will look at the hierarchy of the different vessels on the water. The ones on top have more priority whereas the ones towards the bottom need to get out of the way (according to boatus.com).
Vessels not under command
— Vessels restricted in their ability to manoeuver
(freighter that take ages to turn)
— Vessels constricted by draft
(freighter in a channel)
— Fishing vessels engaged in fishing, with gear deployed
— Sailing vessels
(windsurfers & other sailing boats)
—
Rowboats
— Power driven vessels
(motorboats)
Basically, the ones that have more difficulty in manoeuvering are the ones who have priority.
Now that we have established whom we need to avoid and who needs to act to get out of our way, lets see how the rules apply withing the sailboat category:
In the first two rules, one person will not be able to see the other. We must keep in mind that the responsibility of avoiding the collision is always going to be of the person that can see the other. Makes sense, doesn’t it?
Overtaking person needs to avoid collision
When two windsurfers going on the same tack, one behind the other and the one behind is going faster with the intention to overtake. As the person that is in front is looking forwards (as they should) they are not going to see who is coming up behind them. So it is on the person that is going to overtake them to avoid collision. And no, shouting to get their attention to make them get out of the way does not make you exempt from this obligation nor is it good form to do so.
Downwind over upwind
Again, two windsurfers sailing on the same tack. The one going that is downwind is going to have a hard time seeing the one upwind. Therefore, the one sailing upwind has the obligation to change his course if the one downwind decides to bear into the wind. If the one downwind can continue on the closed haul course, so can the one upwind. That being said, if you are going to bear into the wind, make the small effort to turn your head to avoid any scares or close calls.
Port bow over starboard bow
This is the only rule for which a call had to be made in terms of priority as both people are in the same situation. Two windsurfers are headed toward eachother on different tacks. Both can see eachother and effectively one must get out of the way. Which? Instead of using technical terms, let’s just put it this way. The one with the left hand nearer to the mast must change their course to avoid collision.
However, the one with their right hand closest to the mast has the obligation of staying on their course. They cannot go changing their course as they please as it makes the decision difficult for the one whi must get out of the way to decide on which way to avoid into.
In the end, it all comes down to common sense and common courtesy. Don’t be a nuissance on the water and try to play fair when having to share the water with others. If in doubt on what to do you can just stop or turn around. More than once have I had to hit the brakes due to the other not knowing the rules and changing course when they shouldn’t or simply being arrogant dicks and ignoring all rules. Most of the close call have been when two people decide they can both still arrive upwind of the predicted collision point and so not have to bear away.
As a small side note, these rule apply to when we are sailing on “flat” water. That is to say, not in breaking waves. When we are sailing in breaking waves where people are riding the wave and jumping around, the rules are a little different. I will write a post on that in the future. However, these are the ones that will count 95% of the time so abide by them.
This may be a silly question to some people but I have had it asked by various students. There are actually 3 ways to stop:
1. Let go of the sail.
The most obvious is naturally to let everything go, in other words, just drop the sail and let it fall into the T-position. With no power in the sail there is no propulsion and the sail dragging through the water causes ennough resistance to make you stop moving in a few short metres. The disadvantage: we will no longer have anything to hold on to so we have to either bend lur knees for stability or fall in the water.
2. Luff up to a standstill
There will be times where letting go of the sail is just not an option. Maybe there is someone downwind of you or you want to keep in control procedure, like shen sailing in waves. Also, if we are going fast, the sail falling in the water will cause the board to stop moving pretty quickly meaning that, since you are not wearing a seatbelt, you will go flying. The best option is to lean the sail far back and to put a lot of weight on the back foot so that the board turns into the wind quickly. This way we stop moving and lose power in the sail quickly while staying in control of the equimpent all the time.
Click on image to see in full size
3. Press against the wind
For those with a little bit more experience, when we are plodding along slowly and need to stop we can lean the mast into the wind and push with our back hand. Obviously this requires good sail control as we need to lean against the power of the sail with precision. I tend to use this when I sail closely behind my students and they fall in. In this situation none of the others would be possible.
I hope this has answered the question for some people and given a few ideas to others.