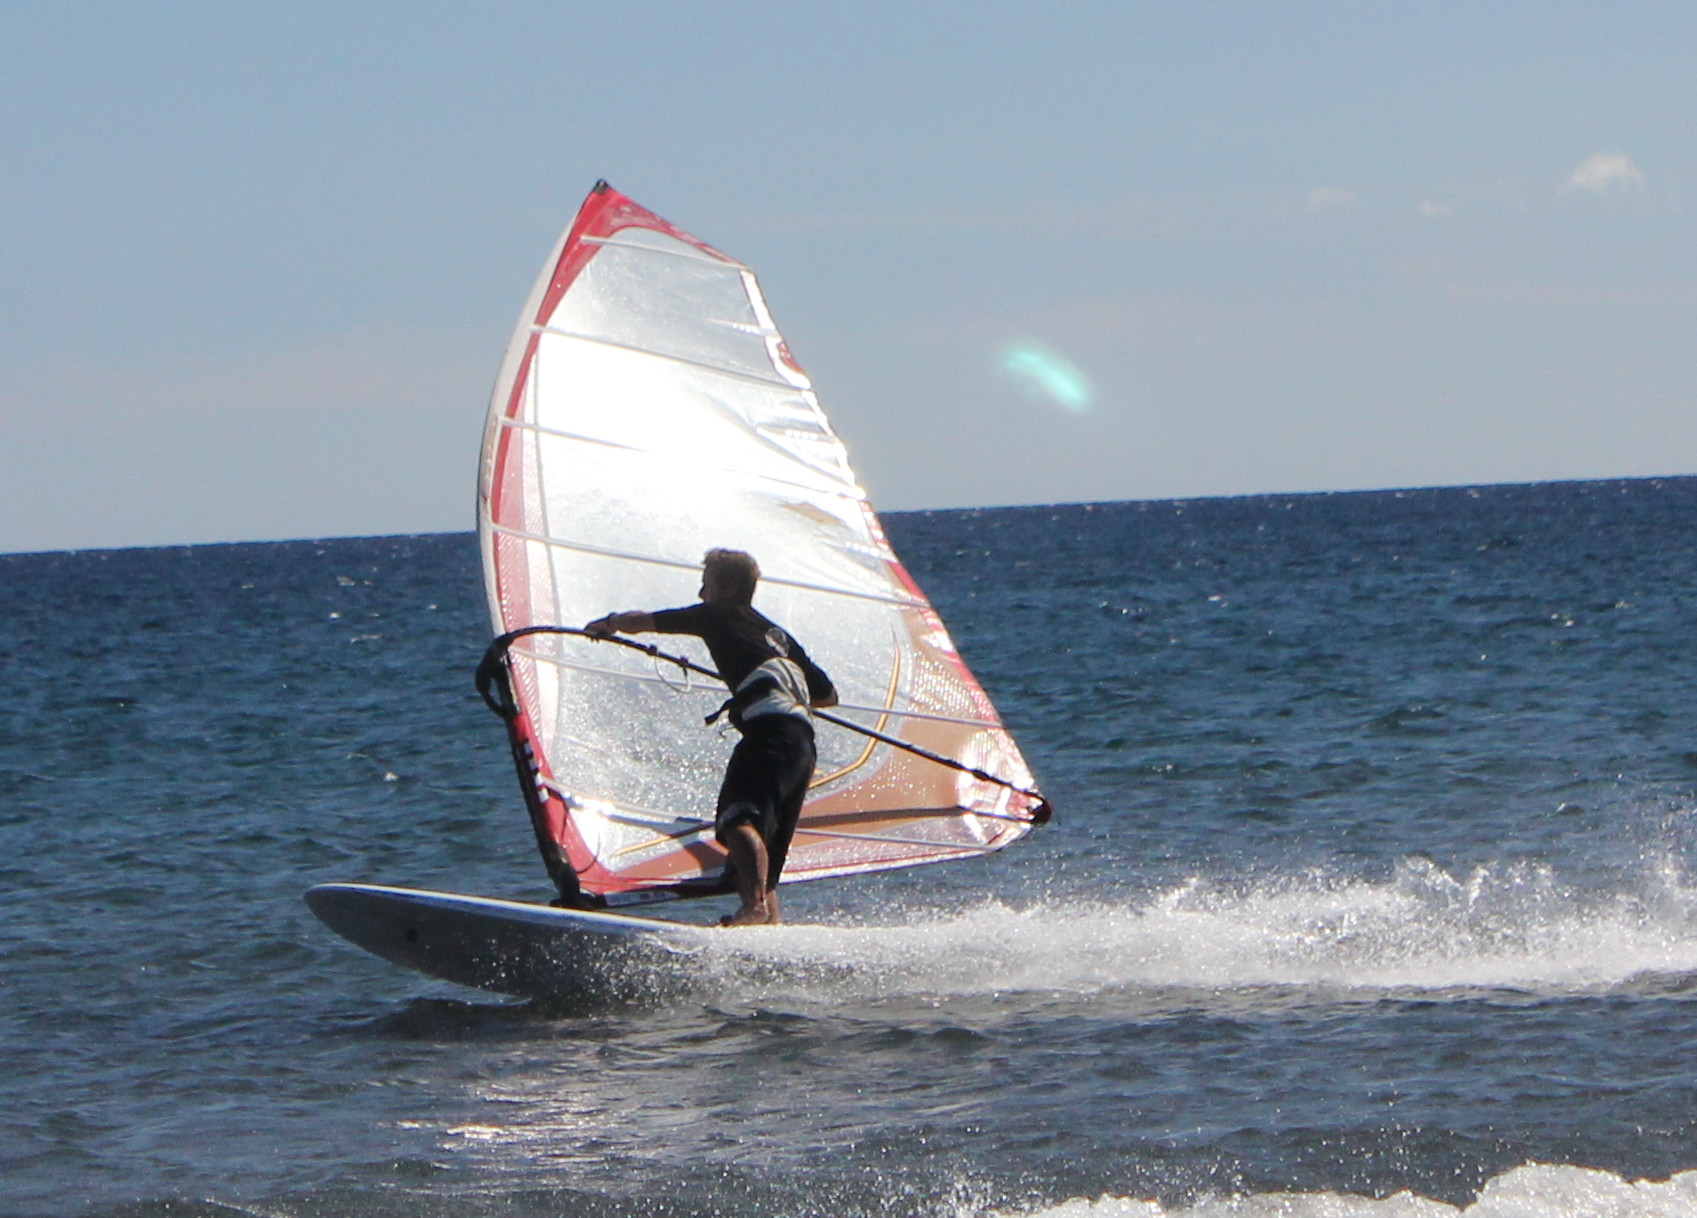
The duck gybe is one of the easiest extensions to our free-ride repertoire as it shows class without being very difficult. In essence we just take advantage of the relative wind being zero on the running course in order to flip the sail around the clew. Let me go into the step by step:
Grab the boom a little bit further back with the back hand
Once you are nearly on the running course (when your relative wind speed is 0) instead of releasing the back hand to shift the sail, release the front hand and simultaneously bring the clew of the sail forward with the back hand
Move the front hand to the back of the boom, closer to the clew than the back hand so that you can let go of the back hand
The sail should now already be with the mast on the correct side only that we are still holding on to it on the old side of the boom
The back hand (now to be the front hand) grabs the boom on the new side
The old front hand comes on to the new side of the sail and grabs the boom further forward than the previous hand
The new front hand grabs the boom close to the mast and we prepare to shift our feet
We Finnish positioning our feet correctly as we start to catch wind again on the new side
Push your hips forward and lean back with your shoulders to continue planing on the new course
The idea is to do all this sequence of steps with no wind in the sail. For this we must be going as fast as the wind so that the relative wind in zero. You can start practicing this manoeuvre by just bearing away onto a running course, shifting the sail around the clew and then continuing to shift it around the mast so that we can continue sailing into the same direction. This will allow you to focus only on the sail control and add the foot position and weight transfer once the sail handling is under control.
One last tip:
Don’t let the mast touch the water as it will get stuck in the water, make the kit come to a sudden halt and send you flying forwards, possibly getting hurt in the process. I call this the involuntary superman.
Disclaimer: I will refer to both gybes as planing gybe so I don’t have to keep writing “power-gybe and carving-gybe” all the time. Basically the thing that differences them is at the end anyways and I will mention it when I get to it.
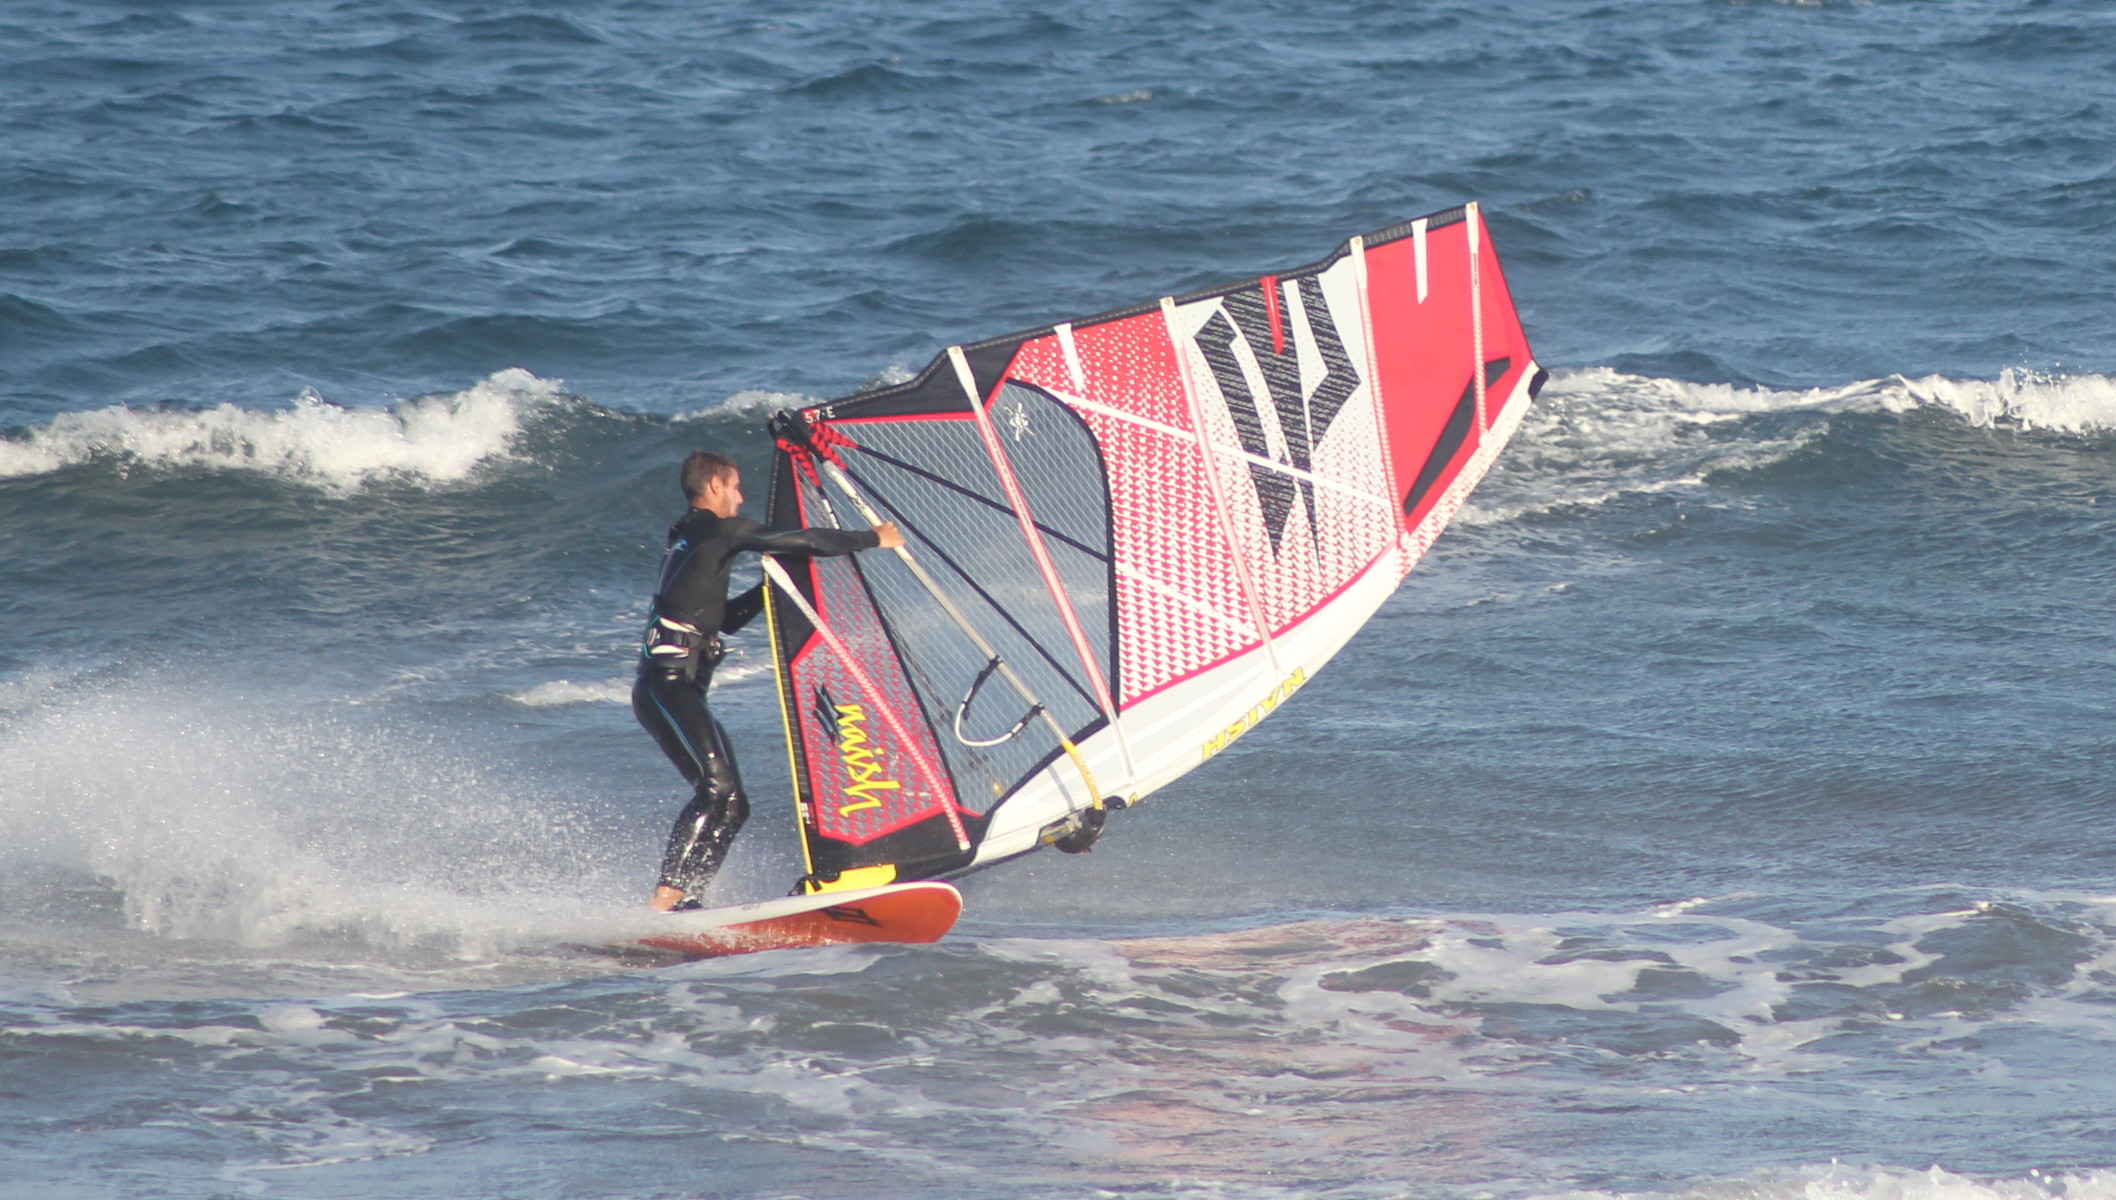
We have arrived at the holy grail of windsurfing. Sailing out on a plane, turning around and coming back to the beach with dry hair. Once the waterstart is a struggle of the past an no linger a big deal, it also becomes a bit of a nuisance having to let ourselves fall in the water to turn around and waterstart back to the beach. It is time to learn how to do the planing-gybe.
First off, the technique of the planing-gybe has little to do with that of the beginners gybe. The first is for small boards with little volume that sink when they are not planing. The normal gybe is for large volume boards which float even when at a standstill. For this reason I recommend learning the planing-gybe with a board no bigger than 120 litres, less if you are a lightweight.
So let’s get down to it:
Start by planing
As already mentioned a few too many times before, we want to be planing for this gybe. The one thing that will make or break the success of this manoeuvre is speed. Having it when we go in and keeping it throughout. The faster we go, the easier the entire sequence of motions is going to be since the board will be more stable at high speed and the sail will be easier to handle. Our immediate goal is to arrive in the downwind course having the same speed as the wind since then the relative wind is zero and the sail can be handled much easier.
Take the back foot out of the strap
We take the back foot out of the strap and place it on the downwind rail and begin to put pressure on that rail.
Move our weight forward
As the board starts to turn we shift our body forward, over the front foot to make sure that the board remains as flat on the water as possible instead of having too much weight over the stern which would cause the board to sink and slow us down quickly. Keep the front arm straight and the sail sheeted in
As we start to bear away, the relative wind changes also. At one point the board speed is going to be faster than the actual wind and the relative wind will be coming from the downwind course. To use this relative wind to the fullest extent we must keep the front arm straight and the back hand sheeting in the sail to keep an optimal angle of attack on the sail.
Keep the weight over the front foot
Resist the temptation of leaning back as you pick up speed on the downwind course. You want to lean forward with your shoulders without sticking your bum out. Leaning back will only slow us down or make the board shoot out forwards from under our feet and stcking our bum out will rob us of stability.
Keep steady pressure on the rail
If we stand on the board unsteadily we will be applying varying pressure on the inner rail which will result in the board to not make a smooth arc through the water but snake lines which will reduce our stability even more.
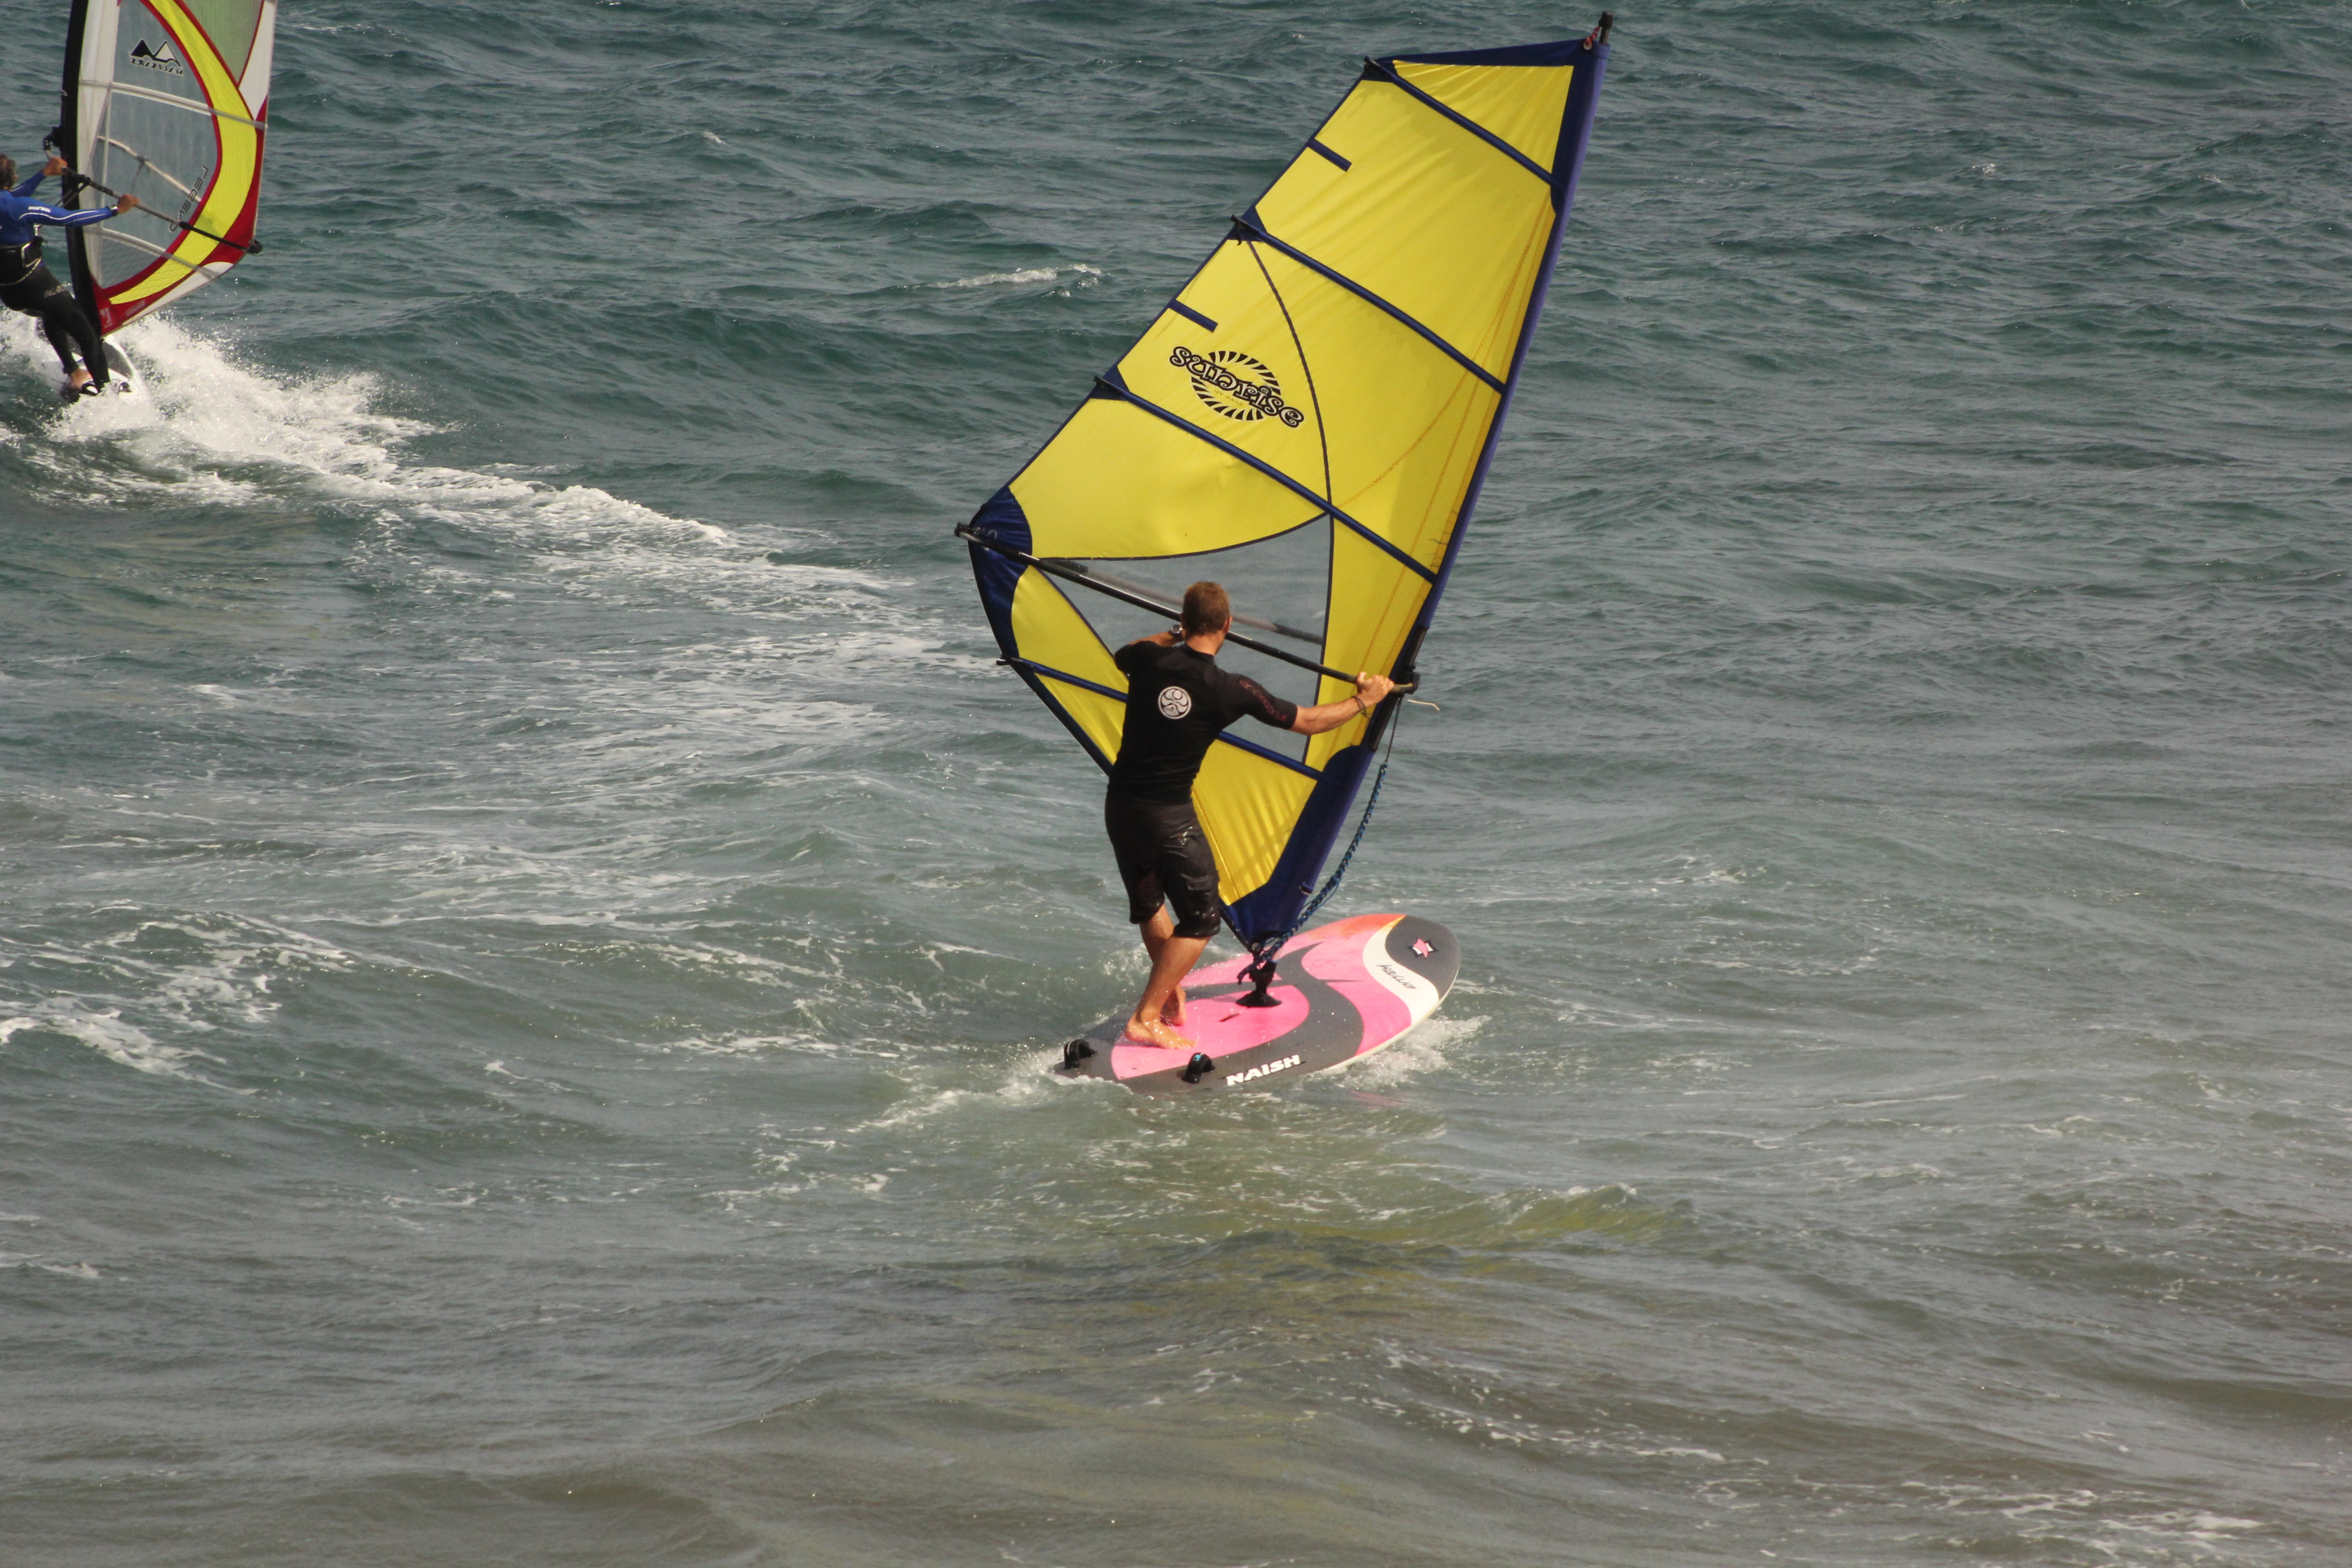
Once we arrive at the downwind course we will do one of two sequences that will decide whether your planing gybe is a power-gybe or a carve-gybe. Taking advantage of the relative wind being close to zero, and so hardly having any pressure in the sail we:
Power Gybe
Carve Gybe
Change our foot position taking care to keep them positioned along the centreline of the board and putting a little more pressure on the heels to keep the board durning. First we change the front foot (of the old side), basically just rotating it on the spot and moving slightly to the centreline of the board so it comes out of the footstrap. Then we move the back foot (of the old side) and move it just behind the mastfoot so that the board remains flat over the water and so that when the sail is shifted we can transmit the power of the sail into the board again.
We then we shift the sail making sure that we bring the mast forward again as quickly as possible as the clew can get caught in the water when it arrives one the new side resulting in the sail getting pulled out of our hands. Once the mast is brought forward we can also grab the boom again with our back hand.
Shift the sail making sure that the mast is brought forward again once it has shifted so that we can grab the boom on the new side and so that the clew doesn’t get caught in the water and the resistance in it pulling it out of our hands.
Now it is time to change our foot position: first the front foot which is taken out of the footstrap and placed just behind the front footstraps and on the centreline of the board; then the foot that is on the rail is moved forward just behine the mastfoot ready to transmit the sail power into the board again on the new side.)
Once on the new side with the feet and sail set up correctly again we need to continue the plane (or get back into it in case we slowed down too much). In other words we must lean back, close the sail and push our hips forward.
I personally do vary on the gybe I do depending on the side I do it in. I feel most comfortable with my right foot in front as I have a goofy stance when surfing or skateboarding. For this reason I do a power-gybe when starting on a port tack and a carve-gybe when I start on a starboard tack so that I stay as long as possible with my right foot in front as I feel I have more control. People with a regular stance will probably prefer to keep their left foot in front longer. In any case, try out both ways and see which one comes more naturally to you.
To recap:
– Important is to be planing
– Back foot out f the footstrap
– Start putting pressure on the rail
– Weight forward
– Front arm straight, close the sail with back hand
– Keep body vertical: no sticking our bum out in a sitting positiion, no leaning back with the shoulders
– Keep steady pressure on the rail throughout the manoeuvre
– Switch feet first, then shift the sail (power gybe)
OR (Depends on preferred stance)
– Shift sail, then switch feet (carve gybe)
– When shifting the sail, bring the mast forward again quickly so the clew doesn’t get caught in the water
As with tacking, in my opinion, knowing how to gybe in windsurfing is unnecessary since our turn will be quite different as soon as we start planing/gliding (the planing gybe is very different to this basic gybe). However, to get to that level we need time on the water and until then we want to be able to turn around with style without getting wet. I will get around to writing a guide for the carve jybe in the future but this is all I have here for now. So here goes:
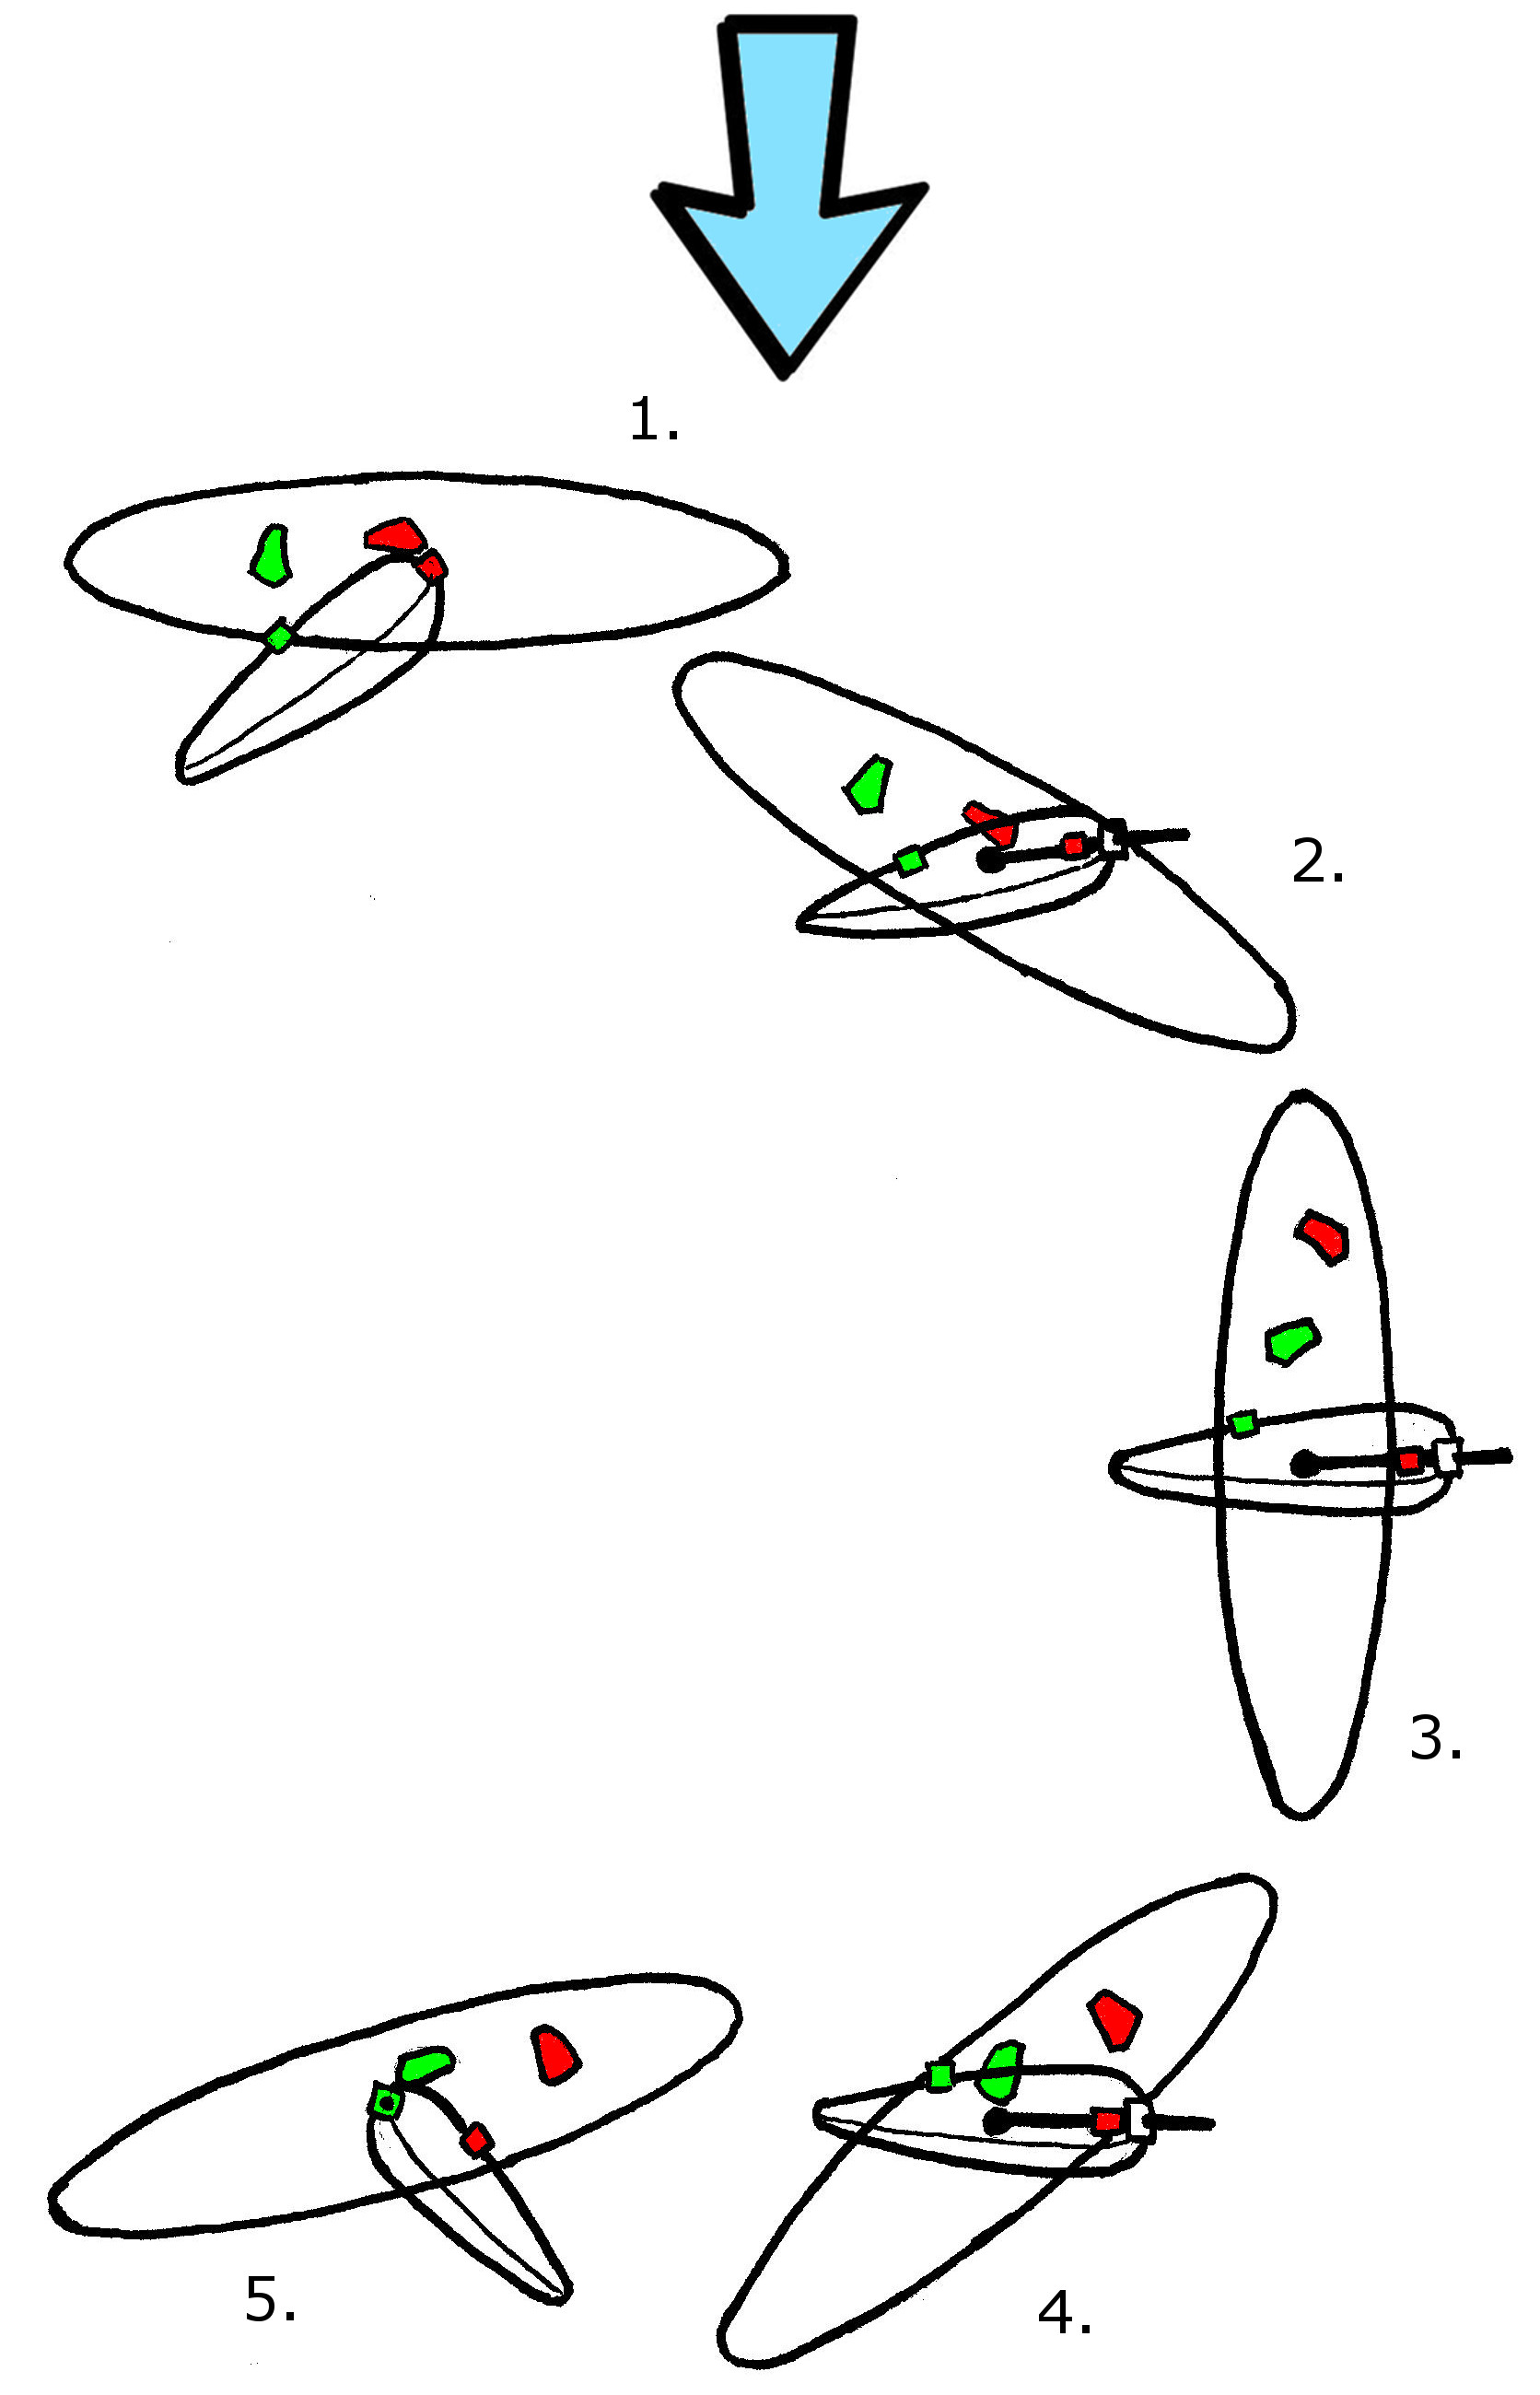
Click on the image to see in full size
We start on beam reach (1.). We put the back hand further back on the boom and start to lean the sail forward (towards the wind) (2.).
As the board starts to bear away, we move our front foot behind our back foot and place all our weight on it (3.).
We keep leaning the mast forward and down towards the water.
We pass through the downwind course and continue sailing clew first in the new direction.
At this point we move our feet forward so that the new front foot is next to the mast and the new back foot a shoulder width behind (4.).
As soon as the feet are in place we shift the sail remembering to bring the mast forward quickly as it shifts.
We bear up again so we get back to half reach again on the new side (5.).
Important throughout the whole manoeuvre is to really lean into the wind as we are going to have the while area of the sail available to the wind and therefore a lot of power in the sail.