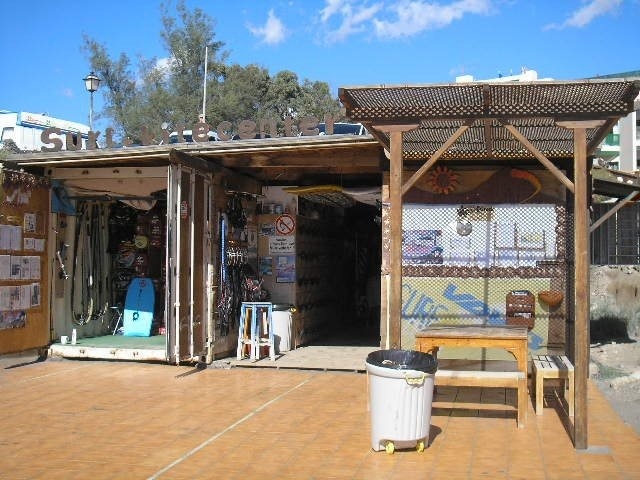
A surf center is a key point to a surf spot. It is a resort that offers an introduction to the awesomeness of watersports and the facilitator of means to enjoy any of the sports that use the ocean as its playground.
Here is a list of what I believe a surf center should have.
1. Location
I could say that this goes without saying but it is good to remember what our target clientele is. If you intend on bringing beginners to your center, it would be a good idea to choose a spot with flat water. However, don’t expect experienced riders to come if all you have to offer is a maximum of 12 knots (formula sailors do exist, but are they going to rent or will they be more likely to bring their own stuff? An alternative to watersports should also be nearby for days with less favourable conditions as well as decent establishments for food and accommodation.
2. Good equipment
A surf center is characterized mainly by its equipment. What makes one center better than another at the same location is the quality of the equipment it offers. It will naturally also determine the price it asks.
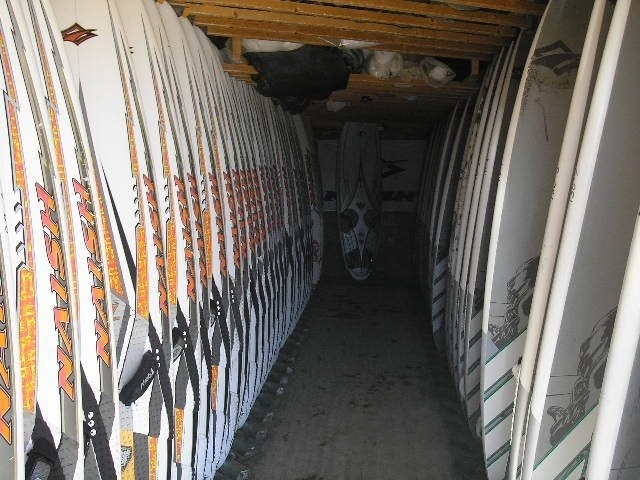
3. Storage space
People who own their own stuff will most likely not want to spend money on rental. They prefer the commodity of sailing the kit they are used to and if you can’t provide a place for them to store it safely, they will go someplace else.
4. Good instructors
A surf school might have great facilities but if the instructors giving the lessons are no good then you might as well just rent. There are a couple pf things that make an instructor good which will be mentioned in a future post.
Disclaimer: I will refer to both gybes as planing gybe so I don’t have to keep writing “power-gybe and carving-gybe” all the time. Basically the thing that differences them is at the end anyways and I will mention it when I get to it.
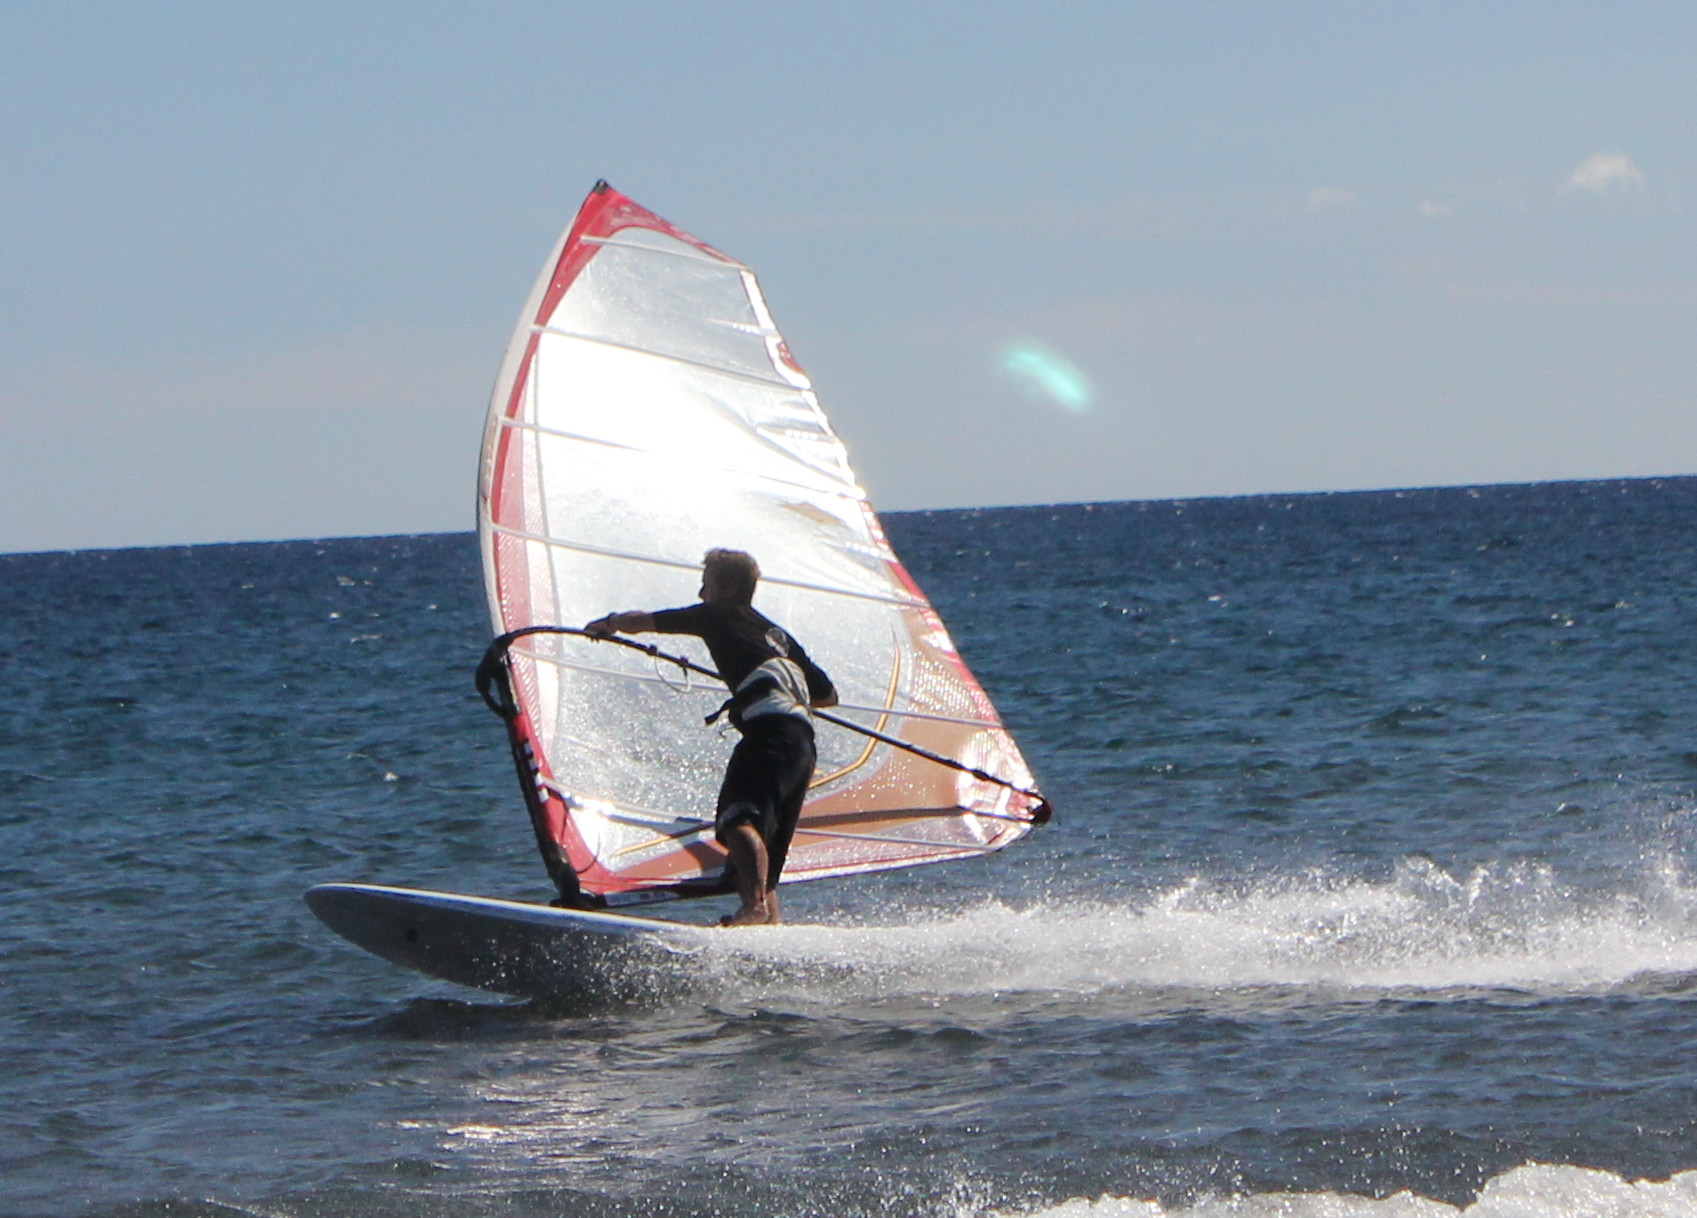
We have arrived at the holy grail of windsurfing. Sailing out on a plane, turning around and coming back to the beach with dry hair. Once the waterstart is a struggle of the past an no linger a big deal, it also becomes a bit of a nuisance having to let ourselves fall in the water to turn around and waterstart back to the beach. It is time to learn how to do the planing-gybe.
First off, the technique of the planing-gybe has little to do with that of the beginners gybe. The first is for small boards with little volume that sink when they are not planing. The normal gybe is for large volume boards which float even when at a standstill. For this reason I recommend learning the planing-gybe with a board no bigger than 120 litres, less if you are a lightweight.
So let’s get down to it:
Start by planing
As already mentioned a few too many times before, we want to be planing for this gybe. The one thing that will make or break the success of this manoeuvre is speed. Having it when we go in and keeping it throughout. The faster we go, the easier the entire sequence of motions is going to be since the board will be more stable at high speed and the sail will be easier to handle. Our immediate goal is to arrive in the downwind course having the same speed as the wind since then the relative wind is zero and the sail can be handled much easier.
Take the back foot out of the strap
We take the back foot out of the strap and place it on the downwind rail and begin to put pressure on that rail.
Move our weight forward
As the board starts to turn we shift our body forward, over the front foot to make sure that the board remains as flat on the water as possible instead of having too much weight over the stern which would cause the board to sink and slow us down quickly. Keep the front arm straight and the sail sheeted in
As we start to bear away, the relative wind changes also. At one point the board speed is going to be faster than the actual wind and the relative wind will be coming from the downwind course. To use this relative wind to the fullest extent we must keep the front arm straight and the back hand sheeting in the sail to keep an optimal angle of attack on the sail.
Keep the weight over the front foot
Resist the temptation of leaning back as you pick up speed on the downwind course. You want to lean forward with your shoulders without sticking your bum out. Leaning back will only slow us down or make the board shoot out forwards from under our feet and stcking our bum out will rob us of stability.
Keep steady pressure on the rail
If we stand on the board unsteadily we will be applying varying pressure on the inner rail which will result in the board to not make a smooth arc through the water but snake lines which will reduce our stability even more.
Once we arrive at the downwind course we will do one of two sequences that will decide whether your planing gybe is a power-gybe or a carve-gybe. Taking advantage of the relative wind being close to zero, and so hardly having any pressure in the sail we:
Power Gybe
Carve Gybe
Change our foot position taking care to keep them positioned along the centreline of the board and putting a little more pressure on the heels to keep the board durning. First we change the front foot (of the old side), basically just rotating it on the spot and moving slightly to the centreline of the board so it comes out of the footstrap. Then we move the back foot (of the old side) and move it just behind the mastfoot so that the board remains flat over the water and so that when the sail is shifted we can transmit the power of the sail into the board again.
We then we shift the sail making sure that we bring the mast forward again as quickly as possible as the clew can get caught in the water when it arrives one the new side resulting in the sail getting pulled out of our hands. Once the mast is brought forward we can also grab the boom again with our back hand.
Shift the sail making sure that the mast is brought forward again once it has shifted so that we can grab the boom on the new side and so that the clew doesn’t get caught in the water and the resistance in it pulling it out of our hands.
Now it is time to change our foot position: first the front foot which is taken out of the footstrap and placed just behind the front footstraps and on the centreline of the board; then the foot that is on the rail is moved forward just behine the mastfoot ready to transmit the sail power into the board again on the new side.)
Once on the new side with the feet and sail set up correctly again we need to continue the plane (or get back into it in case we slowed down too much). In other words we must lean back, close the sail and push our hips forward.
I personally do vary on the gybe I do depending on the side I do it in. I feel most comfortable with my right foot in front as I have a goofy stance when surfing or skateboarding. For this reason I do a power-gybe when starting on a port tack and a carve-gybe when I start on a starboard tack so that I stay as long as possible with my right foot in front as I feel I have more control. People with a regular stance will probably prefer to keep their left foot in front longer. In any case, try out both ways and see which one comes more naturally to you.
To recap:
– Important is to be planing
– Back foot out f the footstrap
– Start putting pressure on the rail
– Weight forward
– Front arm straight, close the sail with back hand
– Keep body vertical: no sticking our bum out in a sitting positiion, no leaning back with the shoulders
– Keep steady pressure on the rail throughout the manoeuvre
– Switch feet first, then shift the sail (power gybe)
OR (Depends on preferred stance)
– Shift sail, then switch feet (carve gybe)
– When shifting the sail, bring the mast forward again quickly so the clew doesn’t get caught in the water
This is a post I wrote a year ago on an old blog and thought I would post it on here also.
When we need to buy a wetsuit there are a couple of things we have to take into account. We have to ask ourselves questions such as:
What sport do we want to do with it?
What temperatures are we going to use it in?
How long will the sessions be that we use it?
And yes, it should make you look sexy as a baboon 😉
The basic things to look out for are:
Thickness
Depending on the temperature of the air and water that you are going to be in and the length of time that you are going to spend in it you will need a different thickness of wetsuit. It hardly bears mentioning that warmer waters require less thickness than cold waters. Also, you may be in a country where the actual temperature is warm but the water is cold so bear that in mind.
I was surfing in Portugal in July and despite the heat on the shore (and boiling inside the wetsuit) the water was rather cold and only permitted sessions of around an hour with long wetsuits.
Naturally ones body constitution will have an impact on the thickness you need. I have seen guys in the water in board shorts while others needed long suits.
Then again, if you are windsurfing and you are rarely in the water and the air is warm, maybe a thinner one will do.
The waterstart could be an easy and energy saving way to get going again after falling in the water. However, a lot of the time I see how people on a more advanced level (such as learning how to gybe in lessons with me) waste a lot of energy on the waterstart. In my previous post on how to waterstart I only focused on the waterstart itself and skipped the part on how to get the sail out of the water or position the gear. In this post I will focus on how to lay out the gear and lift the sail out of the water in the most energy efficient way so that your sessions on the water can last longer.
Check the wind direction
Missing this small little detail is by far the one which has robbed the most people of a lot of energy. By trying to lift the sail out at an angle which has the wind pushing down on the sail rather than going underneath it and lifting it up, many windsurfers end up tired in a matter of minutes. Before you do anything in terms of handling the gear or making a physical effort for the waterstart, take a moment to ensure you have a clear notion of the wind direction.
Put the sail on what would be/is the upwind side of the board when the board is pointing in the direction we want to start in
Let’s assume we want to start on a starboard tack. If we have the sail on the upwind side of the board, all we have to do is turn the board under the sail (if necessary) so that it is set out on the starboard tack. If the sail were laying downwind of the board, simply lay out the board so that if the sail were upwind, it would be set out for a starboard tack.
Position the sail so that the mast is on the sailing direction and the clew is on the aft side of the board
If the sail is not already laid out like this, we must flip the sail. The way we do this is by positioning the clew upwind of the mast and starting to lift the clew out of the water until the wind gets some of the sail surface and helps you by pushing the clew all the way on to the lee side.
Turn the gear so that the mast is between 20° and 90° to the wind
There are two ways we can turn the gear. I generally recommend considering the mast top as the centre of rotation and making the board move around it, always with the bow first (as this is the natural direction to move in and will be wasier). The exception is when the gear is practically already correctly laid out and all that is needed is a few more degrees around. It is more effective to swim 20° in the unnatural sense than 340° in the natural one. I recommend grabbing the mast between the boom and the mastfoot and swimming paraell to the board.
Swim to the correct position along the mast
The closer the sail is to 20°, the higher up on the mast we must position ourselves to start lifting up the sail. The closer to 90° the sail is to the wind the closer to the boom we must position ourselves. At the 90° mark we must be at around 60 cm (2ft) above the boom.
Swim to the wind until the sail is flat on the water surface
Start swimming towards the wind with the mast in hand until the sail is lying flat on the water. Do not lift the mast out of the water until the sail is flat on the water as if the clew is still to deep in the water when you lif the sail up, the wind will blow the sail out of your hand and over the clew instead of getting the rest of the sail out of the water smoothly.If the clew is in the water you will not be able to hold it when the wind hits the sail, and if you are able, all that is going to happen is that the sail sinks into the water again.
Lift up the sail slowly and don’t stop swimming
With the sail flat on the water we start lifting the sail with constant upward force. Do not jerk it upwards. The water on the sail will keep the sail from going up and all you are going to do is waste energy. Lift up the sail slowly so that the water can run out of the sail as you slowly lift it up. Slowly lift the mast about 30 cm (1 foot) over the water surface so that the wind can do the rest of the sail lifting for you. Do not stop swiming towards the wind or the clew will start to slip deeper into the water.
Set up for the waterstart
Now all that is left is to move the sail over your head and grab either the boom or the back footstrap with the back hand and you are set to tackle the waterstart itself.
So to recap:
– Check wind direction – Set up board relative to the sail first – Then rotate to get mast between 20 and 90 deg to the wind – Grab mast and swim towards the wind until the sail is laying flat on the water – If the sail is not flat in the water it can get stuck in the water an undo all the progress. – Start lifting the sail by continuing to swim towards the wind and lifting it up slowly but steadily. – Do NOT jerk it upwards as tere is water weighing the sail down and will just use a lot of energy for little result. – Slow steady lifting up so the water can roll off the sail. – Raise it up to 30 cm so the wind lifts it up completely – Do waterstart
My home spot is El Médano. It is where I learned to windsurf and where I have been teaching for the last 9 years on and off. In that time I have seen hundreds of people keen of getting on the water and having a great session suddenly experience a frustrating fight for even getting on the board and sailing for more than 10 meters. I have seen experienced flat water windsurfers take a severe beating and break gear on many occasions. The reason is that they never had to face a shore break, much less such a constant one as here. And it really isn’t all that hard getting through the waves, all you need to know is how.
We need to take into account that regardless of whether you are positioning the board for the beachstart, the waterstart of just plain sailing, the method to get through a breaking wave is the same. The biggest fight that I keep witnessing is to do the beachstart. The reason is that the waves tend to come non-stop, with a space of 1 to 5 seconds between them. Here are the three basic things you need to take into account when going through a shore break wave:
Go through the wave at 90°
This is the biggest factor to take into account when sailing through a wave, broken or just steep. The wave is a mass of water that is moving towards you that will try to push us along with it, and if the board is not perpendicular to the wave, the bow (which is the first point of contact of the wave on the board) will be pushed/dragged along by the wave. The result is a loss of control. If this happens while positioning the board for the beachstart or the waterstart, all our positioning efforts will have been undone. If this happens while sailing, the result is either a way too fast luffing up to the wind, or a very entertaining catapult (at least for all of us watching :))
The faster the better
As mentioned before, the wave has a lot of inertia, meaning that when it hits us, it will try to push us with it. Hitting it at 90° is one part of the equation, however, unless we have some energy of our own to counteract the waves’ energy, it will in fact push us backwards. While handling the board for the beachstart we can lean against the wave with the gear to stop it from pushing us over although pushing the gear into the wave about a meter before impact is more effective. If we have to waterstart in steep/broken waves, pushing towards pushing the board into the wave like with the beachstart can make the difference of having to lay out the gear correctly again or not. When we are sailing, try to pick up some speed between the waves so that you are not at a standstill when the wave hits you. The faster you are going, the less the wave is going to affect you.
Bend your knees on impact
As I mentioned above, the wave will slow us down in some measure. In the same way that if we hit a curb with the bike or get a stone under the wheels of a skateboard, if our weight centre is high up, we will be more likely to fly over forwards. The solution in windsurfing is to bring our upper body lower by bending our knees just before hitting the wave head on.
One more thing:
Another little tip you can implement is make sure you have the weight on the back foot so that the bow comes up a little and the board can go over the wave naturally and not necessarily underneath/through it.
This advice is mainly for the conditions in El Médano where the wind usually comes side-on. With offshore winds, the advice is still pretty much the same with the small additional hint that we must remember to open the sail right after the wave because the difference in height before and after the wave makes the air speed up, which feels like a sudden strong gust normally resulting in a silly twirling fall over the lee side.
I hope this has provided some insight as to why your efforts in waves have been more challenging, exhausting (maybe even frustrating) and that you are now equipped with the knowledge of how to overcome even the bigger whitewash.