This is a post I wrote a while back for another blog in which I detailed some important features people whould have who were aspiring to become windsurf instructors. However, you can also read this as a bit of a guide as to what to look for in a windsurf instructor in order to have the most out of a lesson with them.
9. Charismatic
This is secondary but in many places it is the responsibility of the instructors to get their own students meaning it is up to you to approach people and offer then the opportunity to experience the awesome sensation that our particular sport brings with it. I’m just saying that being charismatic in this case helps. It is also more likely for a student to return if they felt comfortable with their instructor.
8. Speak the language of the student
I don’t speak Russian to the extent of holding a conversation. I do however know a number of phrases along the lines of “front arm straight”, weight on the back foot”, “back straight and other basics along these lines. It reduces the likelihood of your student misunderstanding a movement of yours that they must imitate.
This might not be a crucial necessity but it helps a lot if you can explain something in words while the student puts it into practice without having to look at you so they can concentrate on the manoeuvre or conditions (like waves or gusts).
Of course we do not depend on auditive communication only, whats more, the student will learn faster if you make them use all their senses, but being able to communicate in the same language will avoid them to focus on the wrong thing or get a different message.
7. Know the sport inside out
You have to be able to explain every reaction of the kit caused by any alteration done by us, be it practical, like why the board turns when we move the sail, or technical like what happens when we tense the downhaul or what the purpose of the loose leech is.
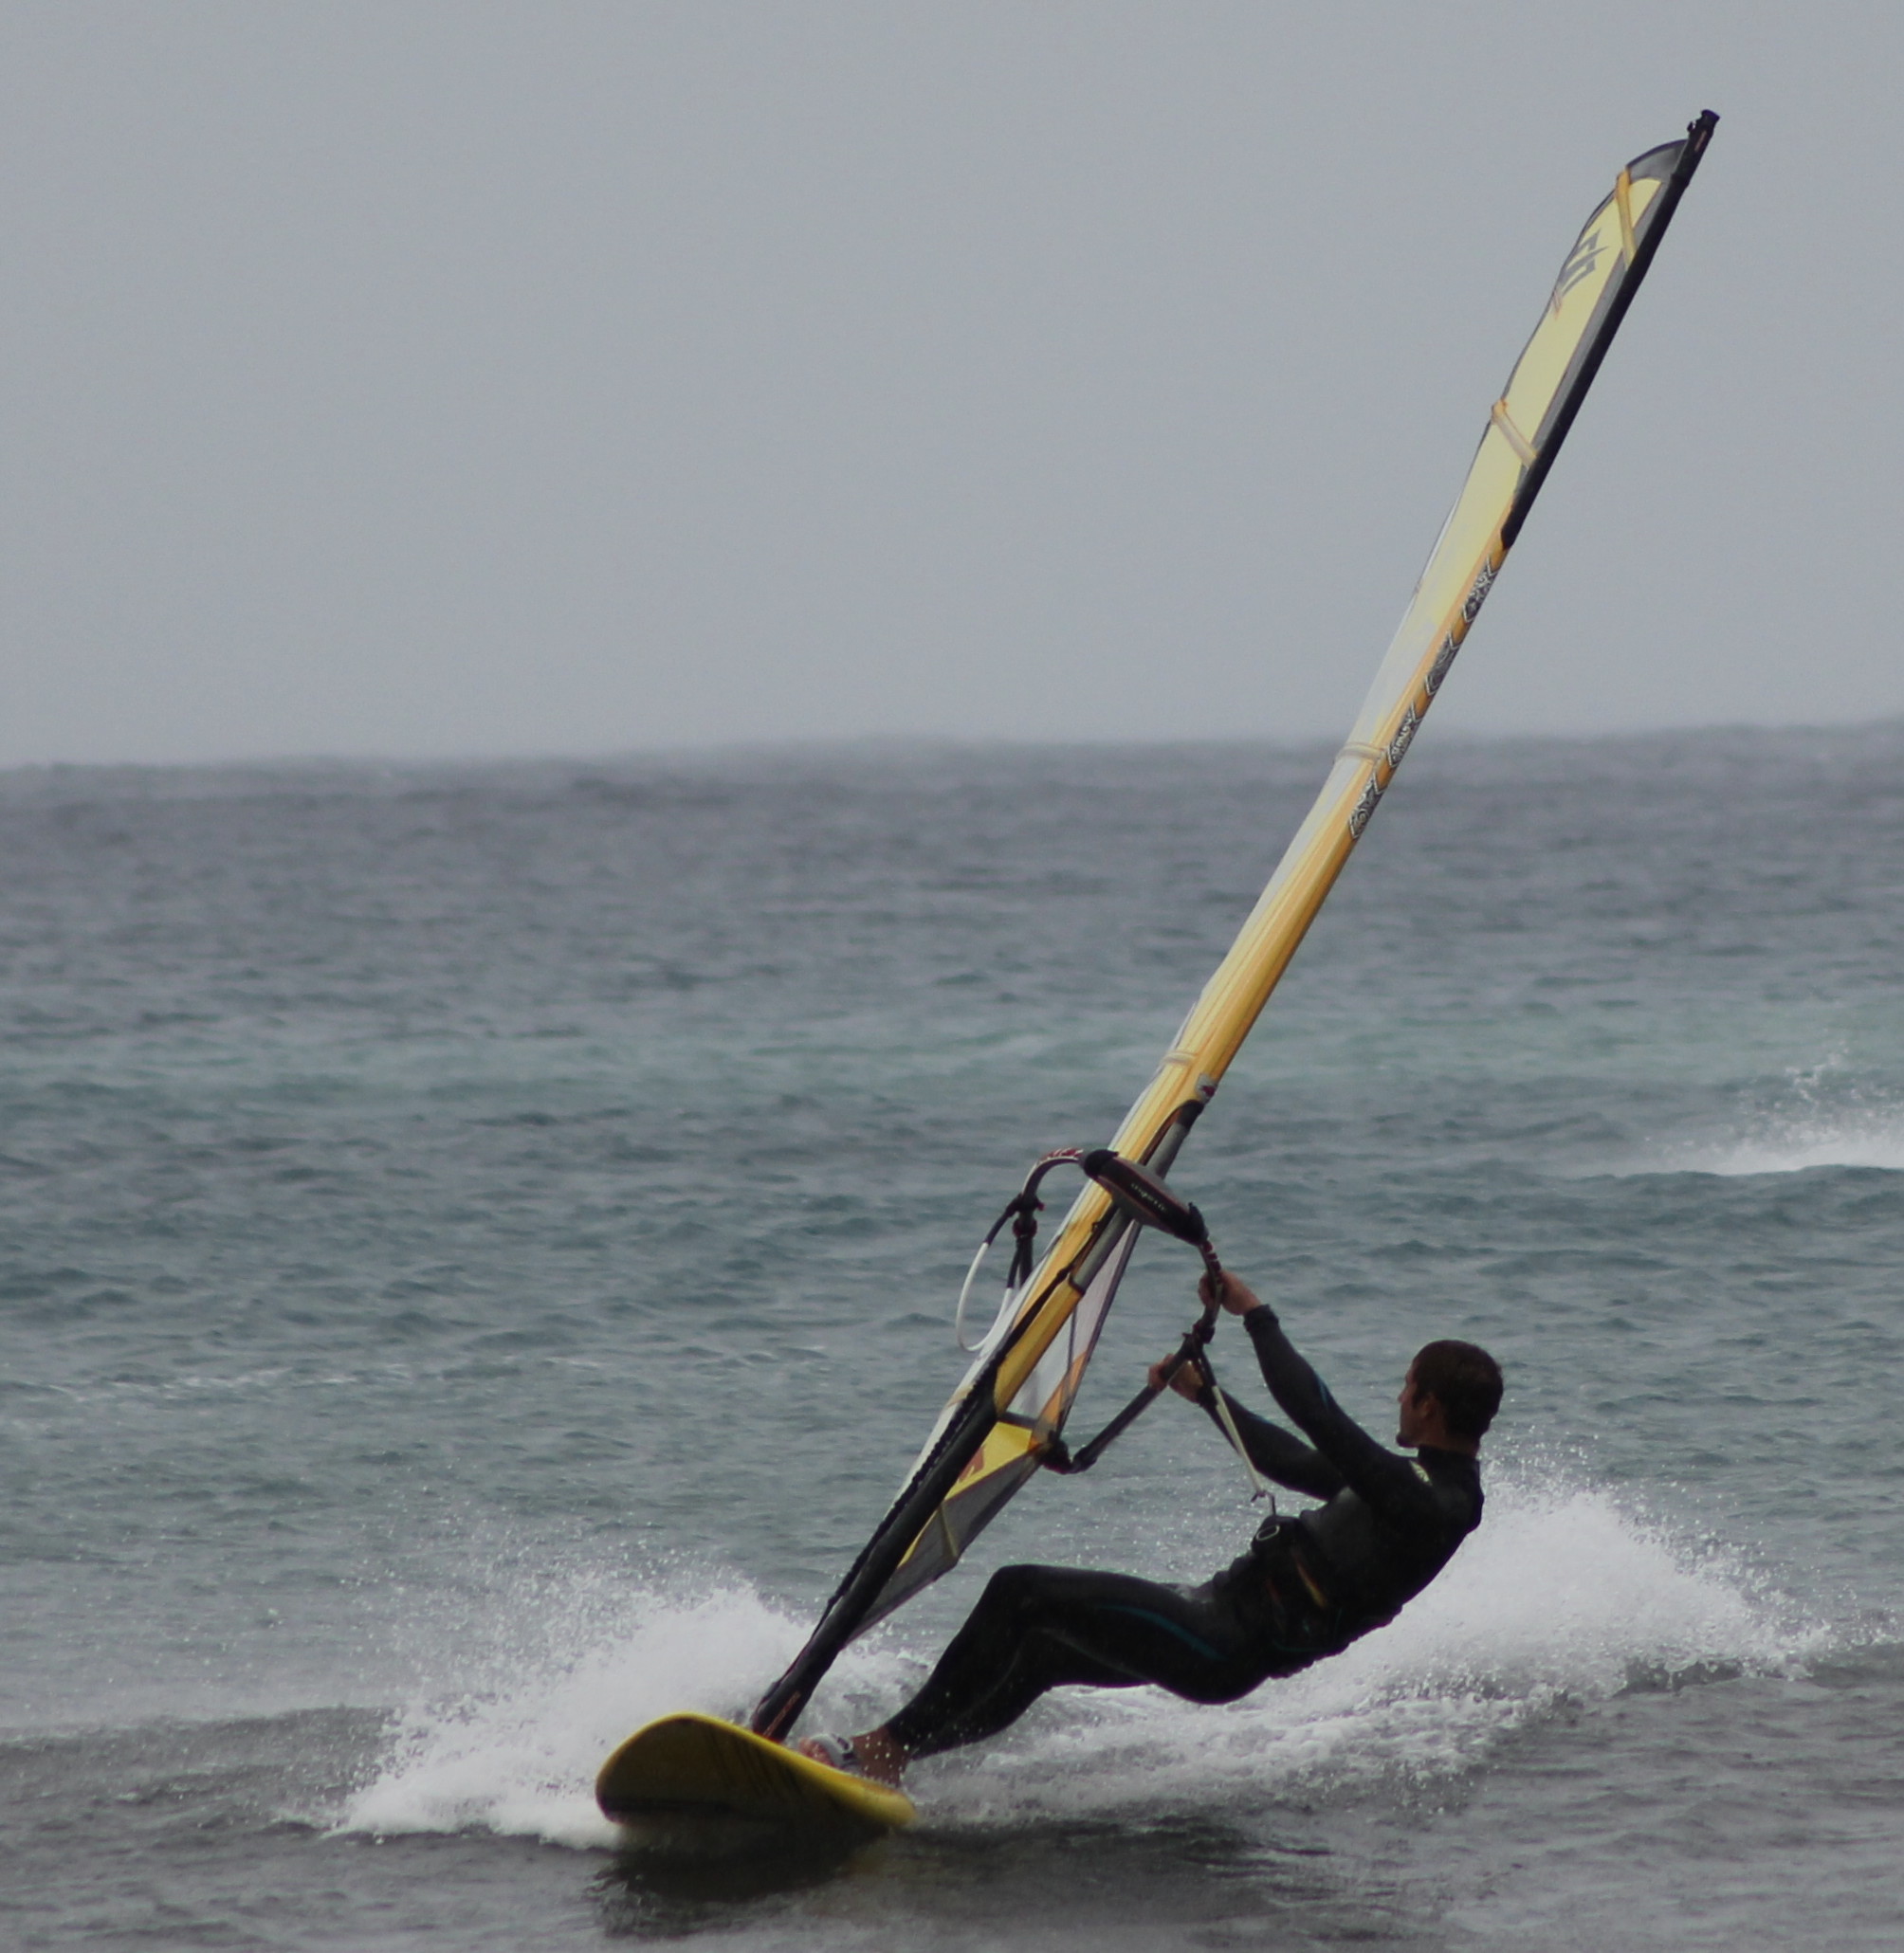
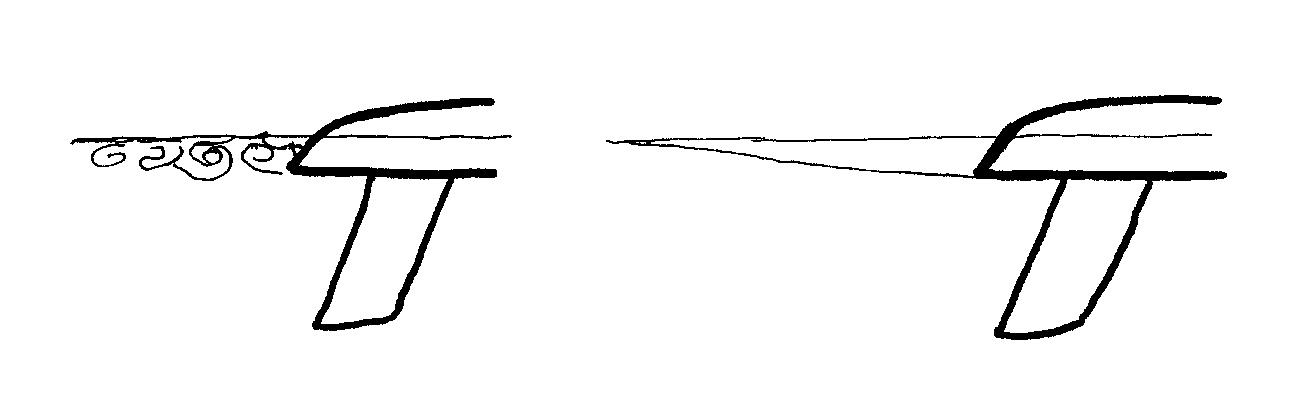
Spin out: the situation in which the flow of the water along the fin breaks off causing the board to slide sideways or at an angle to the sailing direction.
So there you are, planing along, flying over the water and enjoying the sensation of speed when suddenly the aft end of the board slides away from under you. The result of a spin out will vary depending on the circumstances. While just cruising it will just be a nuisance which is corrected with a little bit of technique. When wave riding it is mostly what we aim for in a cutback to get big spray, hence the reason for small fins and/or multiple fins. On the bottom turn it might cause a more precarious situation ending in a faceplant followed by a nice and thorough wash of the wave. And in slalom sailing, a spin out might result in a coma in the worst case scenario although most likely it will just cause a big splash and a scare if it isn’t avoided or corrected in time.
Why does spin out occur?
The reason for a spin out occurring is that the sideways force transmitted from the sail, through our body and onto the fin is so great that the flow of water breaks off and the back of the board is pushed to the side.
How can I avoid spin out?
There are several things that we can modify. First, in terms of equipment, it’s all about the fin. The length and angle of the fin as well as its relation to the sail size determine both the amount we can go upwind and the likelihood of a spinout.
Another deciding factor is the amount of pressure we put on the back foot and therefore on the fin.
How do I recover from a spin out?
Once the board has given way, leewards, we can correct it by putting pressure on the mastfoot with our bodyweight while pulling the back foot back to put the fin back in line of our movement, ie. in line with the flow of water.
If the fin spins out upwind (like during a gybe or a bottom turn) there isn’t really much you can do besides hope you don’t wreck your kit.
Hope this helps avoid or correct those spin outs you’re having. If you want some more information on spin outs check out this post by Tom von Alten.
Flying over the water is an amazing feeling. One that I try to have every student of mine experience in their first lesson with me, which isn’t too hard considering that in El Médano we tend to have 20 knots and I am pulling them behind me with an elastic rope. Once you have felt what windsurfing can be, or rather, what windsurfing is all about, you are hooked. It is an amazing feeling and yet one that many people haven’t gotten the hang of properly despite advancing to more complex maneuvers. Even if it consists of only sailing back and forth, windsurfing consists mainly of sailing back and forth with some sporadic maneuvers in between. Learning to plane comes somewhere between learning to use the harness (making it easier to hold the power in the sail required to start and continue planing) and the foot-straps (which are only really useful to use when planing). You can start planing hooked in or hooked out of the harness depending on how well you can cope with the sudden increase of power in the sail and how well you react to gusts, waves and choppy water.
I can start planing on a 100 l and 5.7 when many others are struggling on their 130 l and 6.6. This is purely because of technique. Sure, having a bigger board and bigger sail helps, but the correct technique makes up for much more. Make sure you spend some time working on your planing technique and your suture sessions will be much more enjoyable as the range in which you can start to have fun on the water will be much larger.
First off, what is planing?
When we start to windsurf, the board sits in the water and begins to move through it much like a container ship would. However, as we pick up speed the boards lifts out of the water and we start to bounce over it like speedboats do. To get more technical, planing is when we are sailing (or gliding) over the water rather than pushing through it and the water that leaves the aft end of our board does so in a laminar cut-off fashion and not in a turbulent stern-enclosing way.
How to se start to plane? Very easy, by going fast enough. Sounds easy right? Many people will have experienced planing at some point or another when they start to use bigger sails and actually use the power that can be generated by them. However, we want to be able to plane with the smallest sail possible since the larger sails get, the more cumbersome they are. Holding the plane once we start windsurfing fast is not too difficult if we have a good grasp of the relative wind generated by our boards movement. The difficult part is starting the plane.
How to start planing
Check out the video series by Peter Hart
To get our board out of the water we need speed. Better yet, a surge of speed. How do we go about this? By generating a surge of power in the sail and transmitting that power into the board. Let’s look at this step by step.
– Stand upright: do not bend your knees or bring your bodyweight down. Your entire body weight should be used to lean into the wind to counter the pull of the sail once the wind hits without getting catapulted forwards.
– Change the course: Again remembering the wind forces in the sail, if we turn from the beam reach into the broad reach suddenly, the area of the sail will suddenly be creating only lift (because the board is meant to go nearly entirely in the direction of the wind) as the drag force is also going where we want to go.
– Shoulders away from the mast: As explained in the video you need to grab the boom a little further away from the boom with your front hand and lean far back with your body in order to get as much sail surface available to the wind and as much weight back to resist the pull AND to be able to generate a horizontal push on the board with your foot on the board instead of a vertical one with your weight.
– Keep your body tension: The less energy that is lost in this crucial moment the better. We must keep our body tense for these few seconds because if we allow our body to be slack, the pull of the sail will not be transmitted into the board but will be lost and we will have to start over again. Keep your upper body and front leg in a straight line so that you can…
– Push forwards with your front foot (pointing towards the bow). Focus on keeping your hips pushed forwards as letting them go back as their shoulders get pulled forwards is what I have seen many people fail in.
And now to top it all off, we need to do all this in one smooth and fluid movement and not in a jerky way.
Continuing to plane
So now we have managed to start planing. How to we keep it? I say focus mainly on your sail position with respect to the relative wind. Read my post on the physics of windsurfing if your haven’t already done so to read up on the importance of this and how to go about it. With strong wind we will usually find the correct position easily (or the mistakes are compensated for more) but in light winds, the wrong angle of attack on the sail can kill your plane.
Planing upwind
One of the most asked question regarding planing I get is this: how to I sail upwind? The problems are usually that people turn in to the wind too fast and slow down quickly or get a spin out.
The solution to both these problems is a correct body position. While on a beam reach we might still get away with the basic body position I explained in my post on how to windsurf once we start to use smaller boards, this will no longer work. This is because the board will sink easier and because we will most likely be using smaller fins despite generating much more sideways force due to planing.
What we need to do is shift our weight from the back foot on to the front foot and put pressure on the mast-foot while leaning the sail to the back of the board. This may seem like a mouthful but is the most compact way of solving the problem.
We lean the sail back to hold the closed reach, we transfer the weight onto the front foot to avoid a spin out (the back foot in the strap of course, don’t want you making a catapult because of some chop) and the pressure on the mast-foot is to transmit the power of the sail into the board to keep the speed.
I have included a video of me explaining the technique to planing as a bonus to those who purchase my e-guide which you can check out here.
Why do I need to know this? Well, although you can probably windsurf by following the indications of an instructor, if you are going to try and learn how to windsurf on your own, understanding thow the sail words will save you a lot of trail and error and frustration and improve our technique so that you can get the most out of the sail enjoy the full range of what is possible in windsurfing especially in terms of speed, the powerjybe and the bottom turn.
How the windsurf sail works
The sail works like the wing of an aeroplane. Funny thing is that I have had students that had taken plane flying lessons have the workings of a wing explained as: “working the same as a sail”. So, let’s explain how a wing/sail works shall we?
Here is a video that explains thie workings of a wing nicely if you can keep up with the speed at which he speaks.
First, let’s pretend the sail is a rigid flat surface. The best comparisson I have is comparing it to sticking our hand out of the window of a car (if you have never done this, you didn’t have a childhood)
When we stick out hand out horizontally, the wind generated by the car hardly affects us.
If we now tilt our hand slightly so the little finger (trailing edge) is lower than the thumb (leading edge) the hand starts to get rise. In other words it generates an upwards force called lift.
However, there is a second force, a sideways force called drag. As we continue to tilt our hand, the lift reduces and the drag increases. Eventually there is going to be more drag than lift and the hand will just be blown sideways rather than up. The same occurs with our sail.
Naturally just a small angle of attack of the sail to the wind only offers very little surface for the wind to generate any sort of force on whereas too much surface (from a too large angle of attack) will result in too much drag. We want to find the sweet spot between getting the maximum lift and generating only as much drag as absolutely necessary.
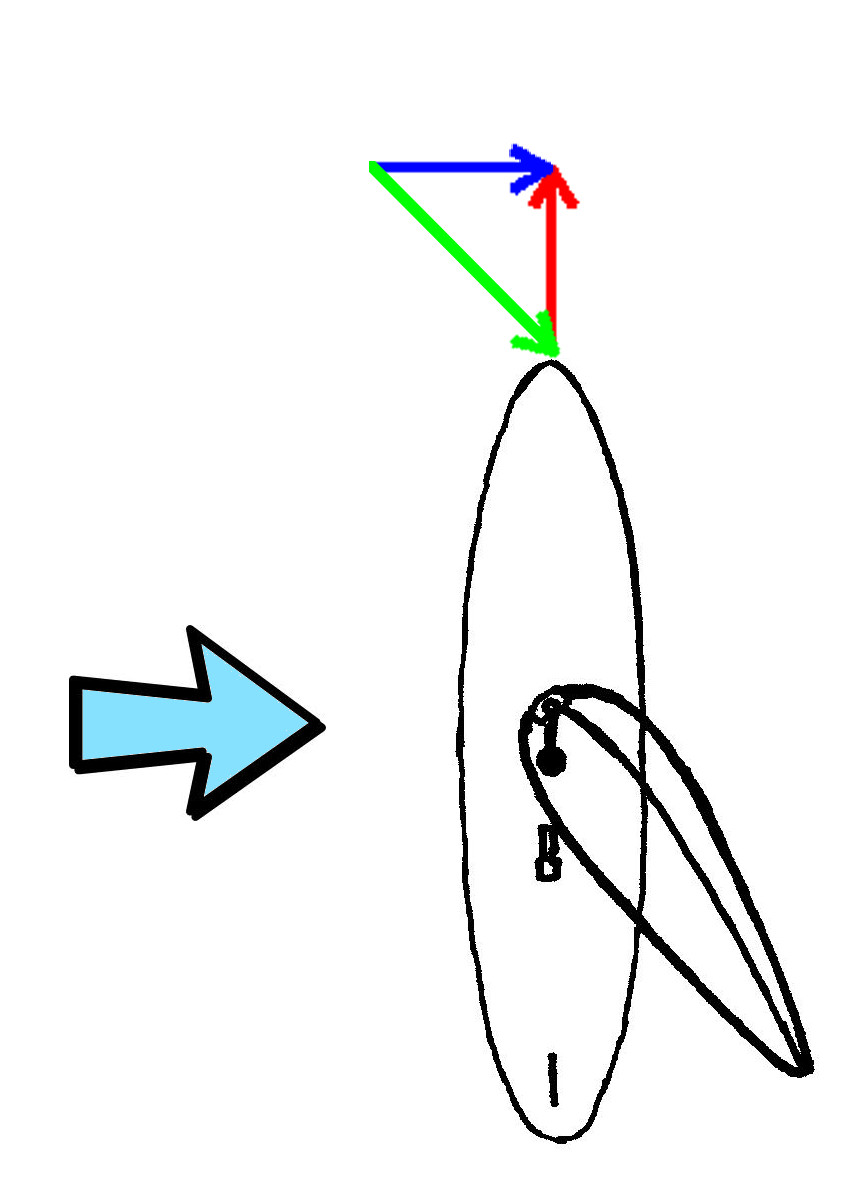
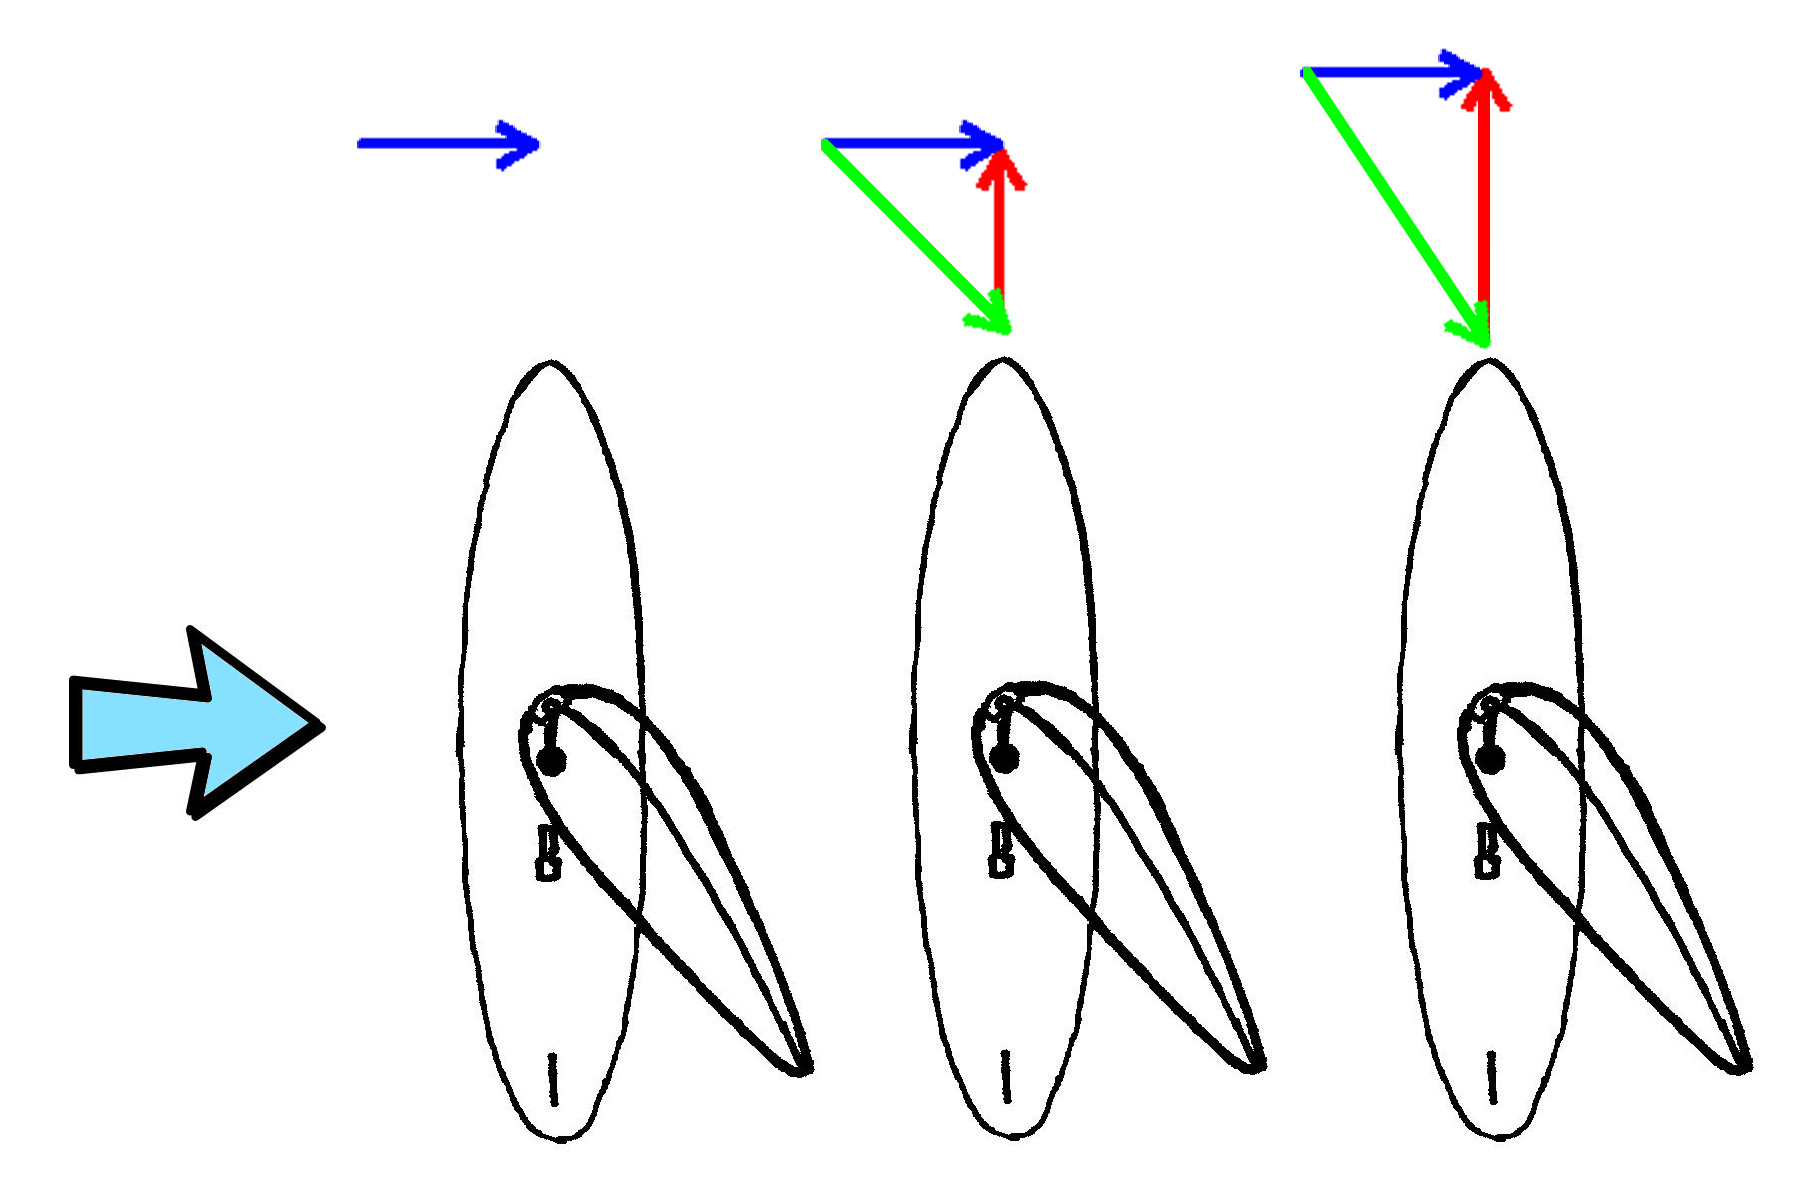
Relative Wind
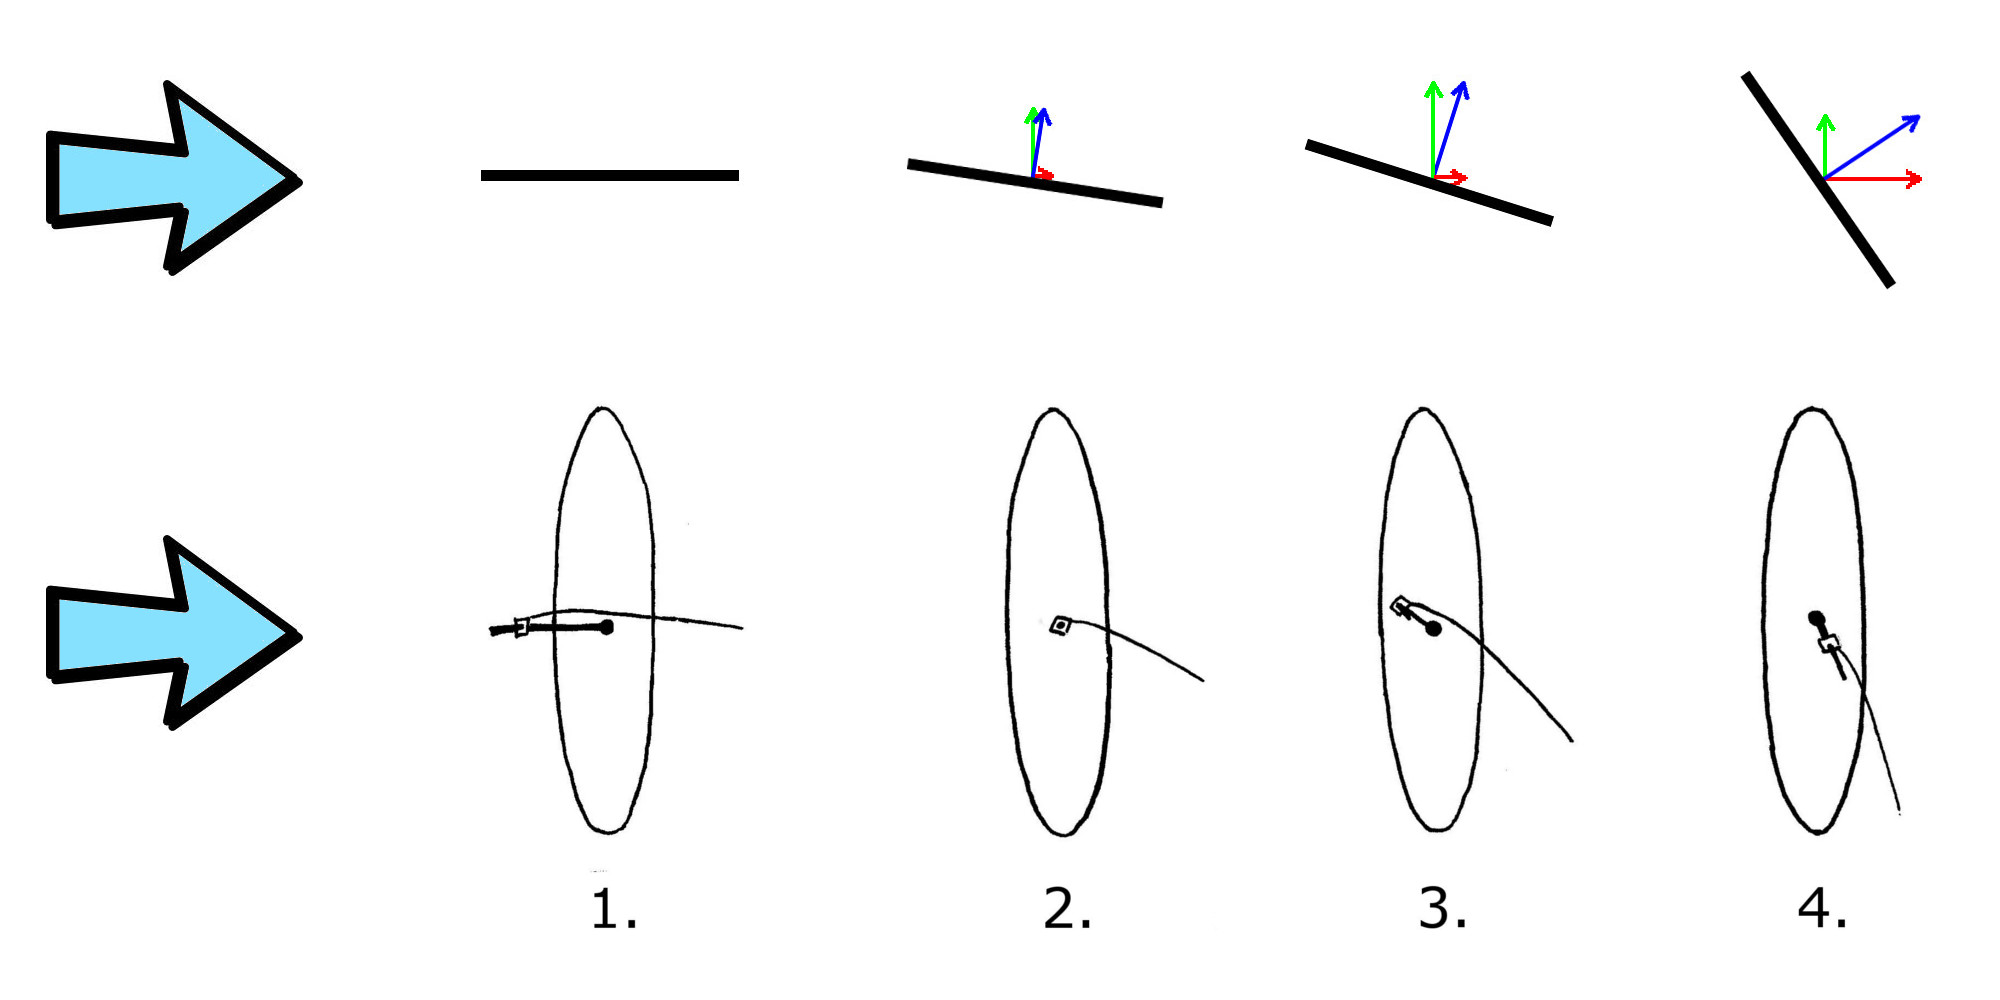
So now we know how important it is to find the best angle of attack of the sail to the wind. As we start to sail we only have to take into account the true wind.(blue arrow) As we start to move we start to feel another wind component which we will call the board wind (red arrow – in sailing it is called the boat speed).
If we combine these two wind components we get the wind we feel: the relative wind (green arrow). Depending on which course we are on and the speed we are going at we will get a different relative wind. Since our sail must be positioned at the perfect angle with respect to the relative wind, we must constantly be modifying the sails’ angle of attack to get the maximum speed the wind and sail can allow us.
Here is the relative wind as we build up speed..
And here is an example of how the relative wind varies at the same speed on different courses.
I hope now you get an idea how to get the most out of your sail. Now a small change in how the sail is built to get the most out of the wind.
Sail Profile
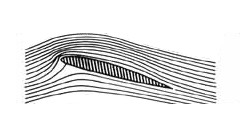
Now let’s look at the profile of a sail and the air flow along it.
Air Flow of a wind/sail – Courtesy of Wikipedia
As you can see, the curve of the sail causes the air particles on the lee side to have a longer way to go than the ones on the windward side.
According to Bernoulli’s Principle this difference in speed creates a difference in pressure, the top side (our leeward side) having less pressure and the underside (our upwind side) having more. Since the pressure acting on our side of the sail is greater than the pressure on the other side, lift is generated and we move forwards.
These two components of lift generation (angle of attack and sail shape) are what makes up move. Understanding this will help us get the most out of our sails in terms of speed and early planing.
I hope this has explained how your windsurfing sail works. For an fun video going through exactly this subject you can check out Surfertoday.com and their post “How does a Windsurfing Sail Work?” If you have any questions, feel free to let me know in the comments.
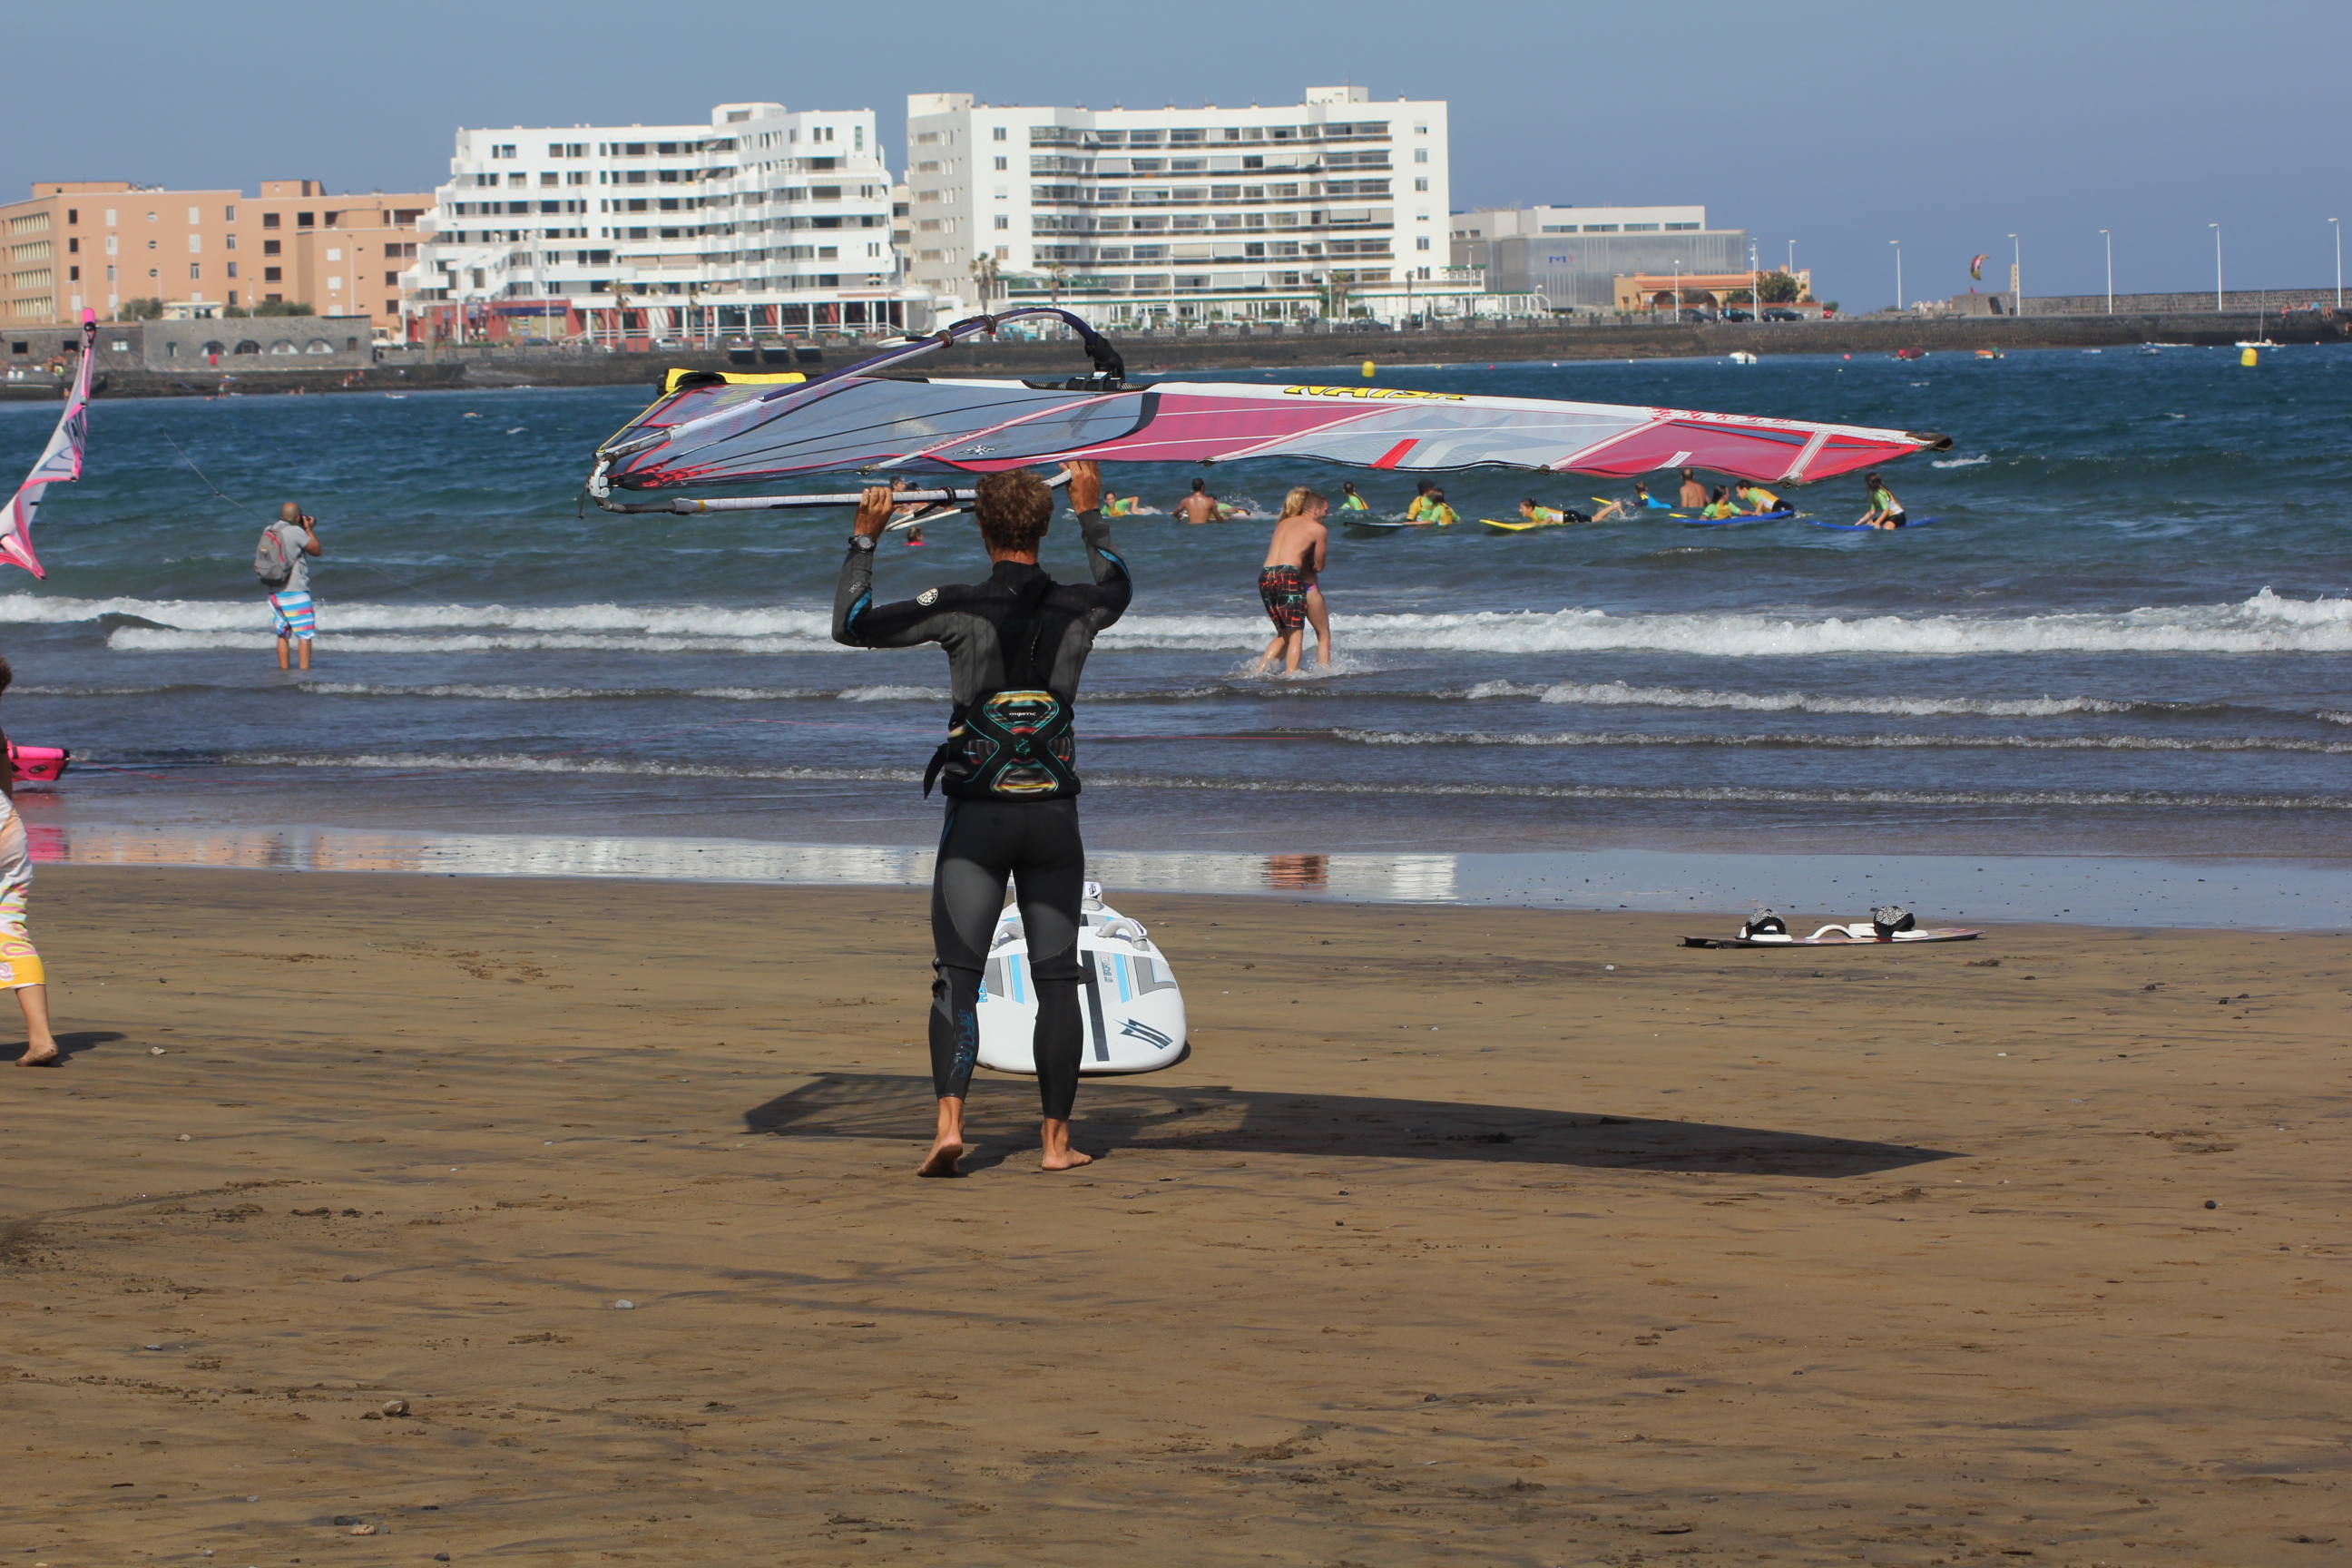
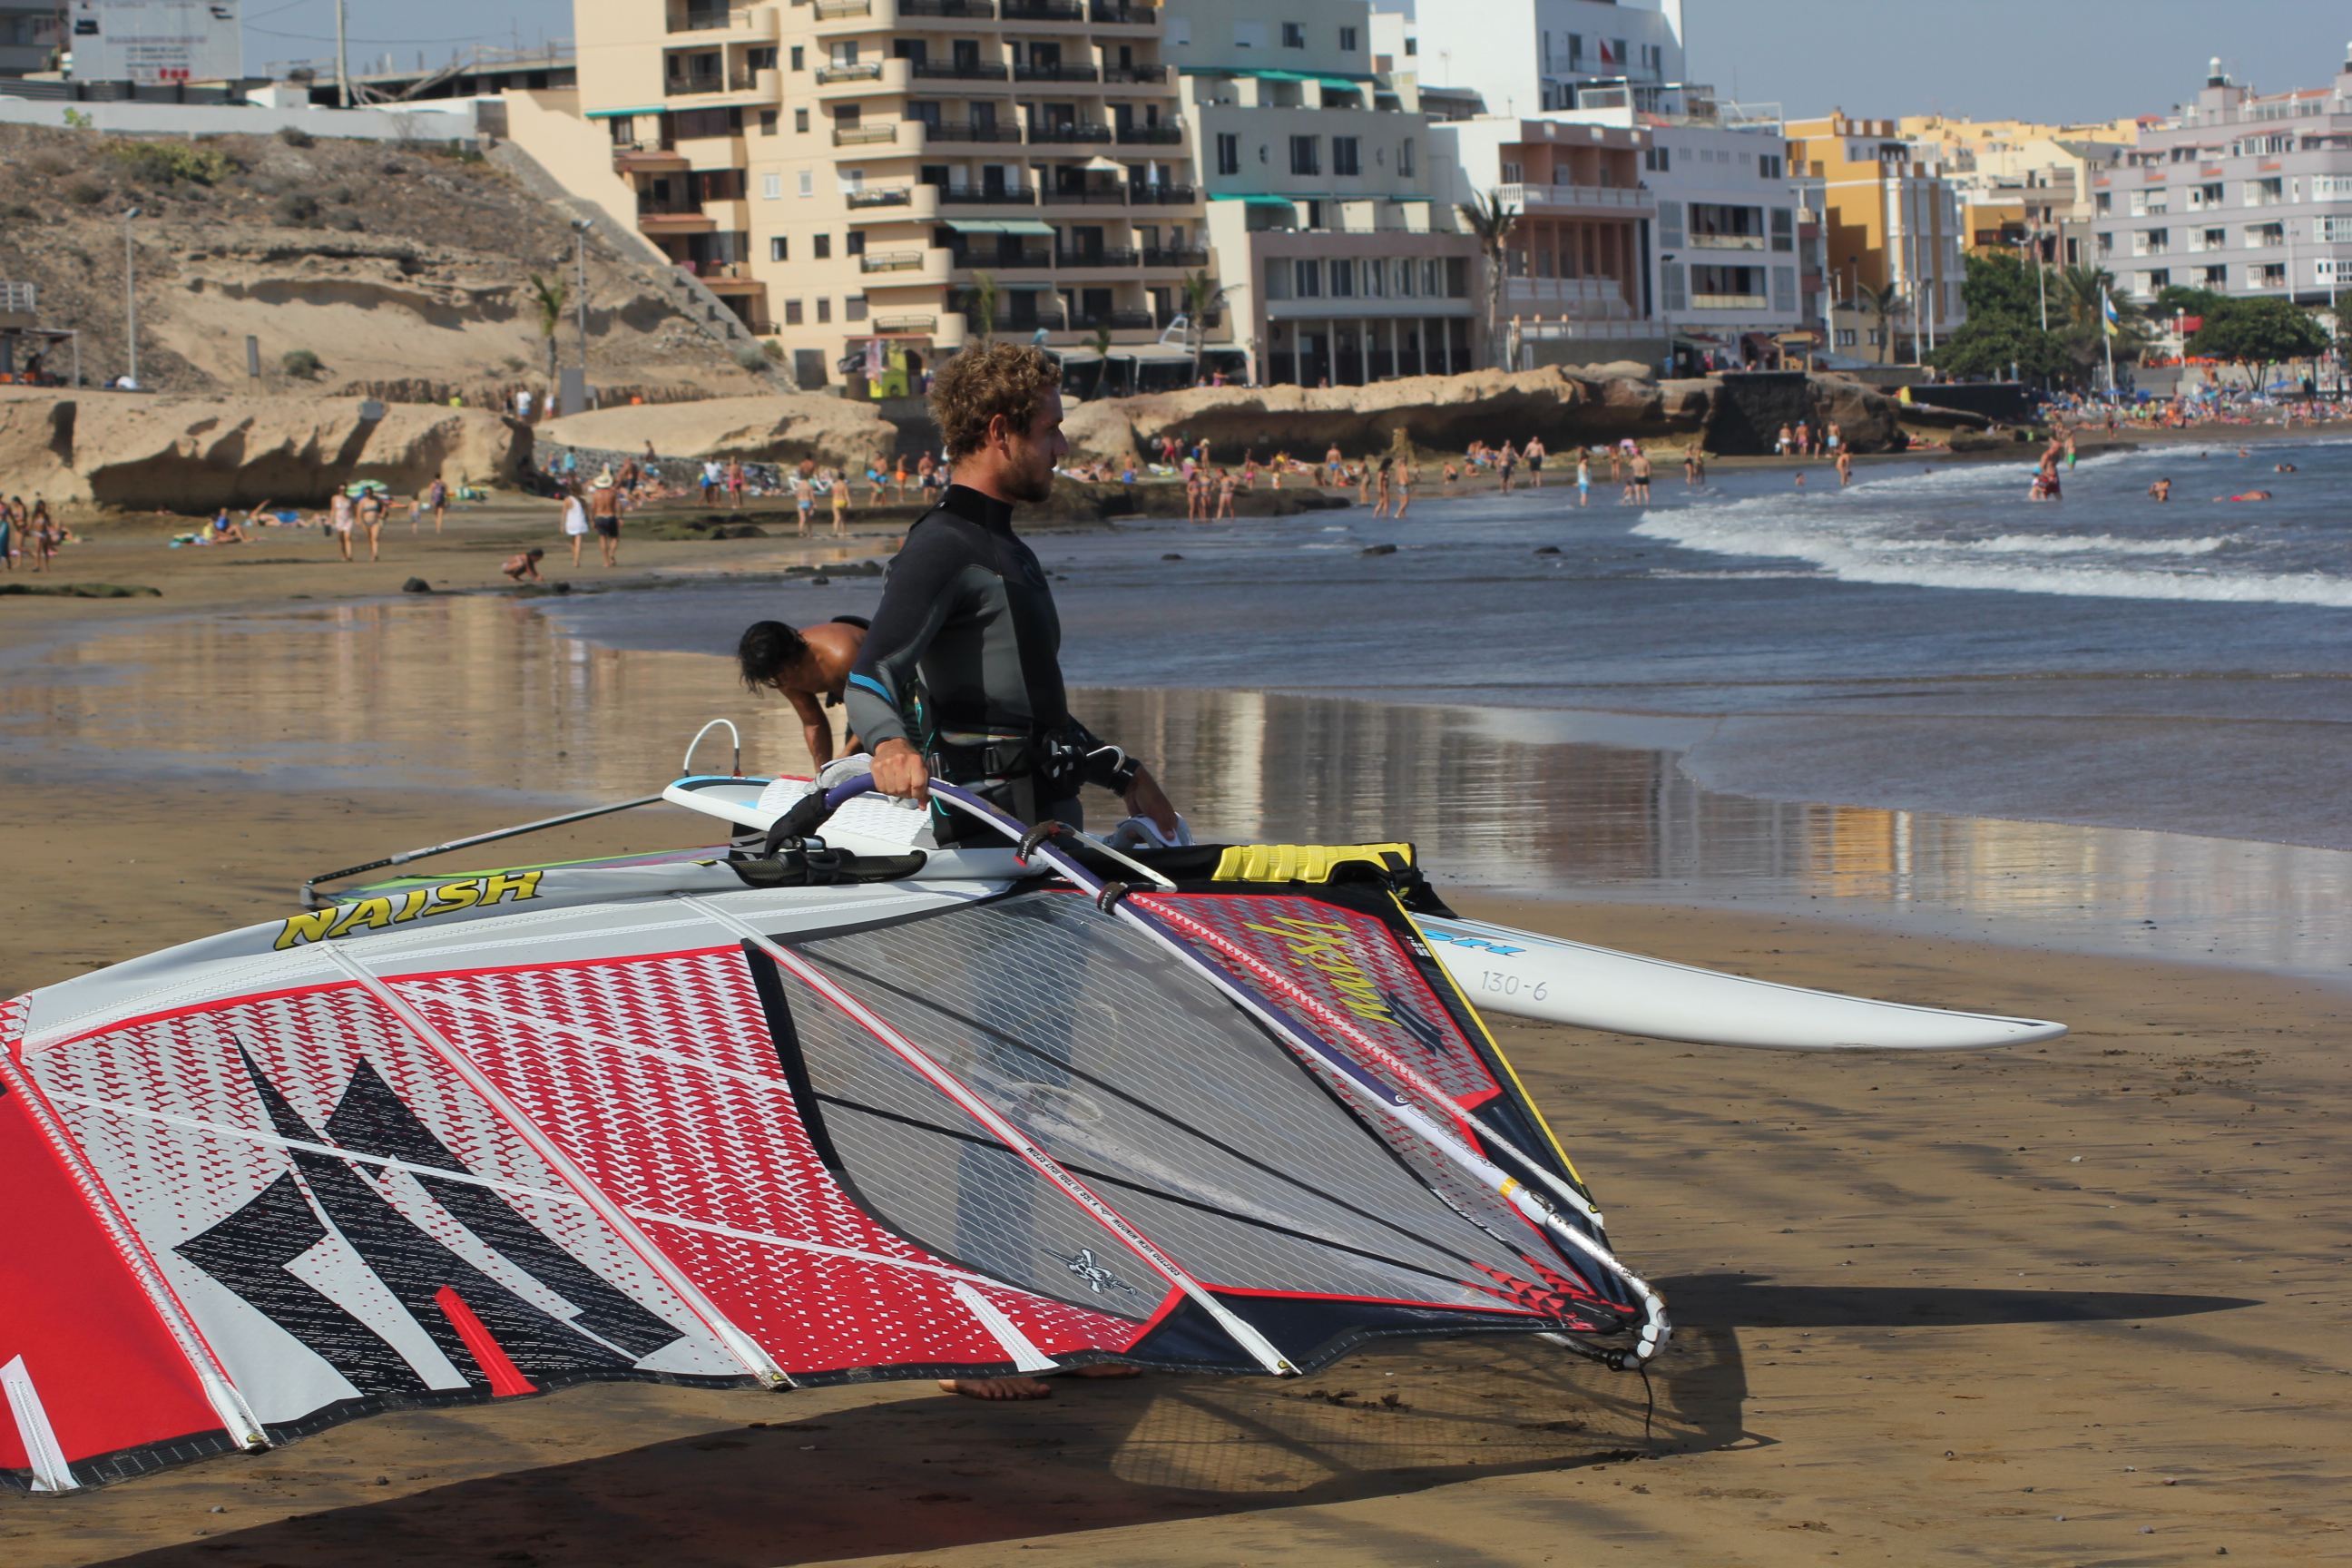
Carrying our windsurfing equipment can be one of the most annoying hassles of the sport if we don’t know how to do it right. Time and again I have seen people carry their windsurf gear in such inefficient ways that this aspect definitely deserves an article. Most of it is common sense but when you are used to a certain way of doing things or don’t adapt your carrying method to the type of equipment and the environment, you will certainly create a habit where you are going to waste a lot o energy in the process of getting your rigged gear to and from the water.
Sails
With enough wind
Above a certain wind speed this method is possible and even if we hardly have any wind, if we run or walk fast we can generate enough aparent wind to make this work.
We can position the sail holding the lower end of the mast and the boom close to the mast or over our heads with one hand on the mast (or boom close to the mast) and the boom. In both of these methods it is important that we keep in mind that tge wind is to do ALL the work. We only need to position the sail correctly relative to the wind. In fact, we literally only need to use TWO FINGERS to carry the sail in wind. If we need more than that, we are doing something wrong. Important to keep in mind is that the mast needs to be on the wind side with the mast foot being slightly more upwind than the boom, and slightly (5 cm, 2 in) more elevated.
With little to no wind
When we have very little wind we won’t have any help from the elements to lift the sail. However, as I mentioned earlier, we can create our own wind by walking fast or running.
Over the head
As with the method with wind, we can balance the sail over our head. One hand will be on the mast and the other in the sail with a flat hand so as to hold it with the maximum surface of the hand. The smaller the hand surface, the more we damage the sail.
DO NOT pull the sail down onto your head!
Our heads have a pretty small surface due to its round shape. The weight of the sail alone laying on top of our heads shouldn’t damage it. However, it we pull the sail down, it’s tge same as if we were standing on it when laying on the ground. At some point it will deform the plastic/cloth/monofilm of the sail.
Big Boards – One person
Daggerboard
If you are strong enough you can lift the board under your arm by grabbing hold of the daggerboard or the daggerboard slot. Just make sure you keep the board on the lee side (downwind of your body) as this way the board is not pressing against you and you can let it swing away from your body, especially useful in the gusts.
(Board on the lee side)
Picture
Over the head
If we need to go upwind we can carry the board on our head (going across the wind or downwind like this can be tricky).
Remember, the board is heavy and has a large surface which means you can easily hurt yourself and others if you lose control of it due to the wind knocking it out of your hands.
Picture
Big Boards – Two people
Large boards are easy to carry between two people since the weight is distributed. The best method is for one person to grab the fin (the board positioned so that the fin is pointing away from the body) and the second person carrying the bow. As mentioned before, it is best if the board is carried on the lee side of the body to make up for the wind pushing the board. Also, when walking in line with the wind, the end with the fin (stern) should be pointing windward.
Buggy
If you are privileged enough to have access to one of these, be sure to use it. It makes your life so much easier. Strap the boards on so that the eind doesn’t blow them off and hurt you or someone else in the process.
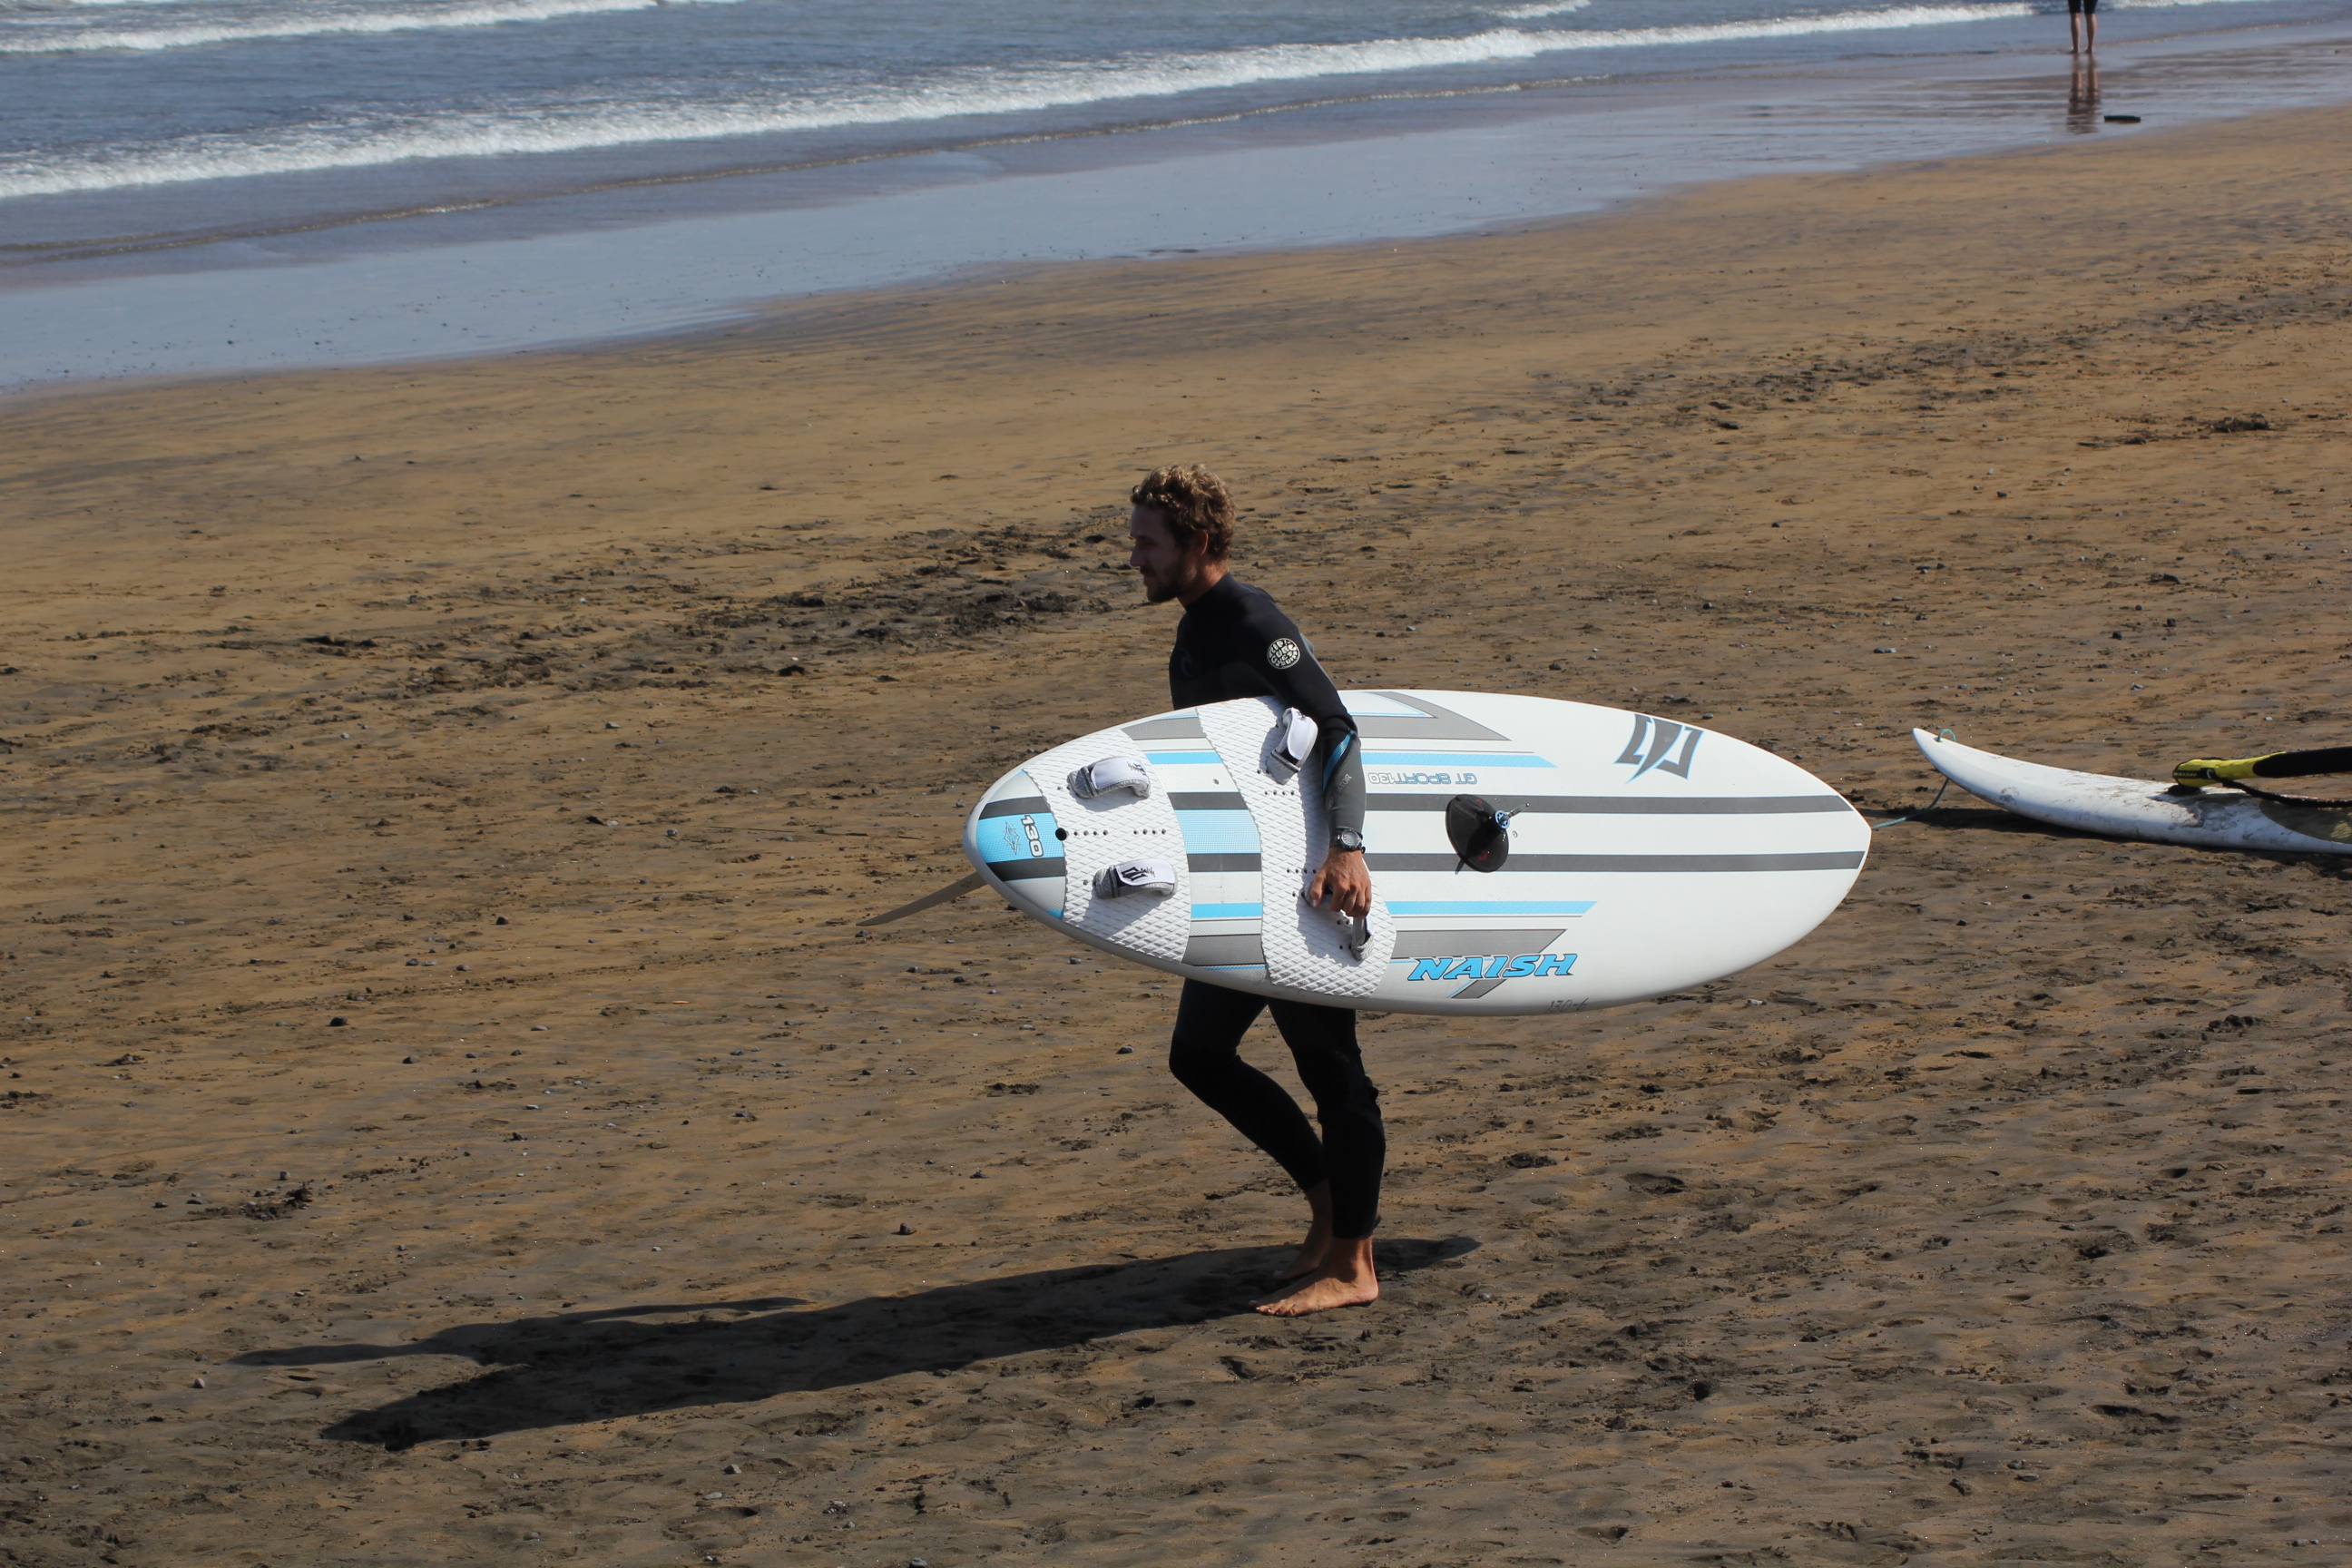
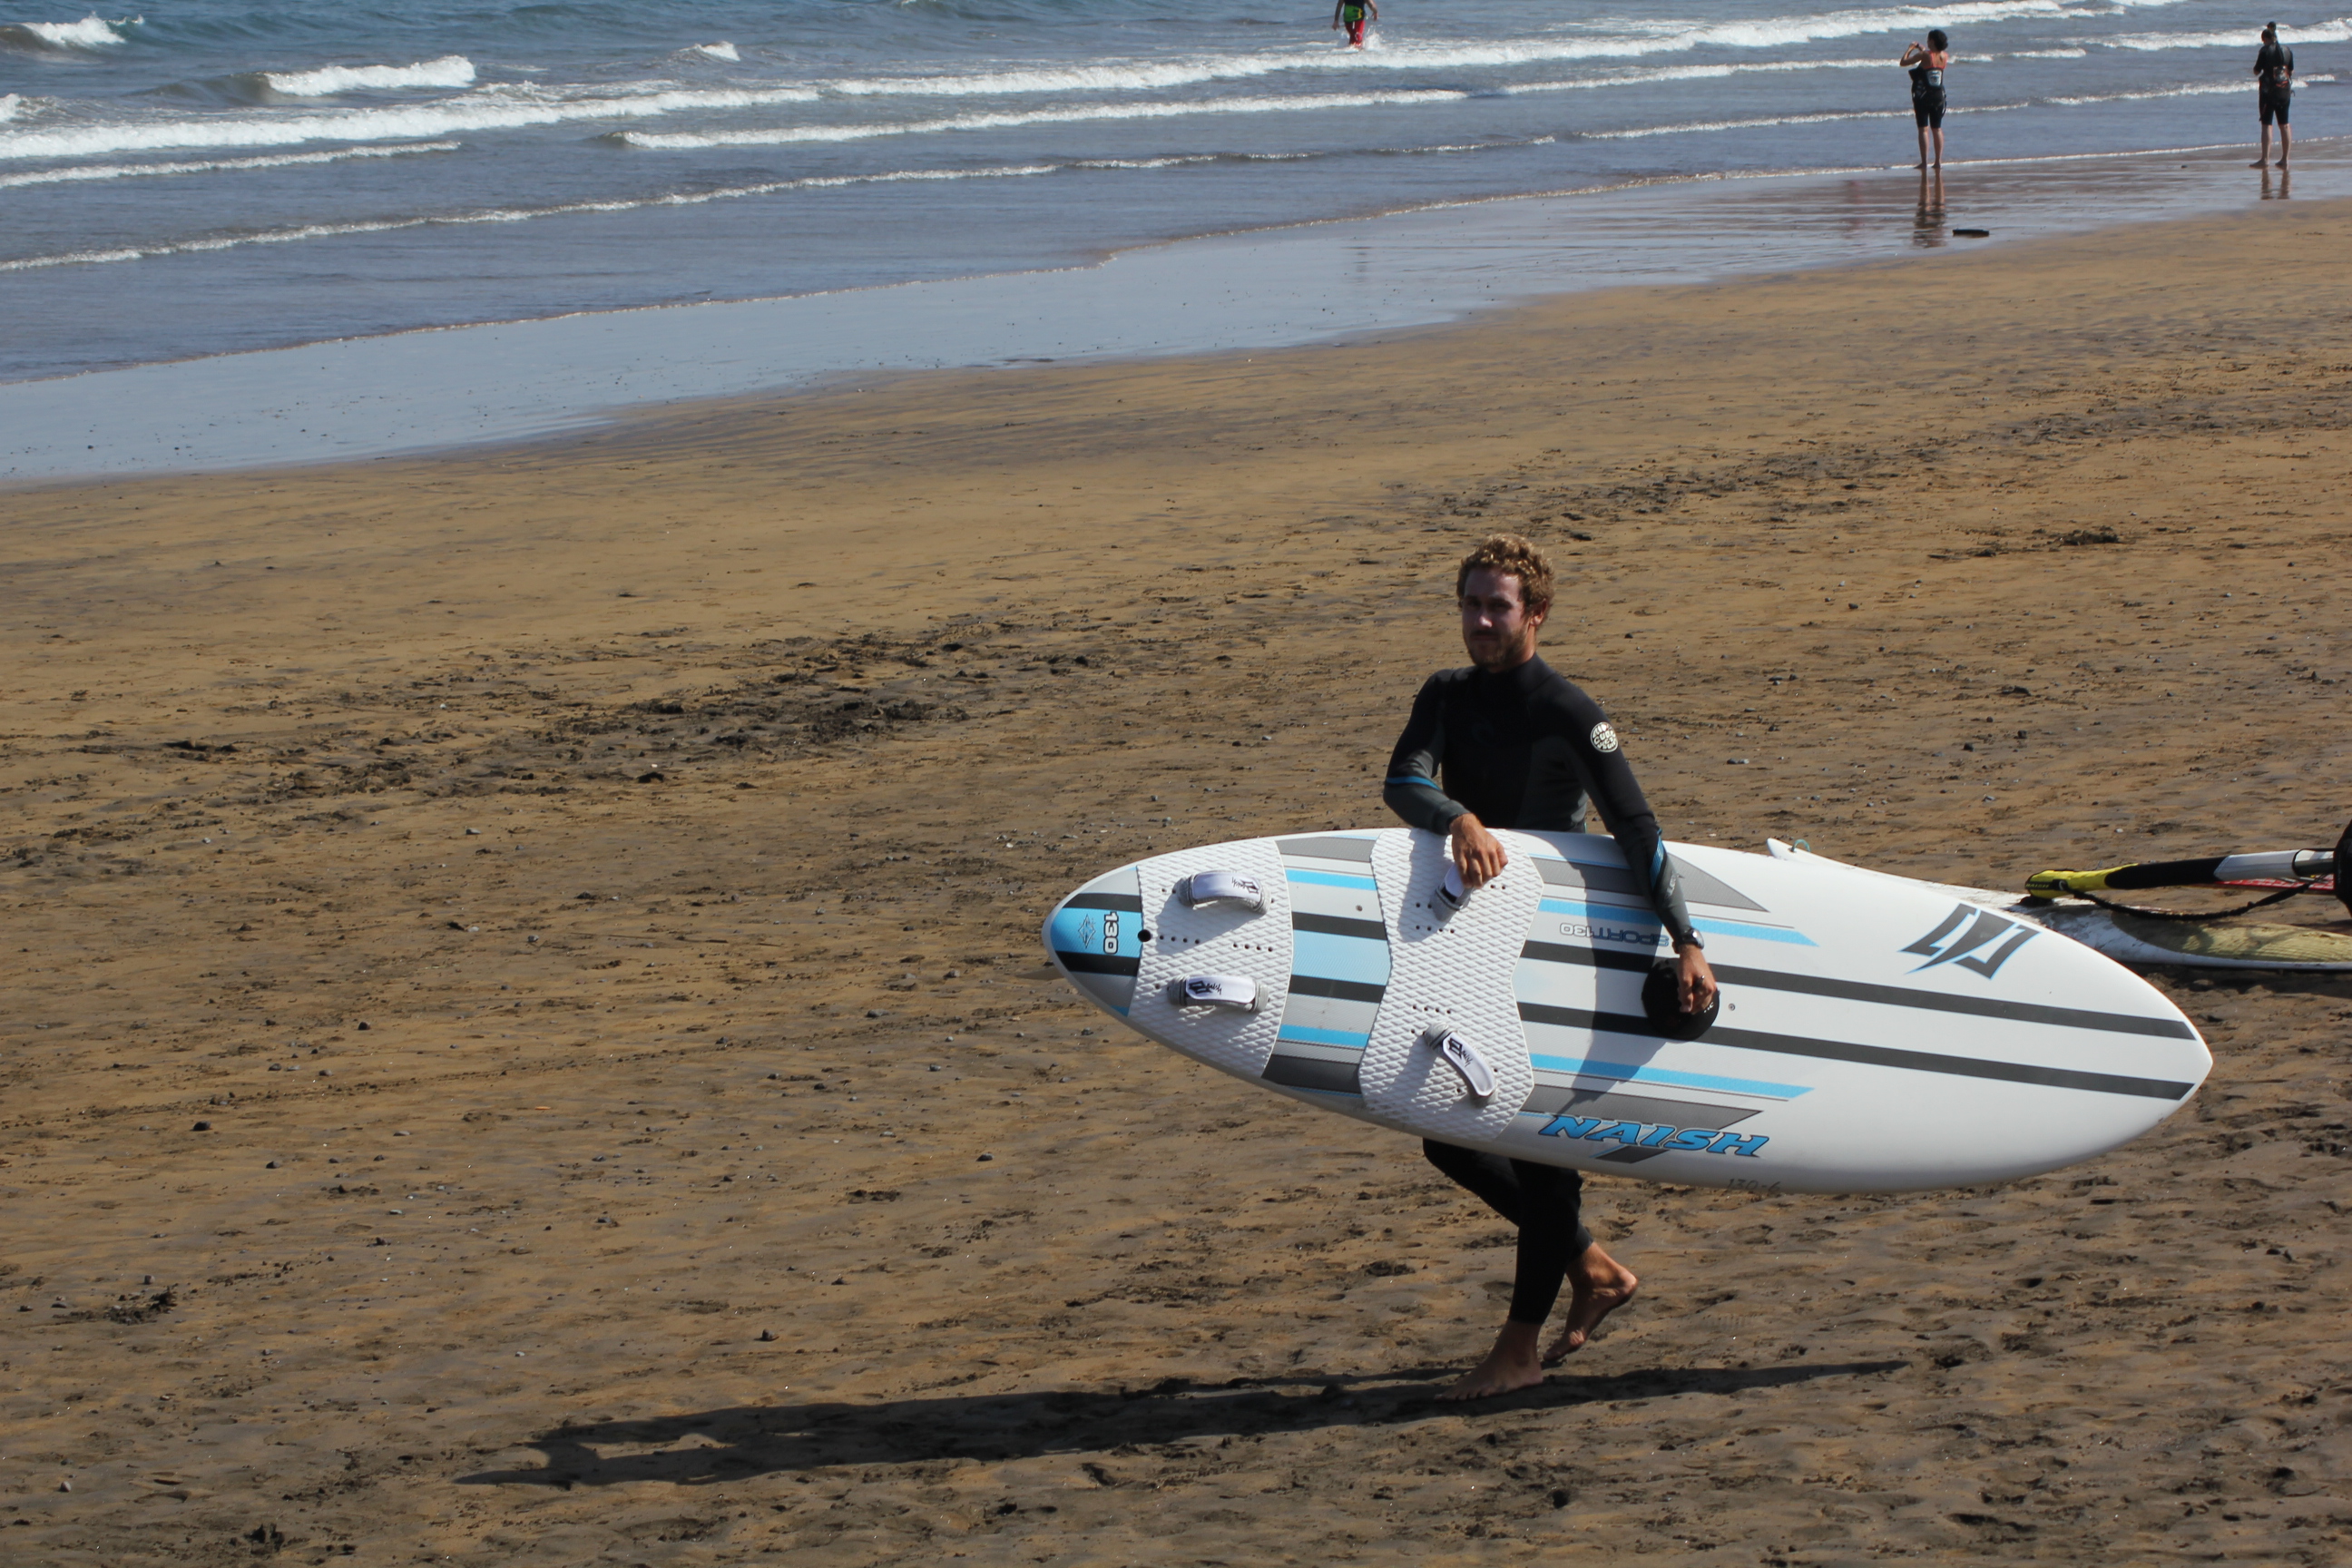
Small Boards
Although small boards are lighter and easier to carry than beginner boards, there are indeed ways to carry them that are impracticable and make life hard on us. Here are the methods of how to carry them correctly.
Fin to wind
Before we begin with all the ways, one thing to keep in mind is to always carry the board with the fin end pointing to the wind. This is the position that the board turns to naturally if we carry it at its centre of gravity. It may seem common sense to avoid using energy to fight the wind but I see this a lot on the beach.
Board on the lee side
The other thing to keep in mind is to carry the board on the lee side of our body. This way the wind doesn’t push us sideways but rather we can let the board be lifted by the wind and thereby be less heavy.
Under the arm
Nowadays, with the boards being wider and shorter rather than long and slender, this option of carrying the board in the same fashion as a regular sure board is not always possible.
One footstrap
Grab the lower footstrap and have the other on rest on your forearm. This keeps the board vertical.
Footstrap + mastfoot
Again, keep in mind not to fight against the wind.
Board and Sail Combination
Footstrap + Boom
This is the method I find the best and recommend. It is the one where we have the most control over the gear and so the safest. It is also the one that requires the least energy.
Footstrap + Boom (low wind alternative)
Although it looks similar to the previous one, it is prone to lack of control because the board can start to flap about over the arm holding the footstrap. HOwever, with low wind it is a lilttle easier to carry the gear if it is heavy.
Over the head back footstrap and mast
This consists of holding the mast underneath the boom, leaning the sail on top of your head and the other hand holding the back footstrap. The only time this one is practical is when we have to walk directly upwind. However, even then I recommend the first option as we will always have more control over our gear.
I have seen other methods of carrying the gear but to me they are not the way to go as they are cumbersome and offer less control. If you have any other methods to add, please let me know in the comments.